After the dust has settled, we’ve had a chance to sit down and look at the thousands of photos we took while creating our newest award-winning outdoor living space. While we typically only put our finished projects on display, there was so much detail into this one, we felt the need to show it off. Some details were so refined, they tend to blend into the space as a whole, which was our intention. This is our chance to show off what makes us different, as designers and builders of your new space! We broke the job down into a few of the monumental phases below. We’ve named this project “The Opus”. While we assume this isn’t the last one we do like this, as two artisans, we poured thousands of hours into this project with plenty of blood, sweat, and even a few tears along the way. We hope you enjoy viewing the process that landed us the award for the “Best Hardscape in North America- Clay Brick”!
BEFORE WALKTHROUGH VIDEO
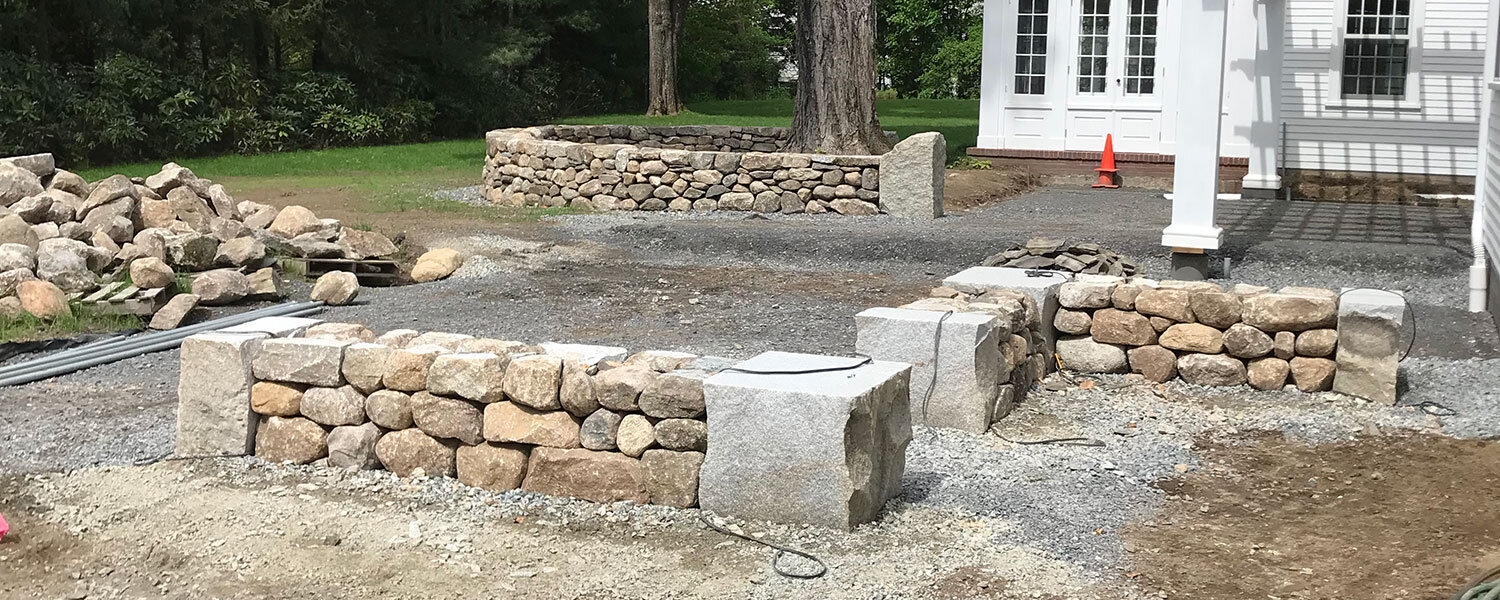
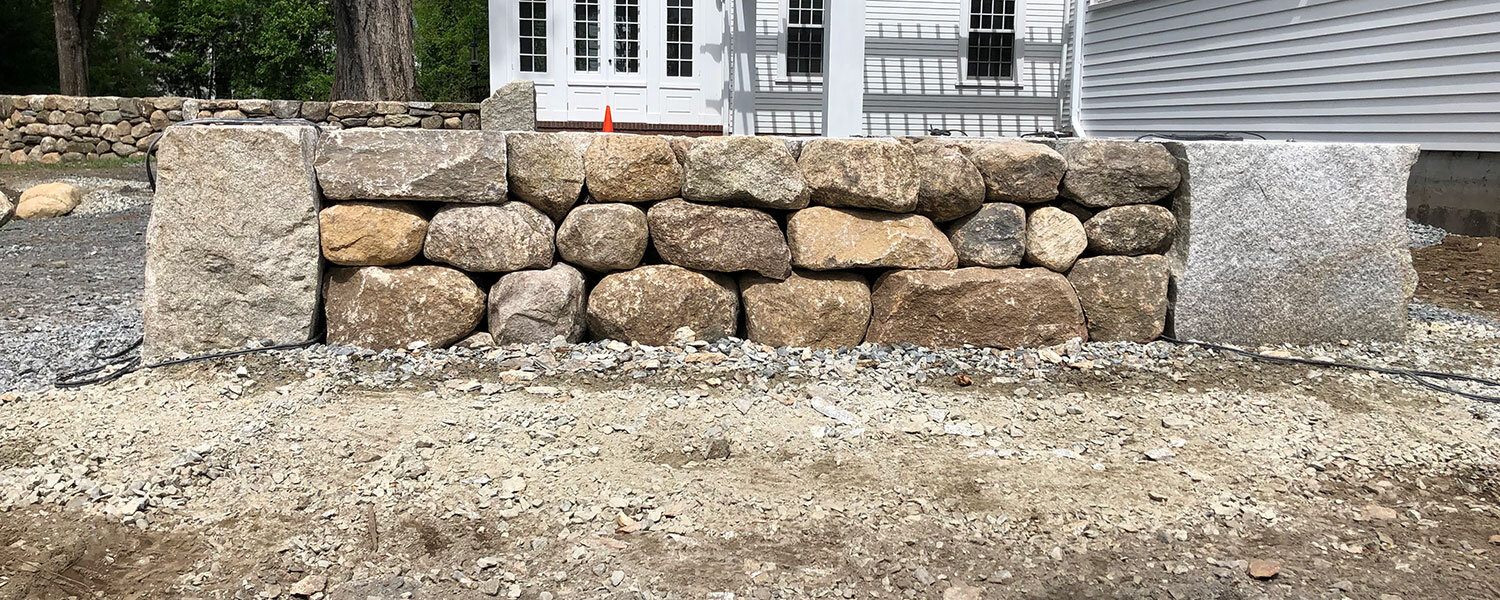
RADIAL DRYSTACK FIELDSTONE WALL
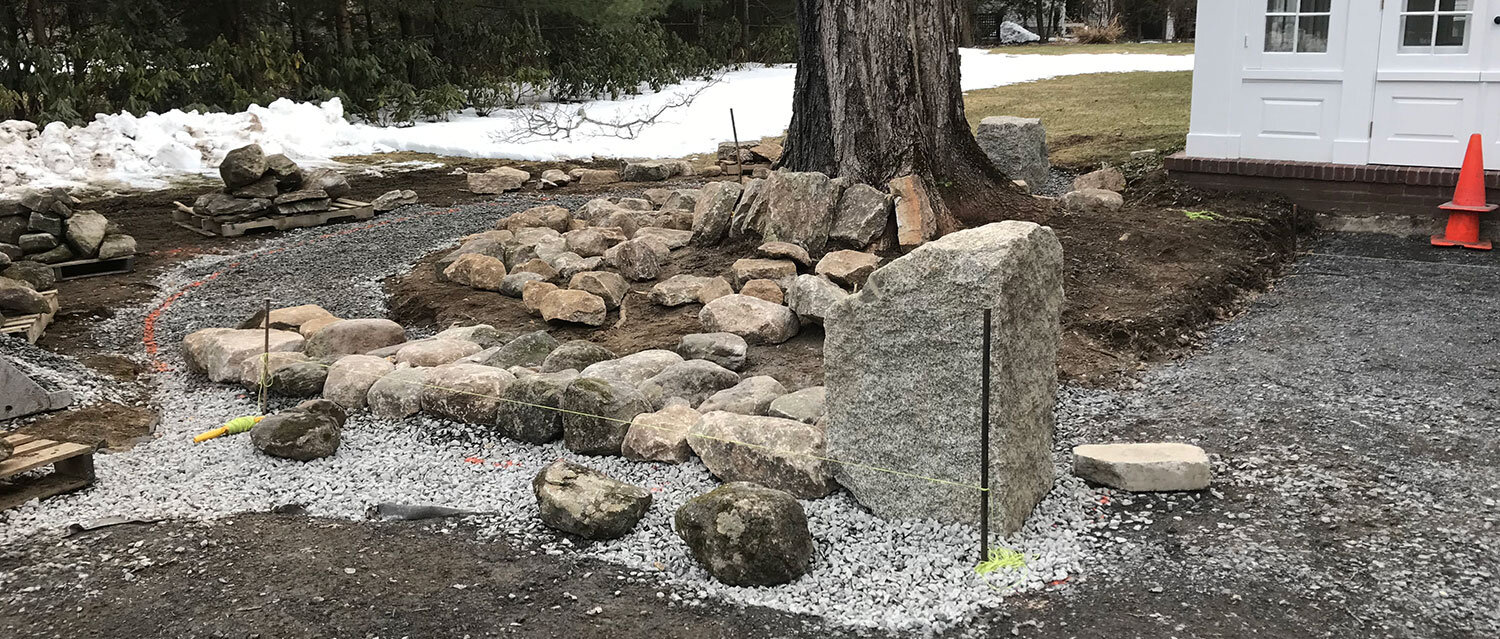
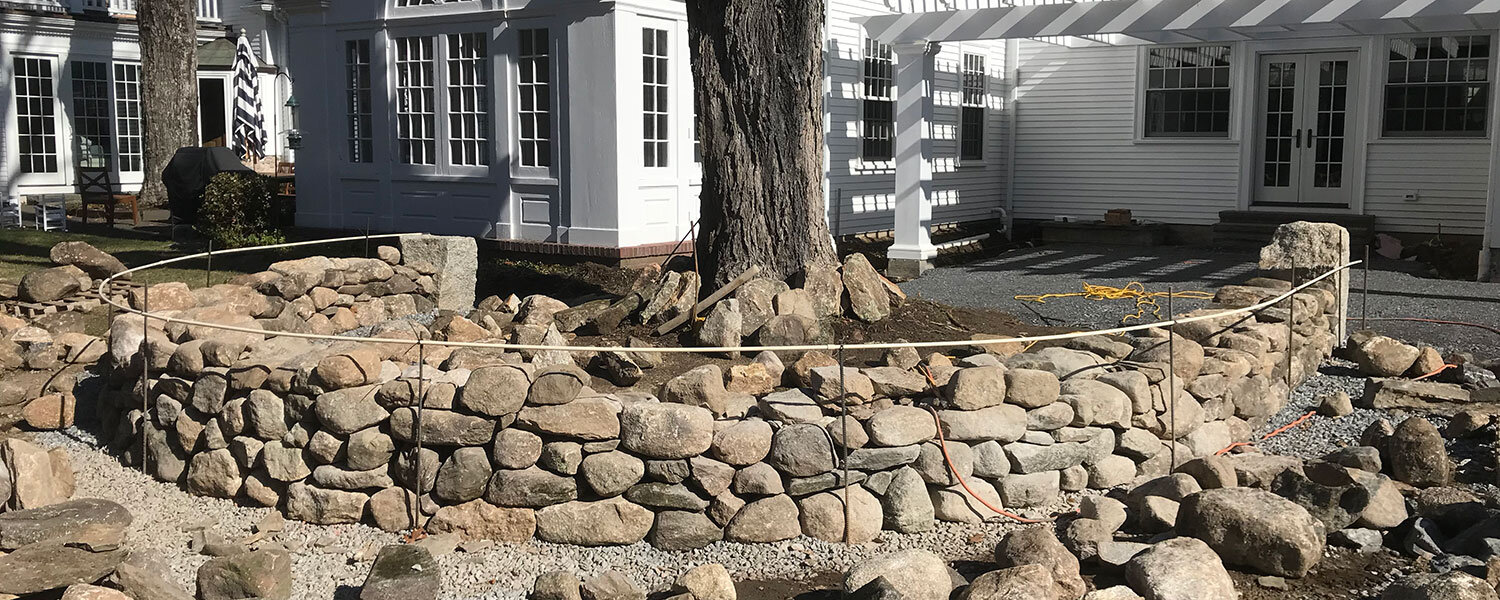
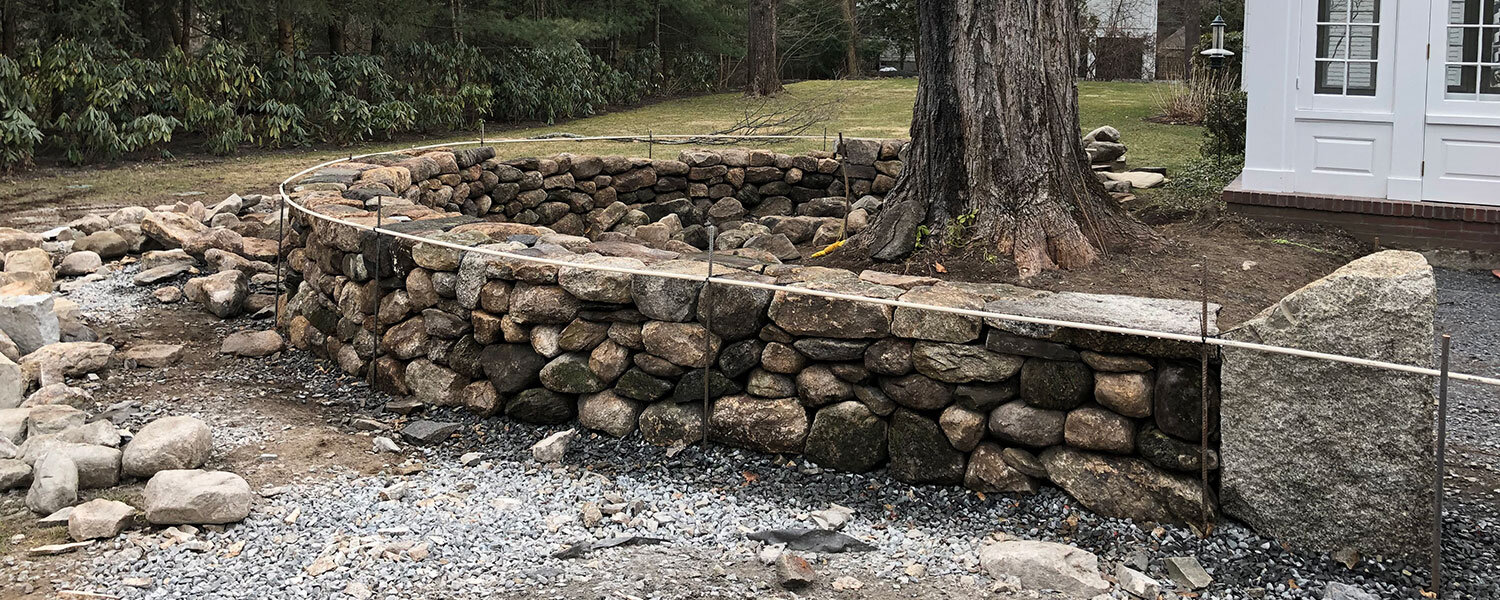
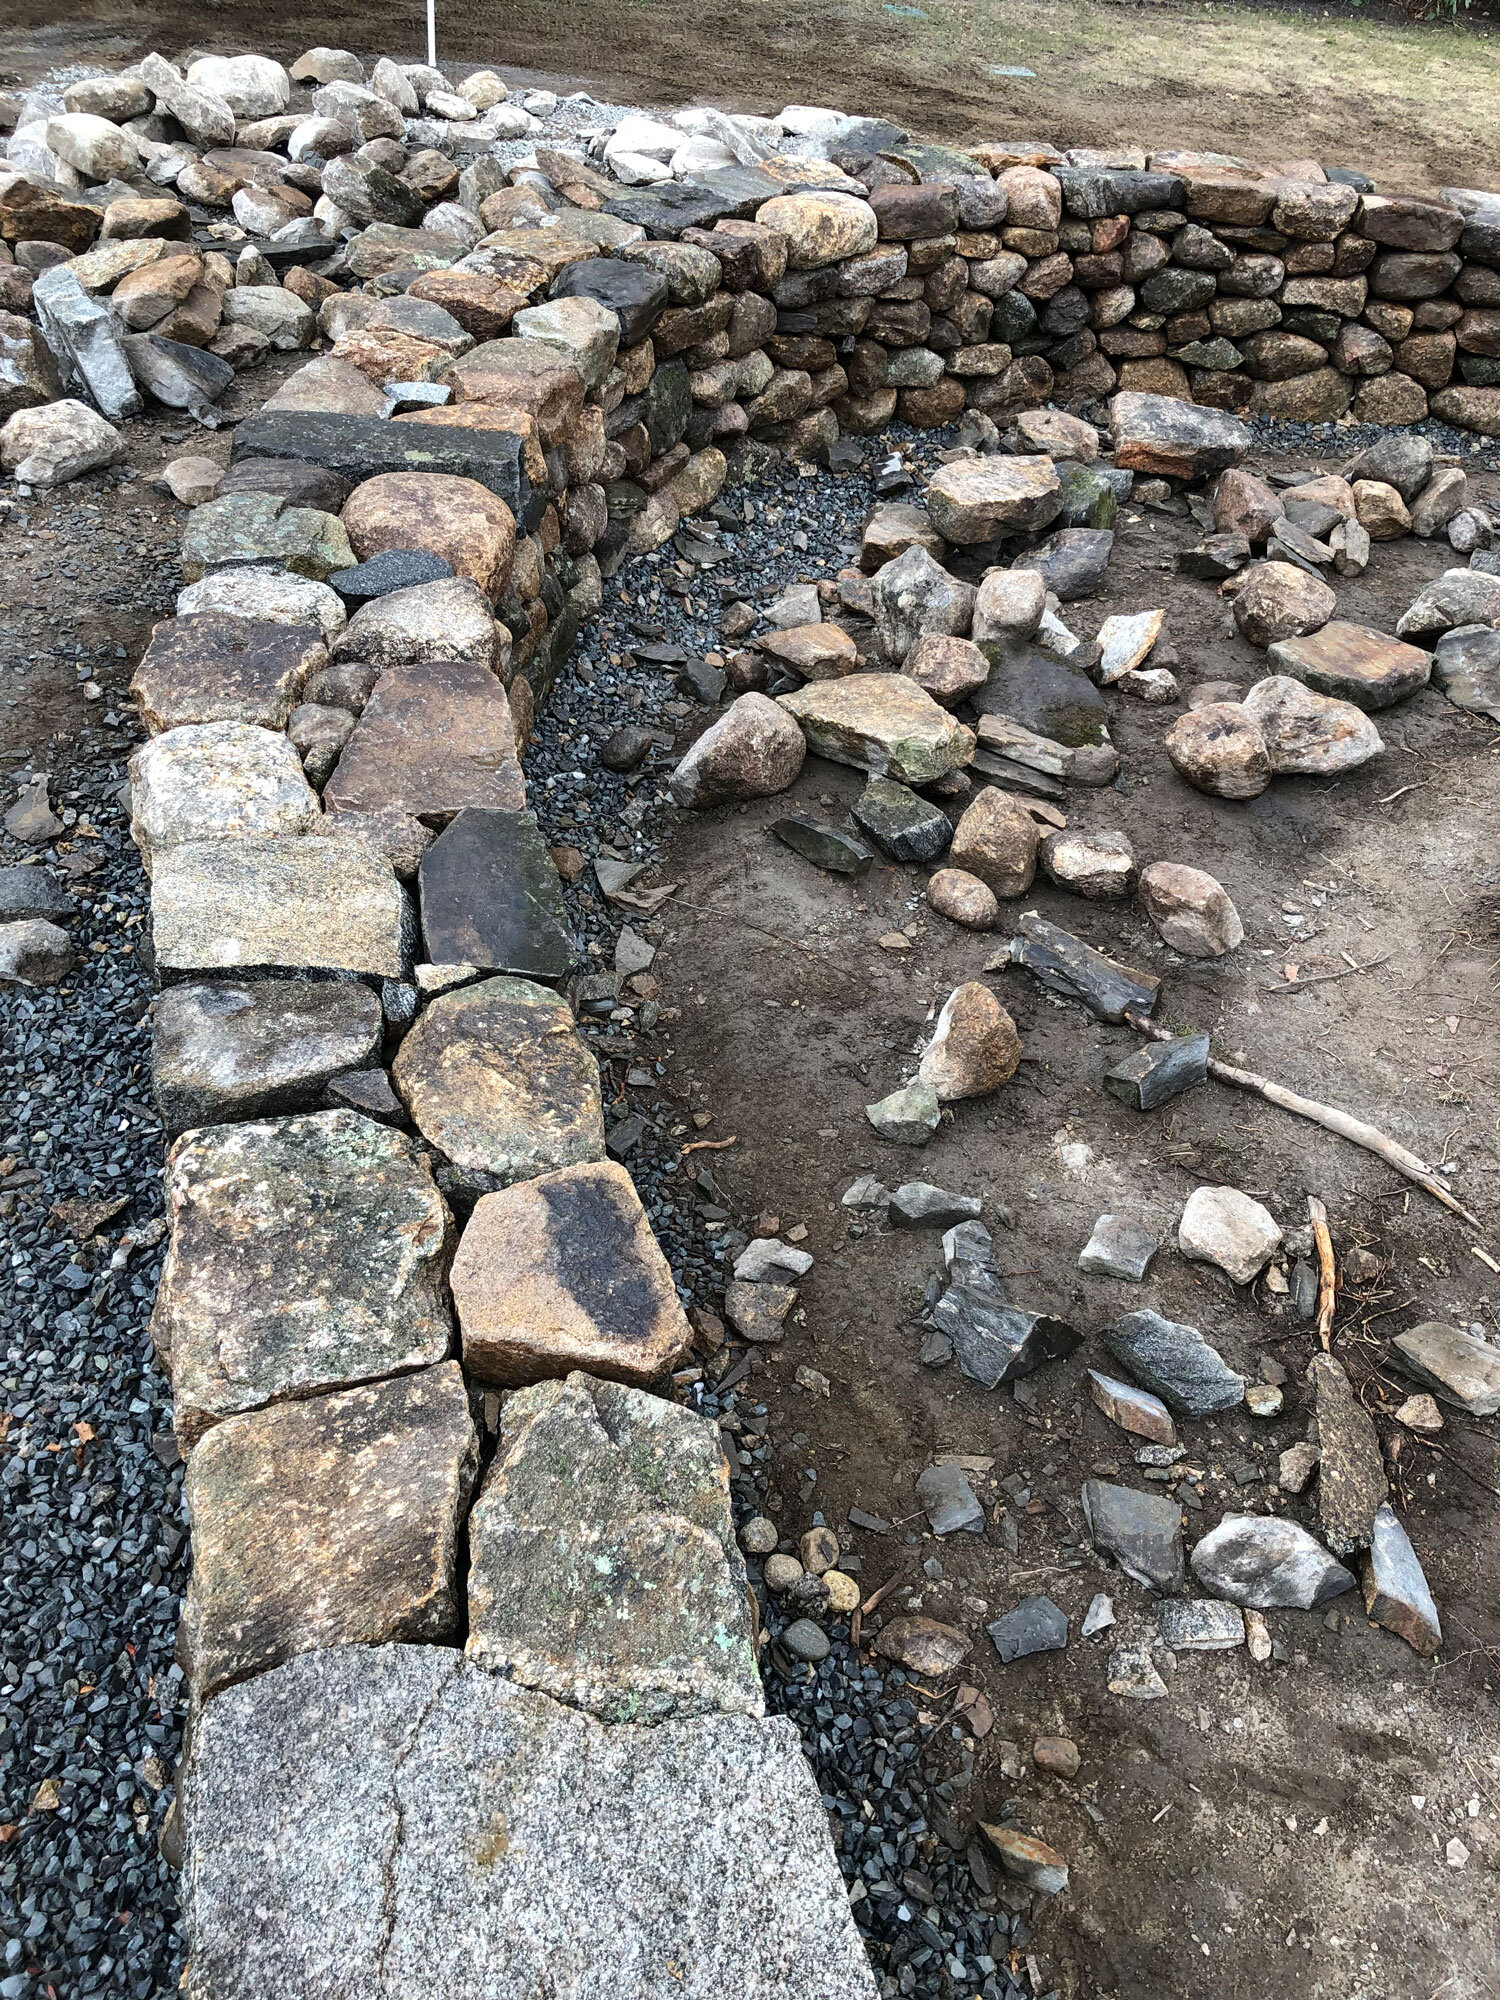
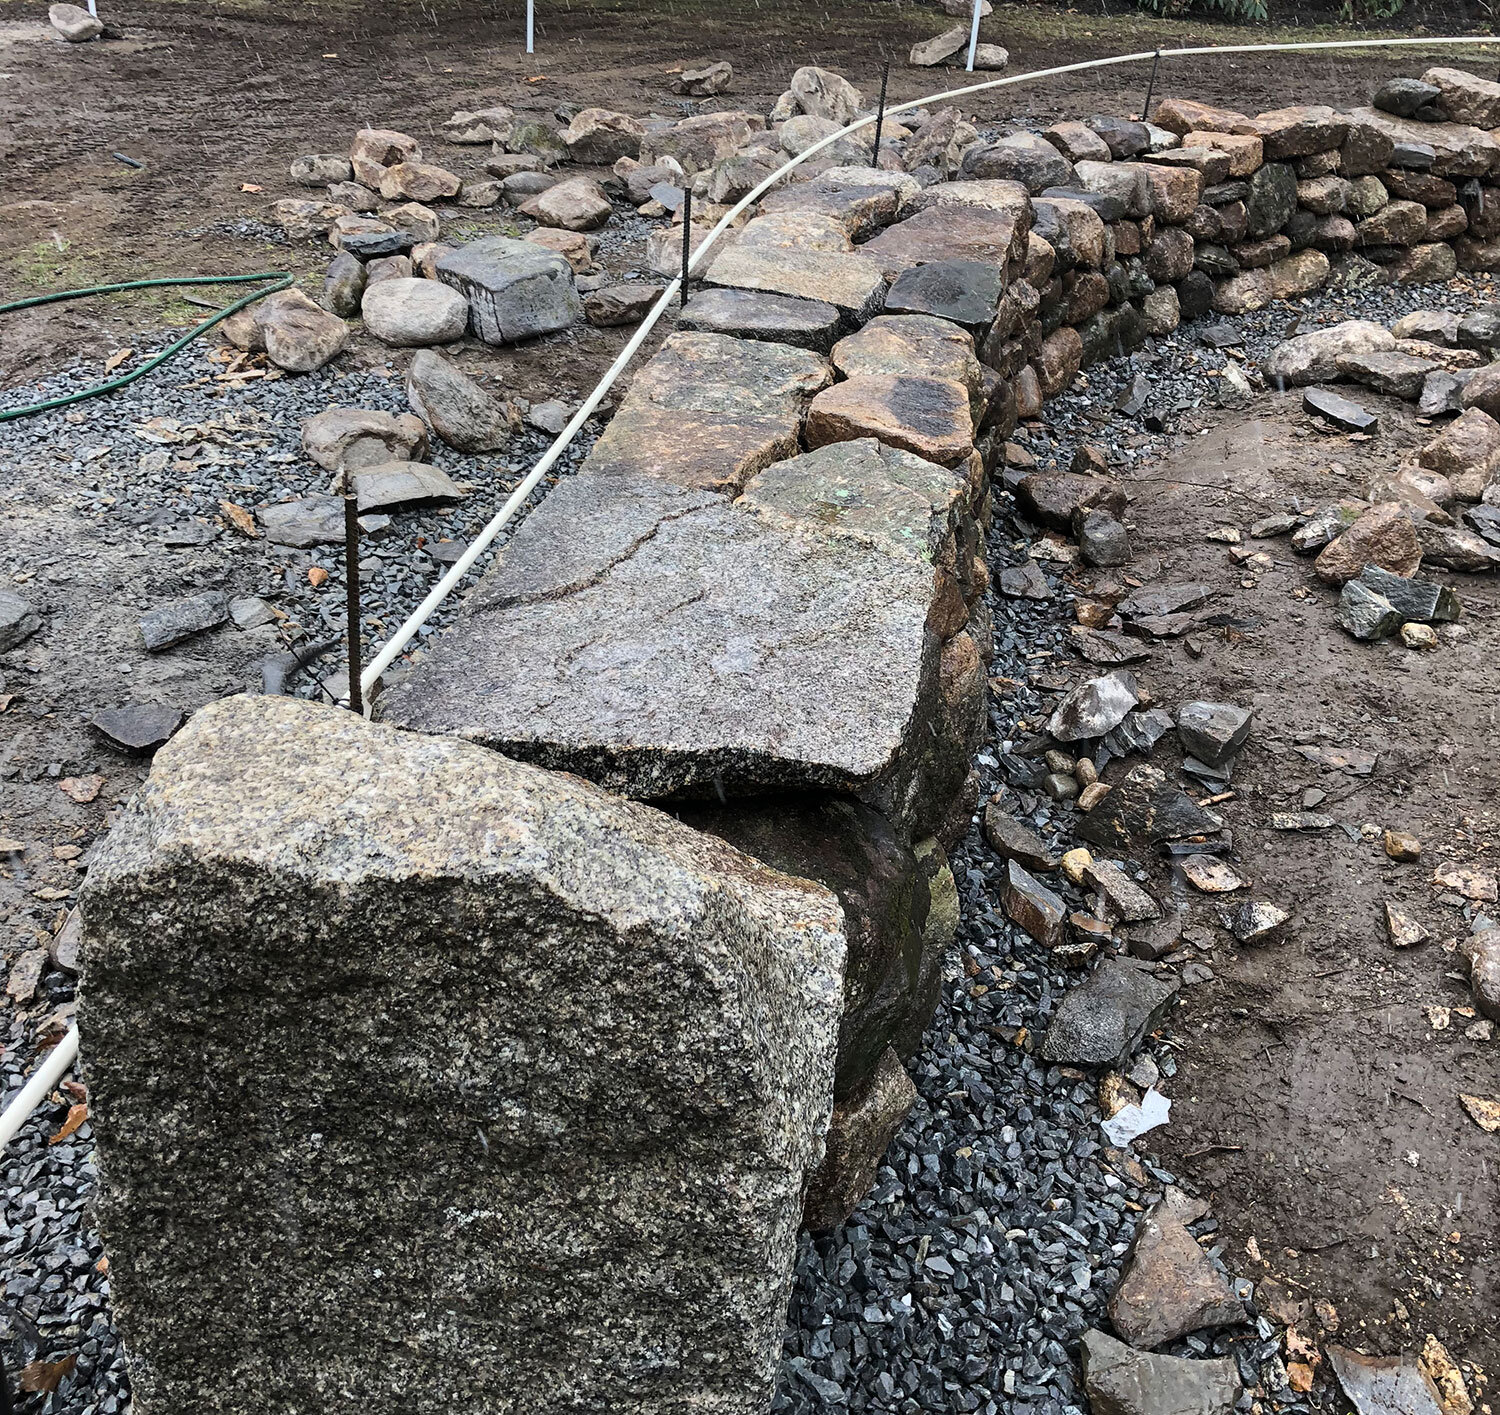
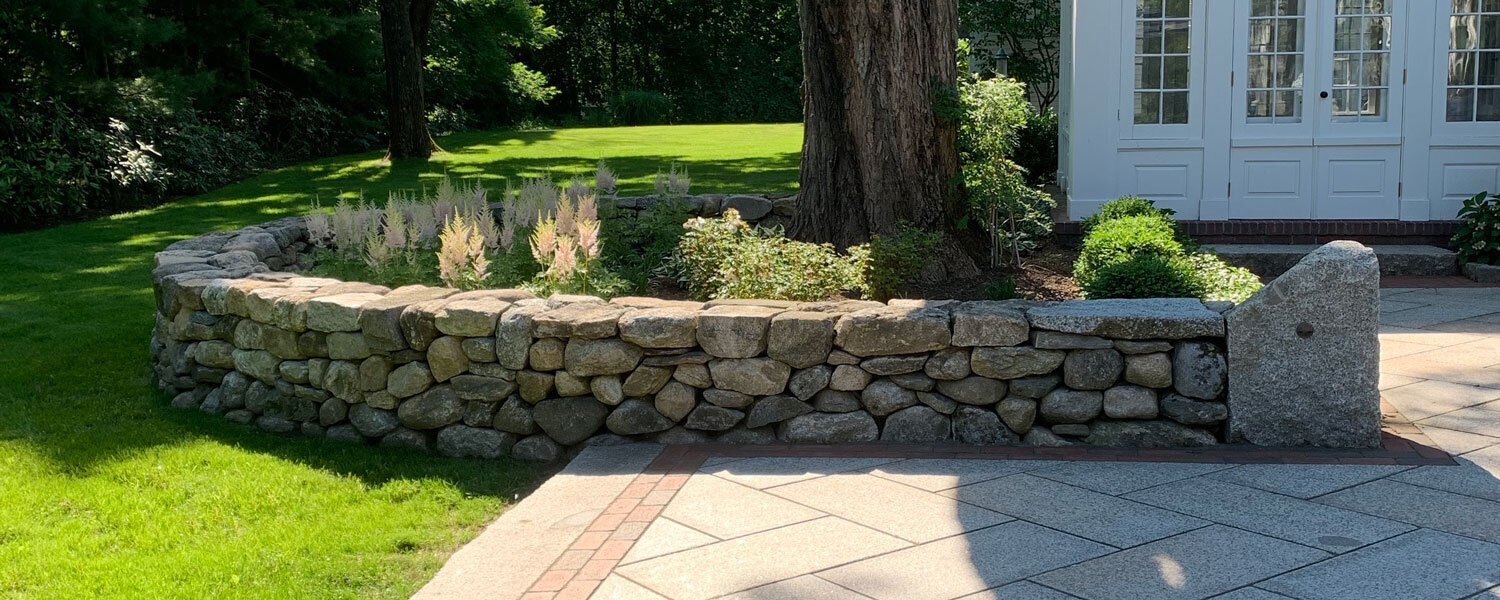
This project began by building a radial weathered New England fieldstone dry-stacked wall with reclaimed granite bookends. There is not a drop of concrete in this wall as we used traditional dry stone walling techniques for the build. Our intention was to create a look of antiquity by keeping as much patina as possible on all stones used in the project. This stone was all hand sourced from local farms in the area. Our client approached us with the idea of a curved stone wall around the beautiful existing mature maple tree. He desired a wall similar to his rustic front boundary wall, albeit more refined and safer for his energetic toddler to climb all over. We were up for the challenge. Safe to say, if they checked the security cameras, they would see two grown men doing jumping jacks on the cap stones to test its strength when we were finished!
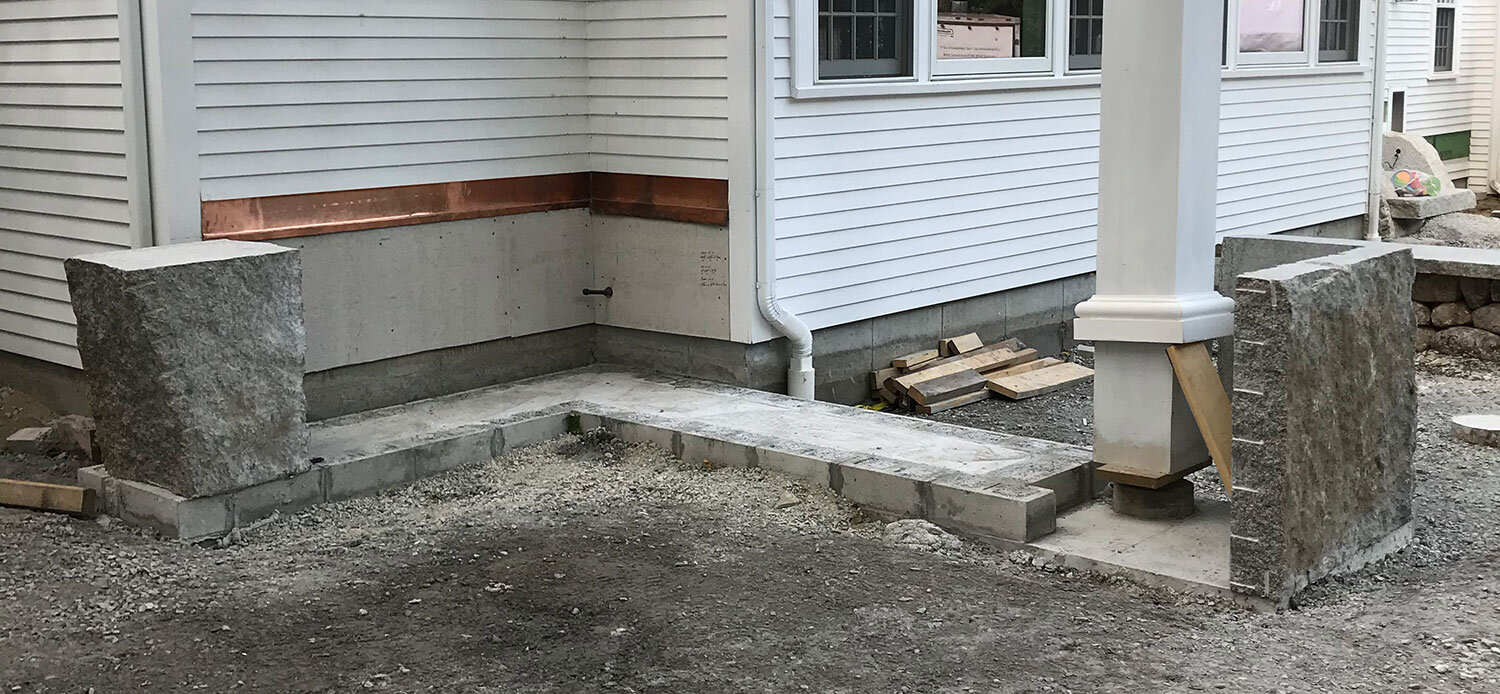
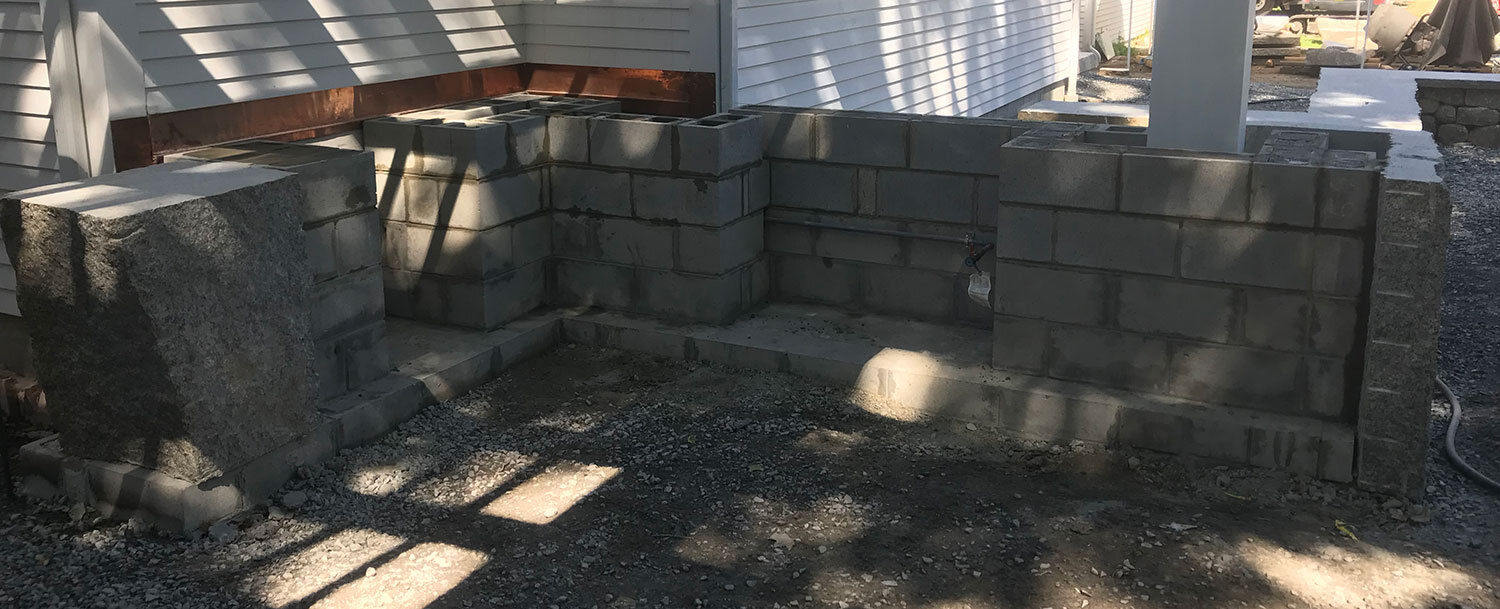
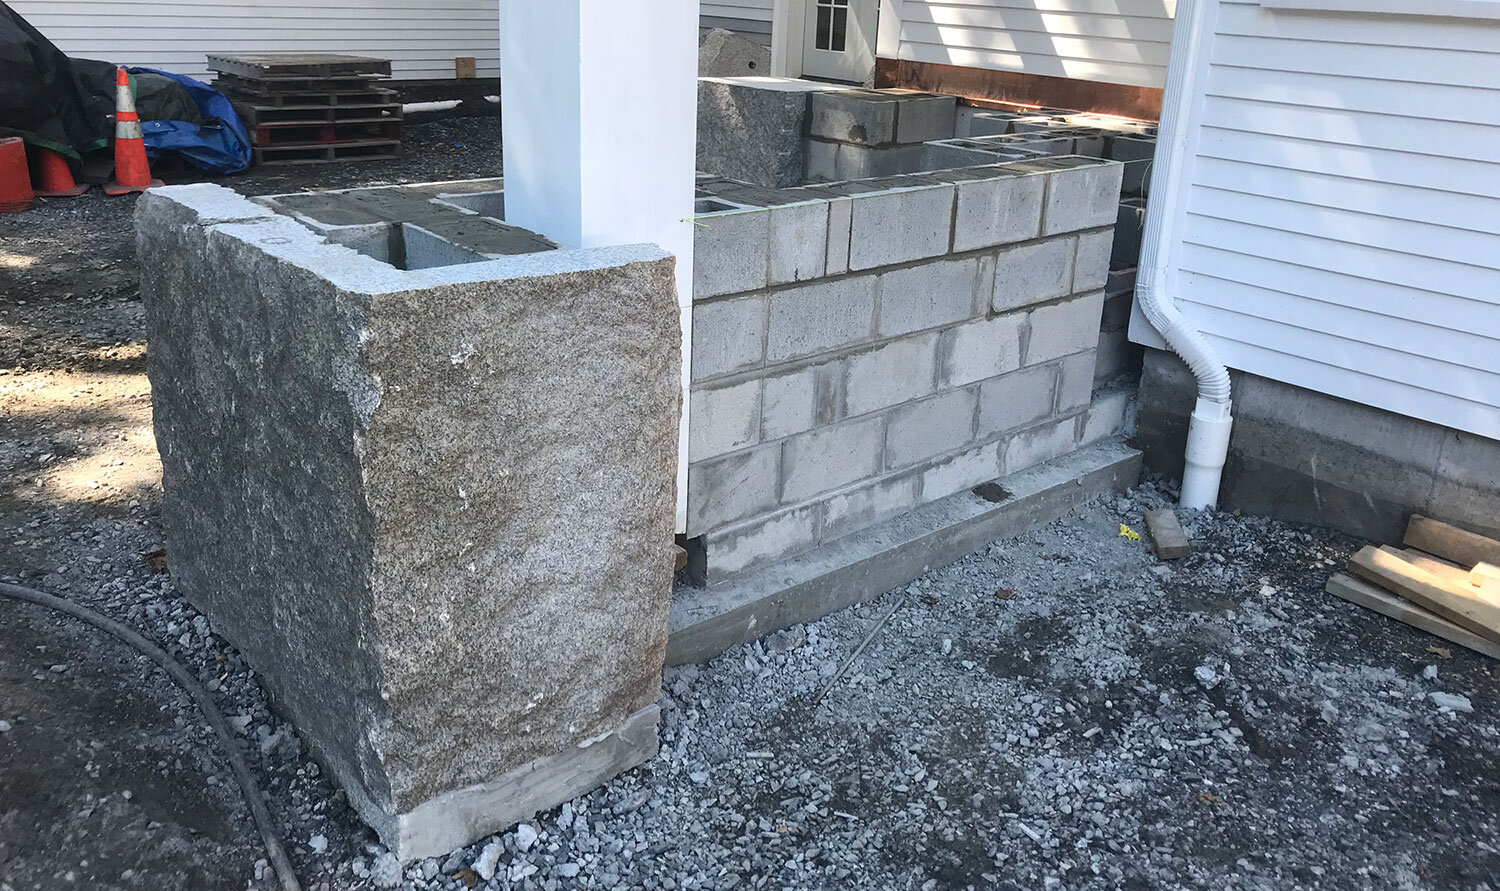
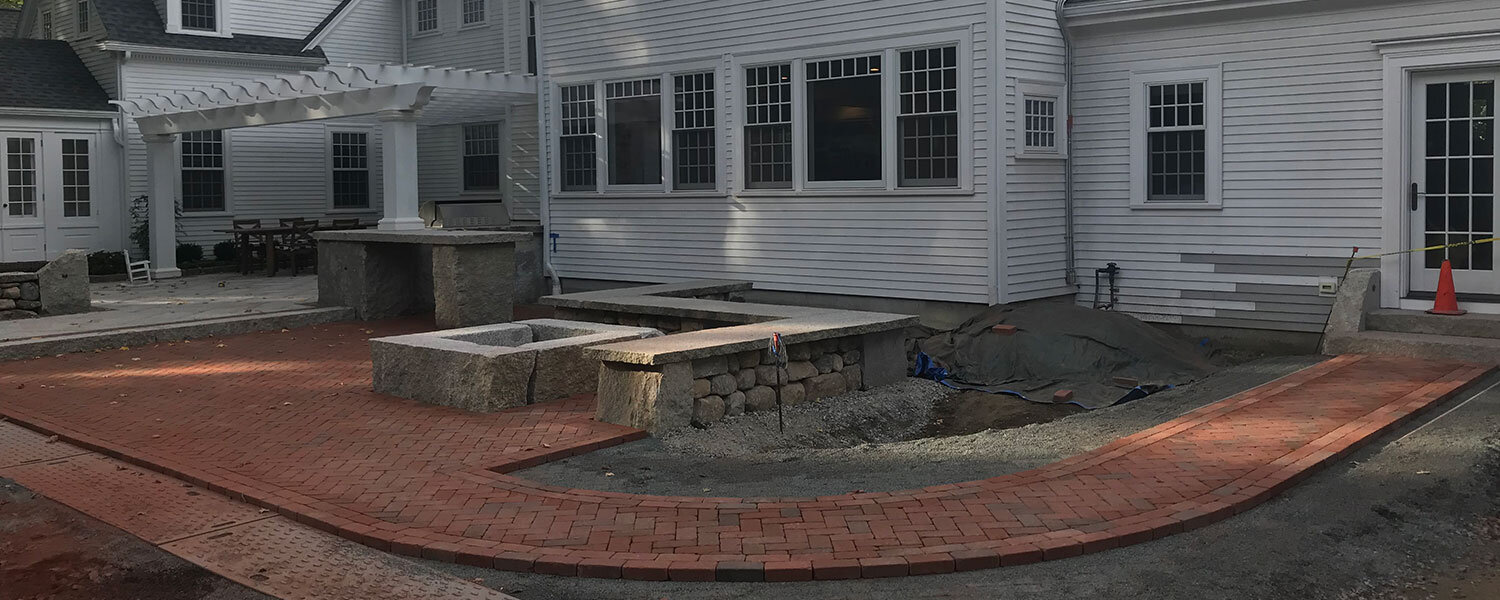
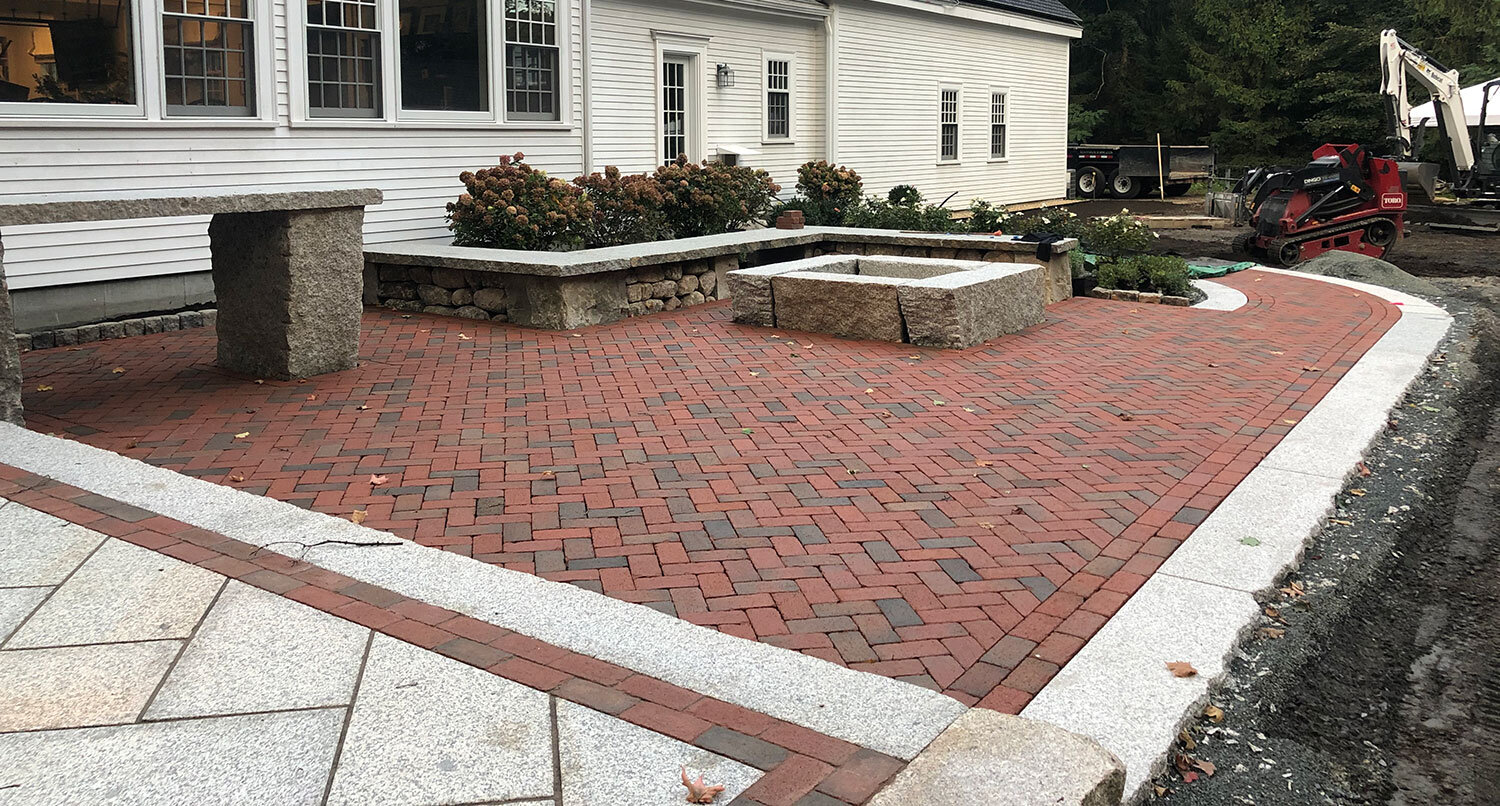
LOWER PATIO SITTING WALL
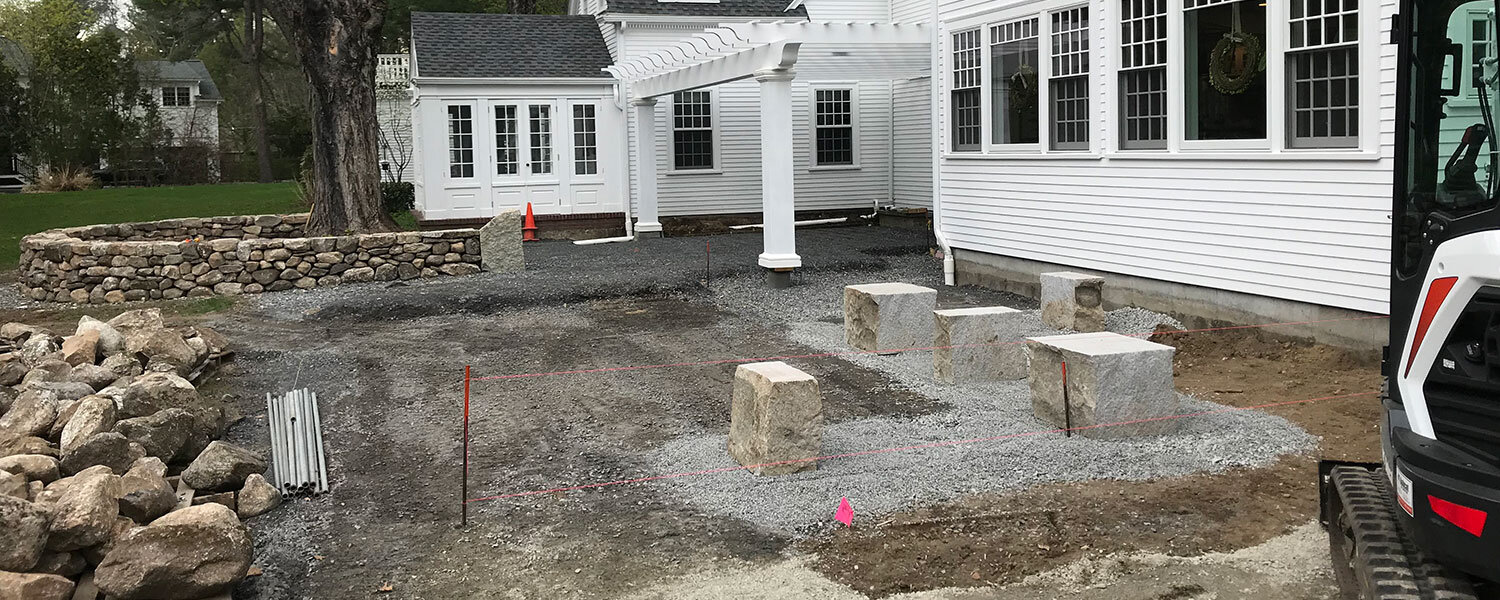
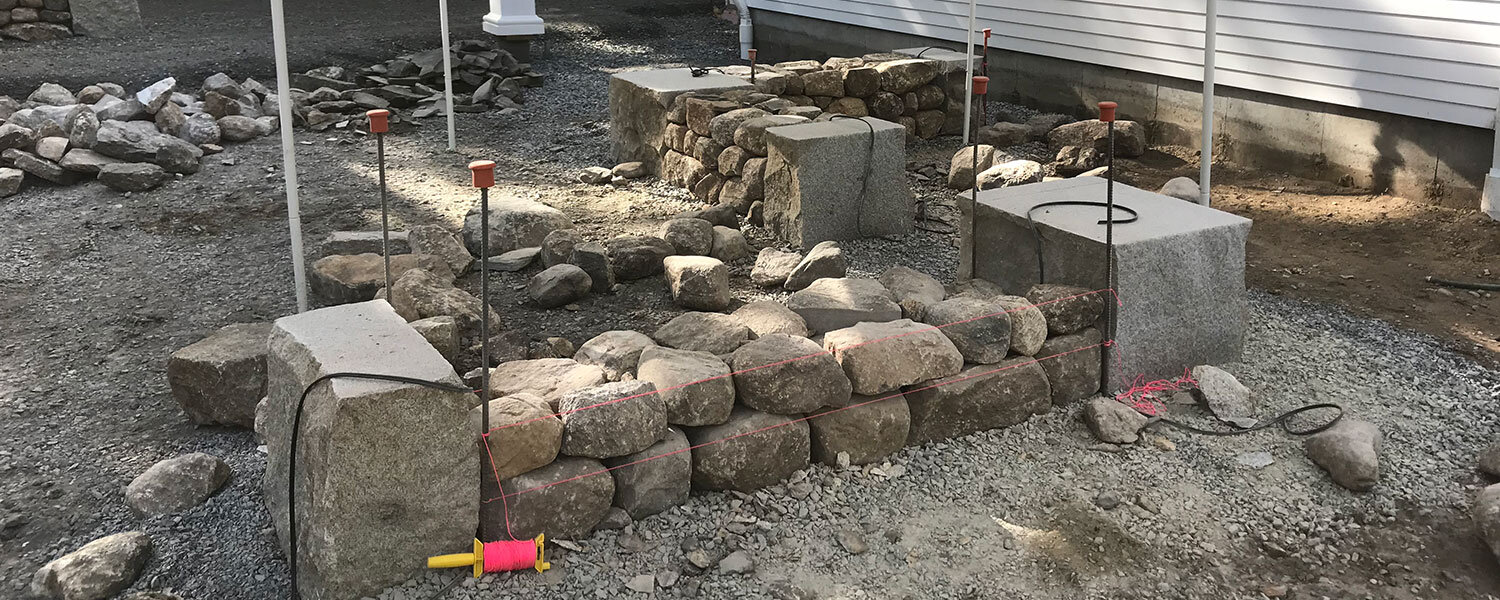
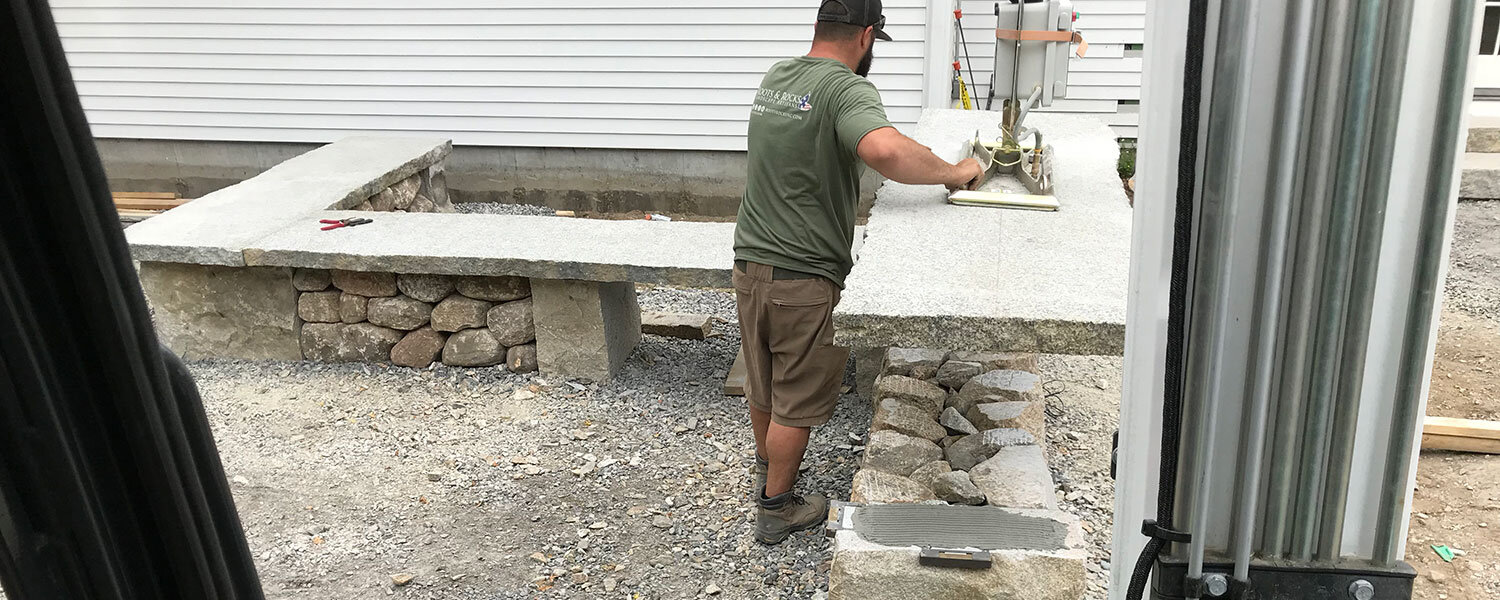
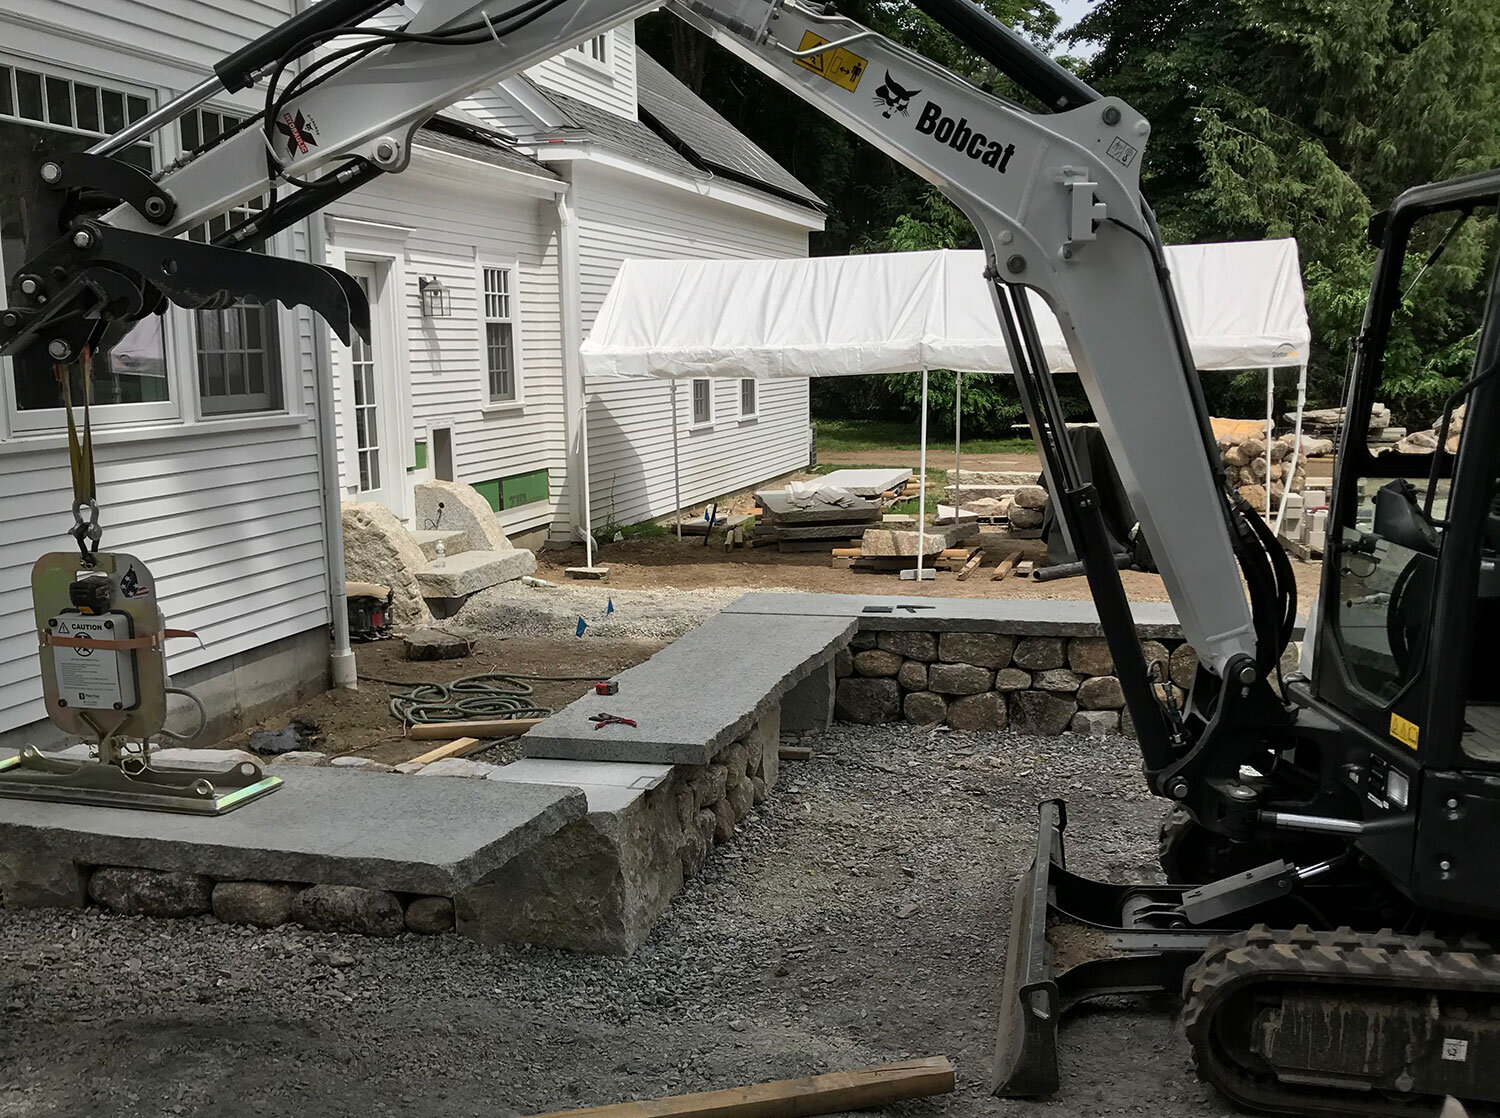
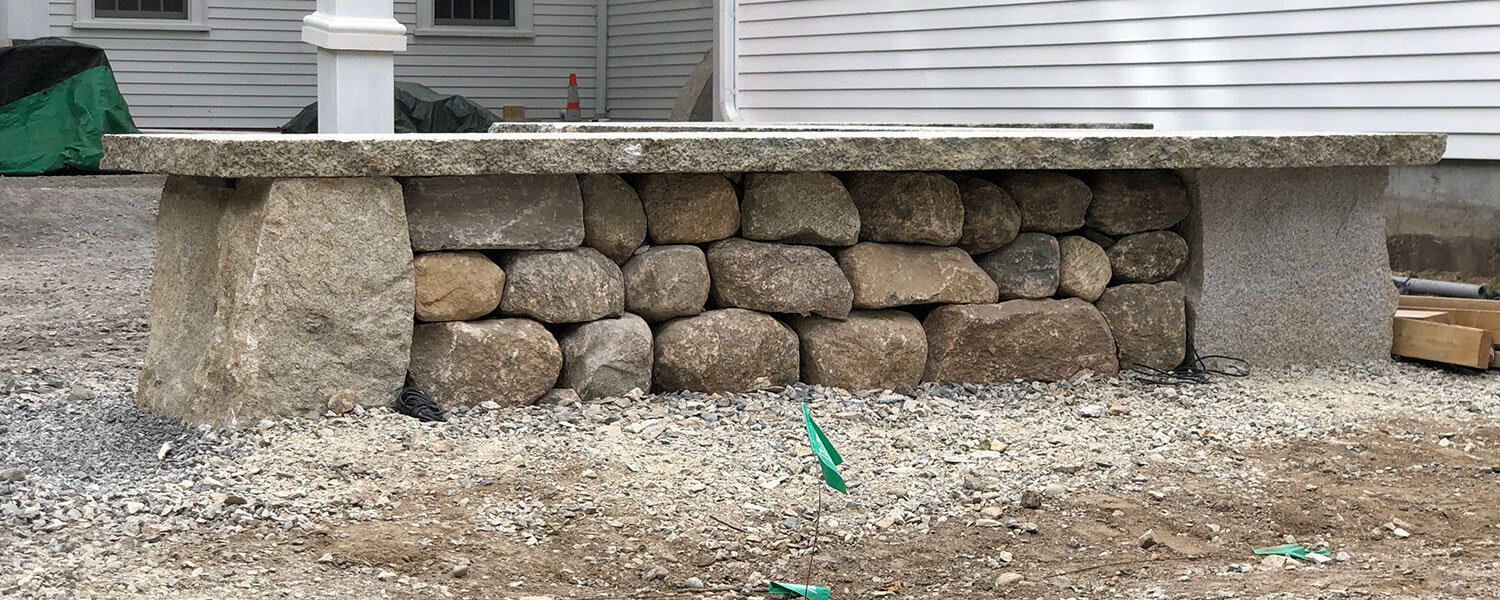
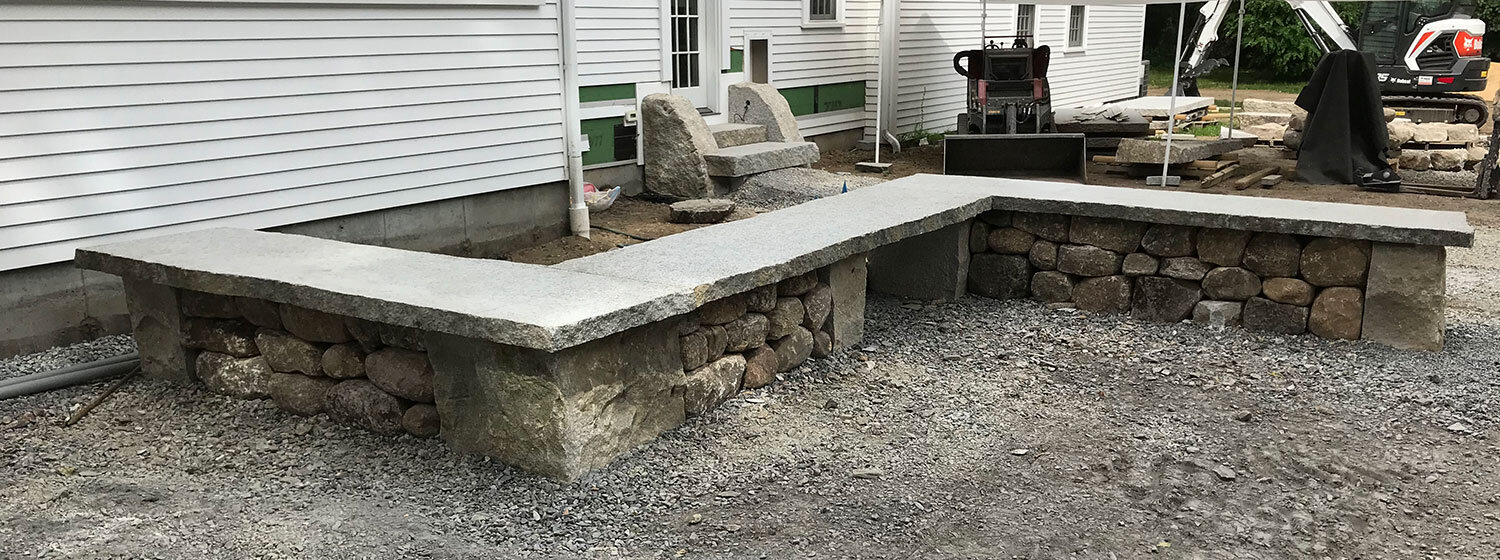
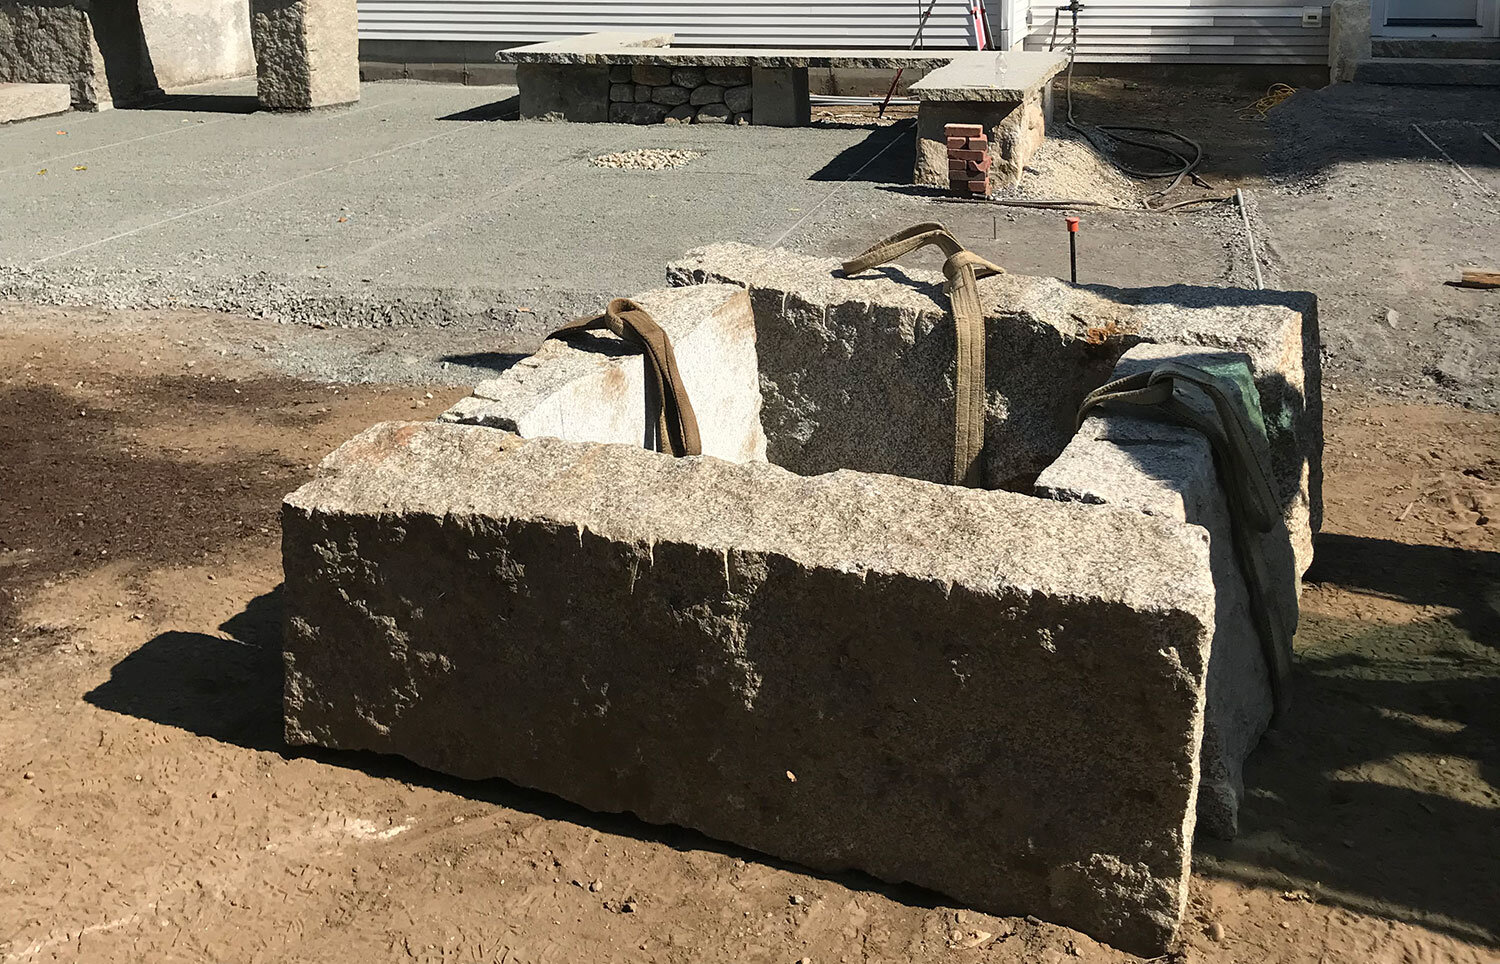
On the lower patio, we created a “Z” shaped sitting wall to provide seating and wood storage for the large firepit that would sit on the patio. We used five granite blocks to bookend our dry-stack walls and to create a solid support for our 3” granite wall caps. The wall caps were custom-cut from an old embankment block from the Howley Street bridge in Peabody, MA. We fabricated this block into three live-edge wall caps while leaving the century-old patina intact on all sides. We left a void in the wall to store ample amounts of dry firewood. This wall has low voltage lighting hidden throughout.
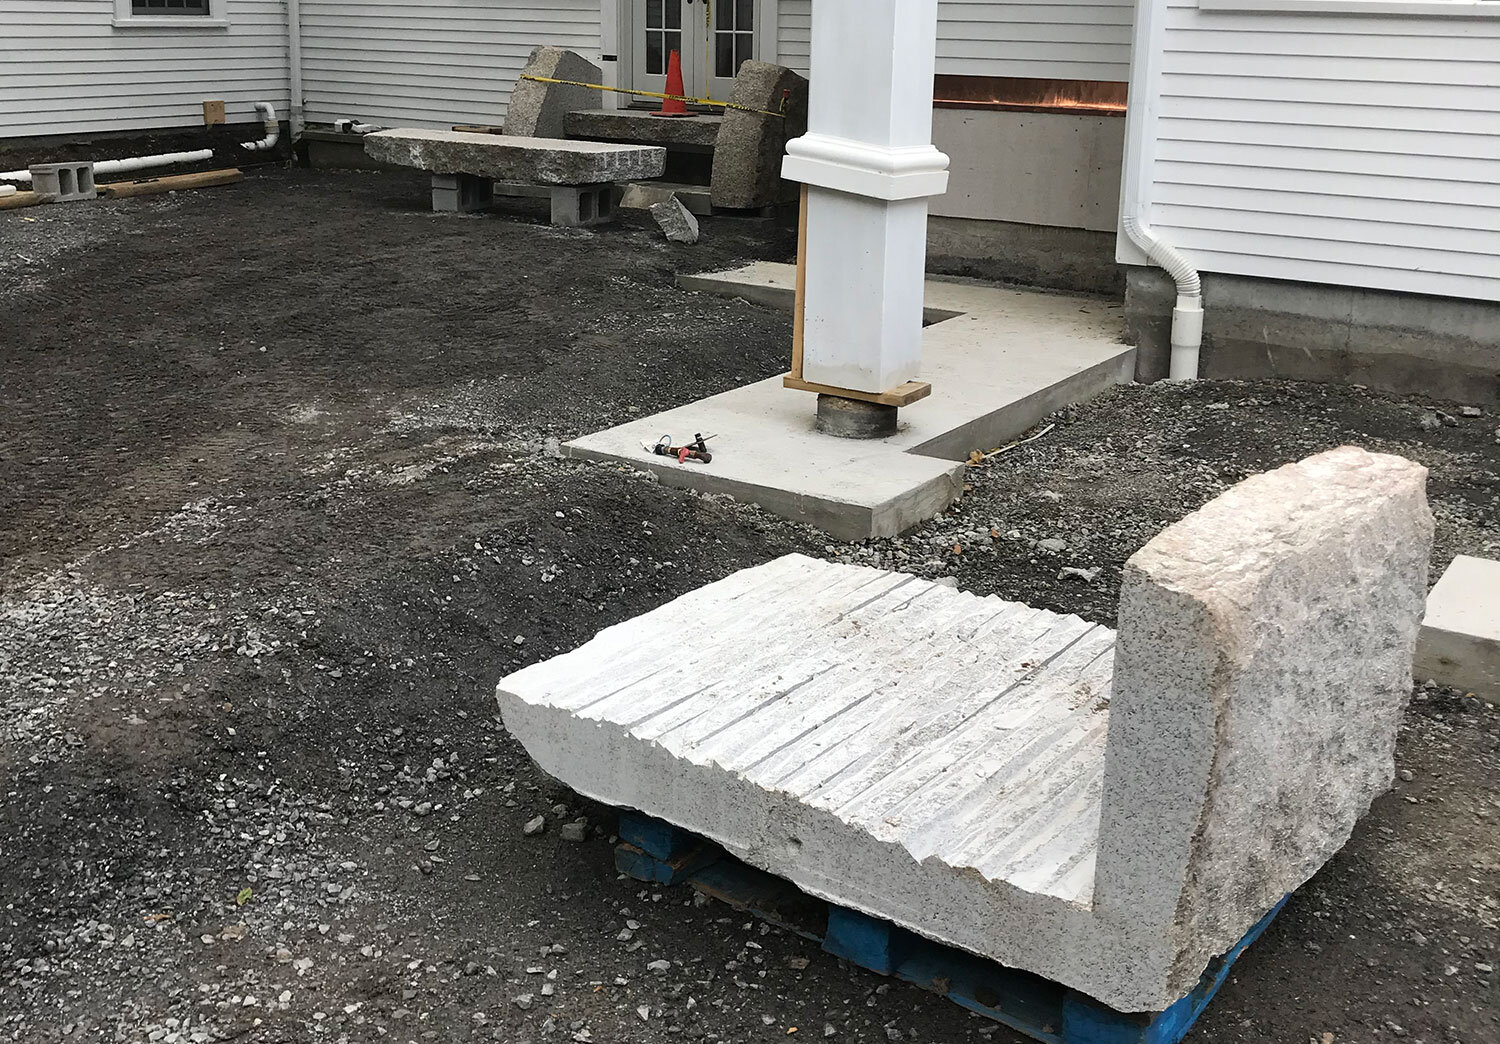
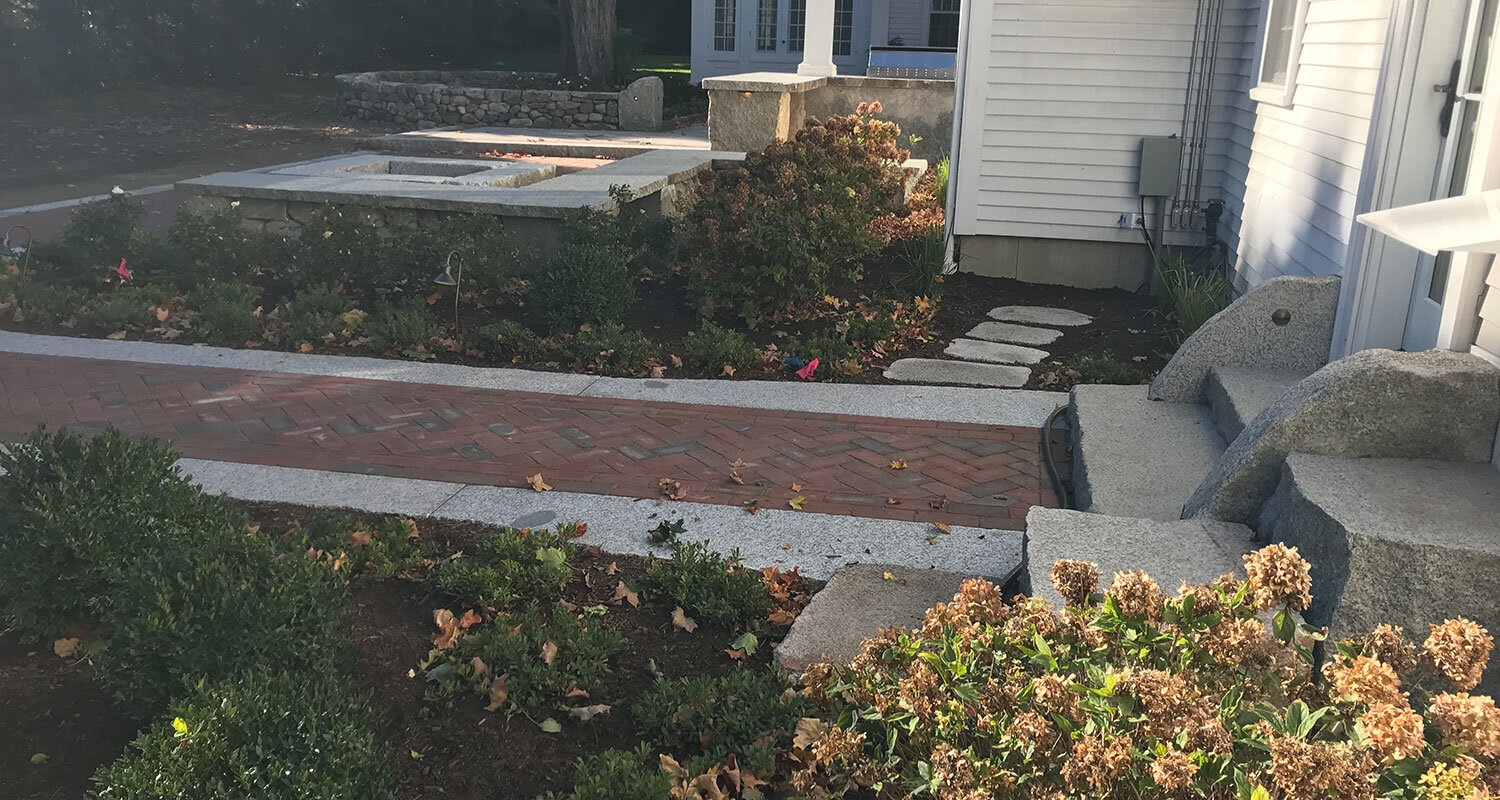
CUSTOM GRANITE ENTRY STAIRS
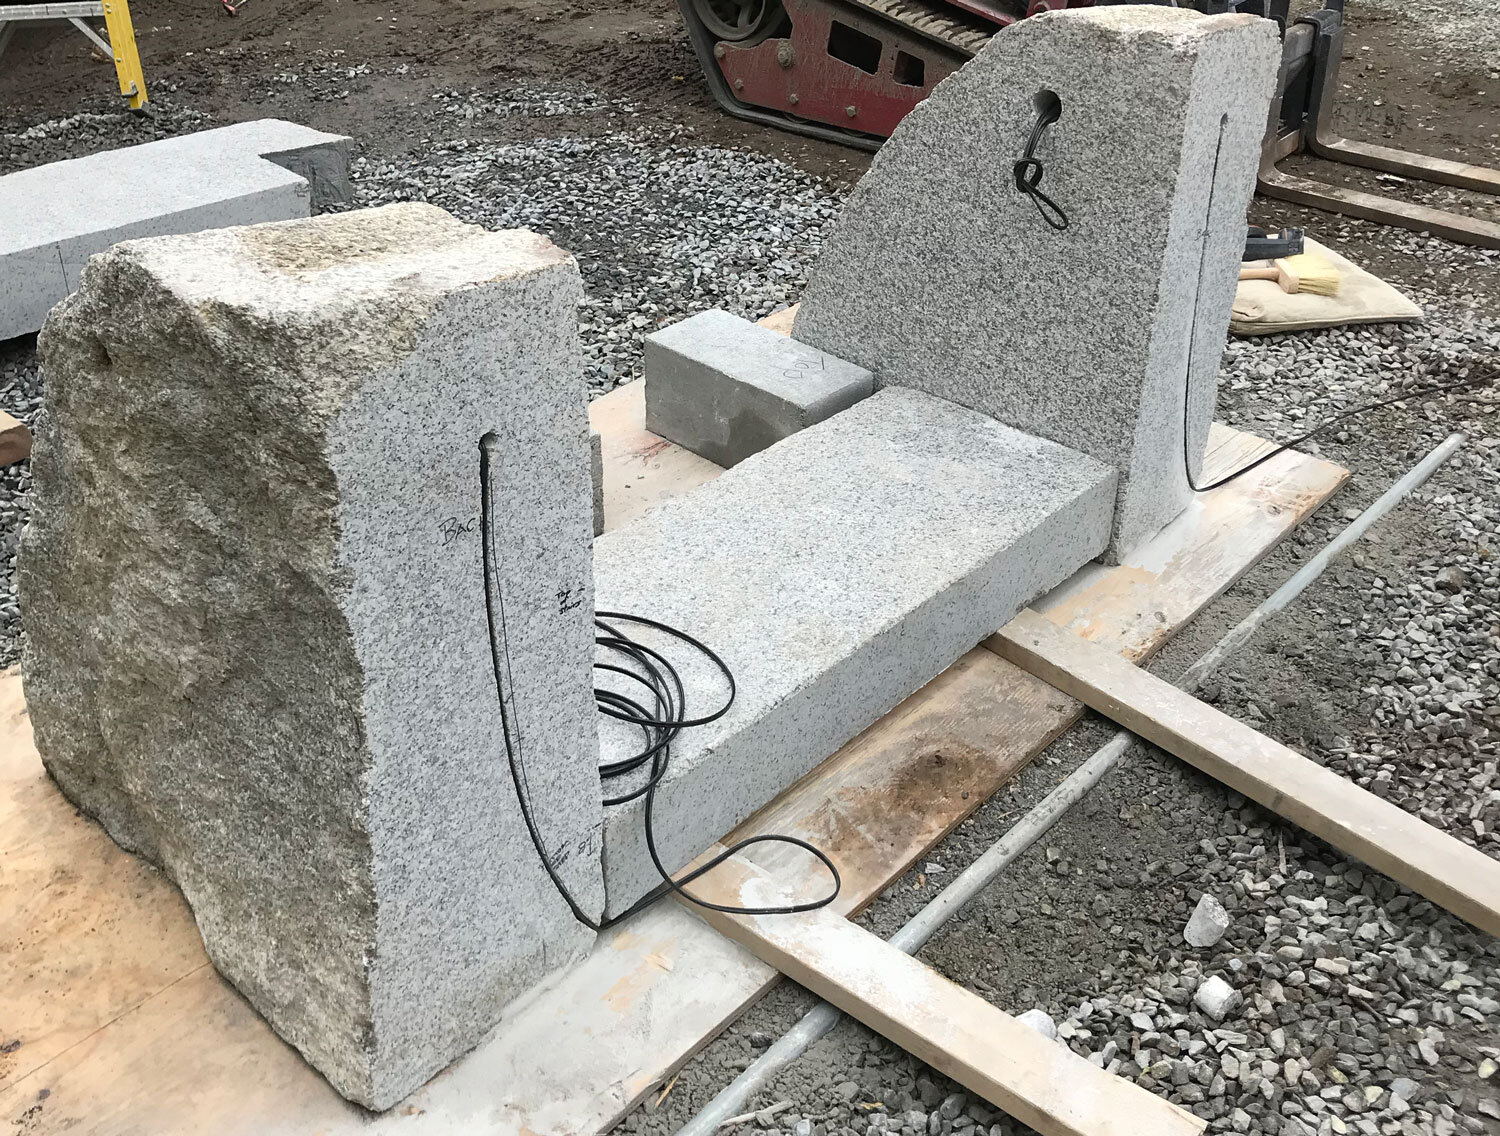

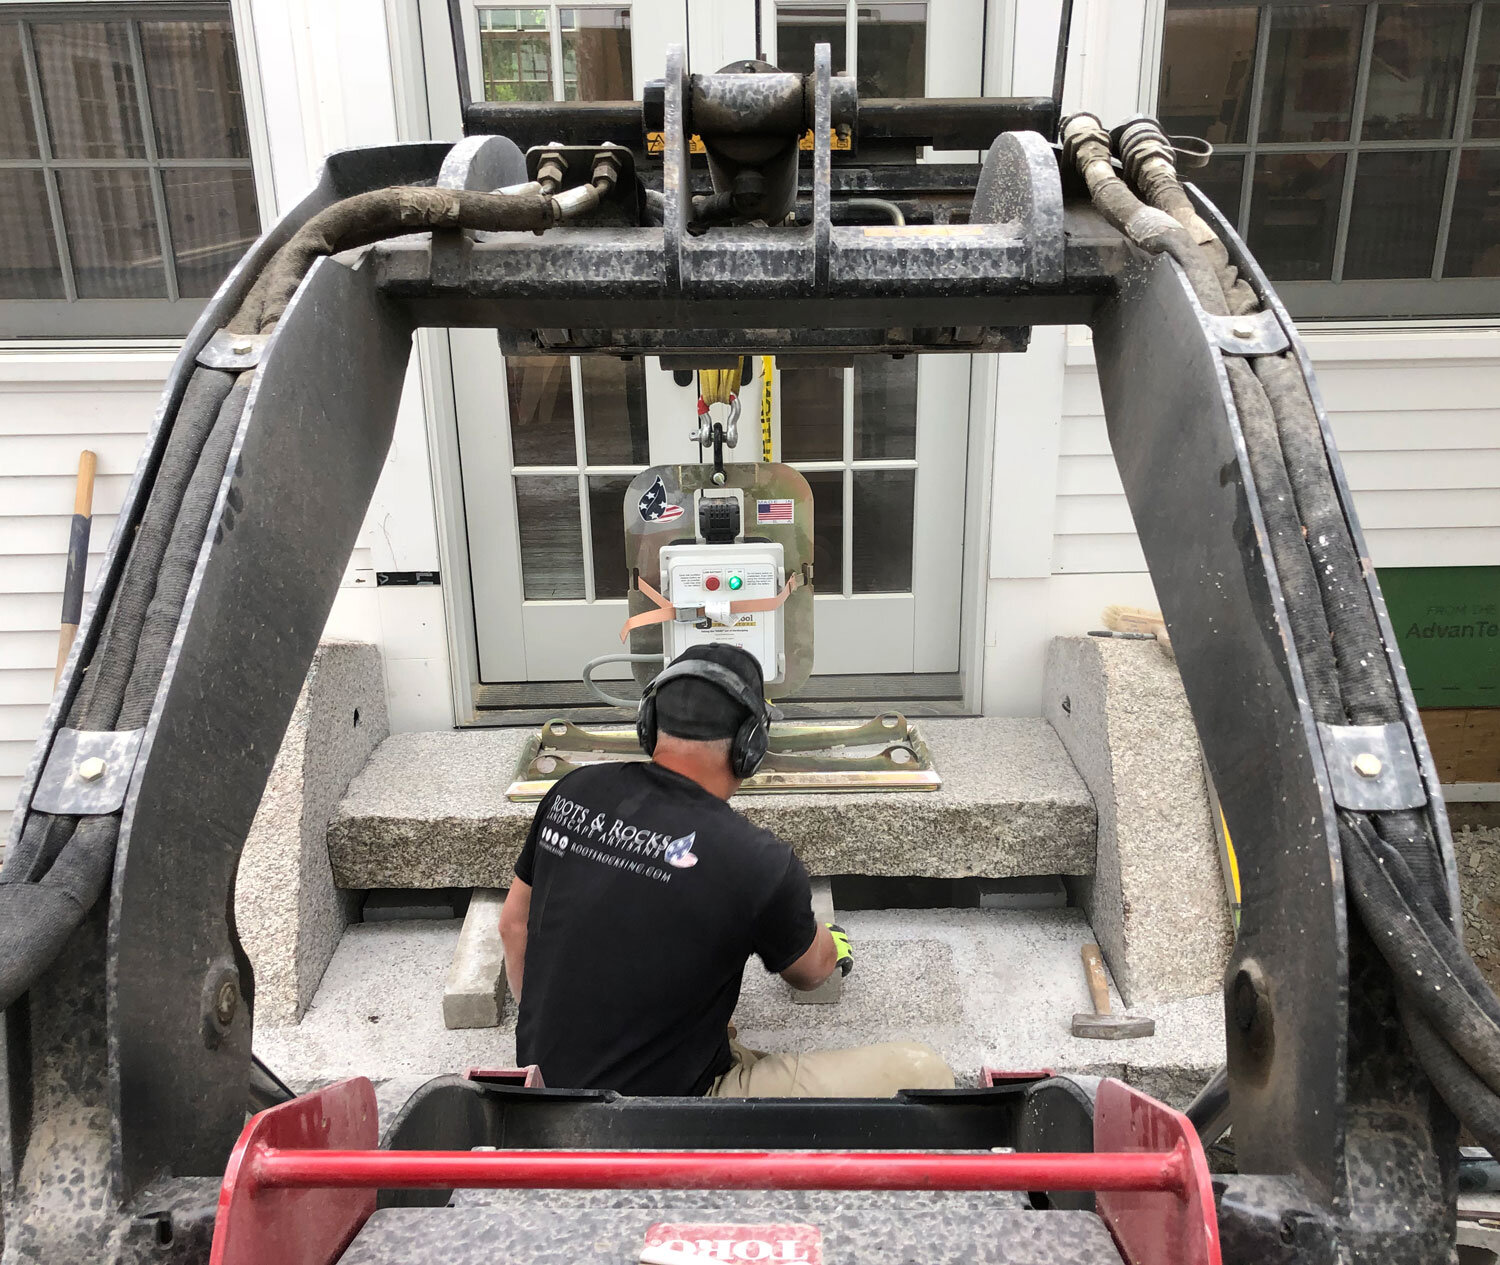
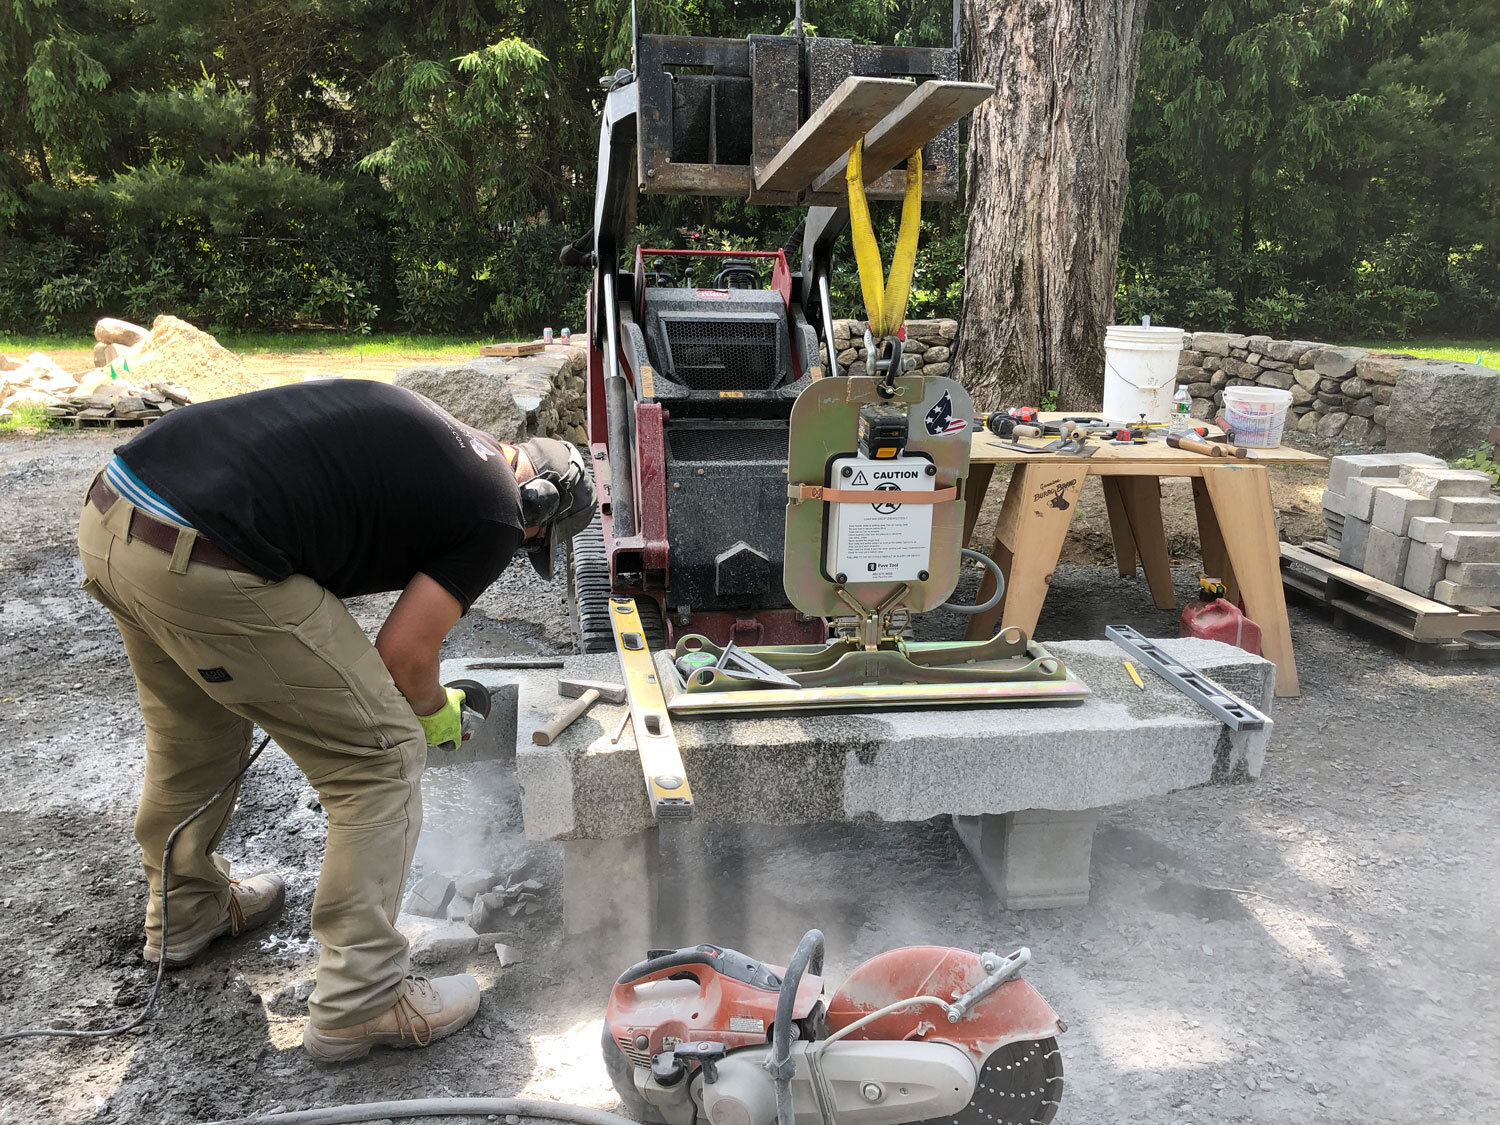
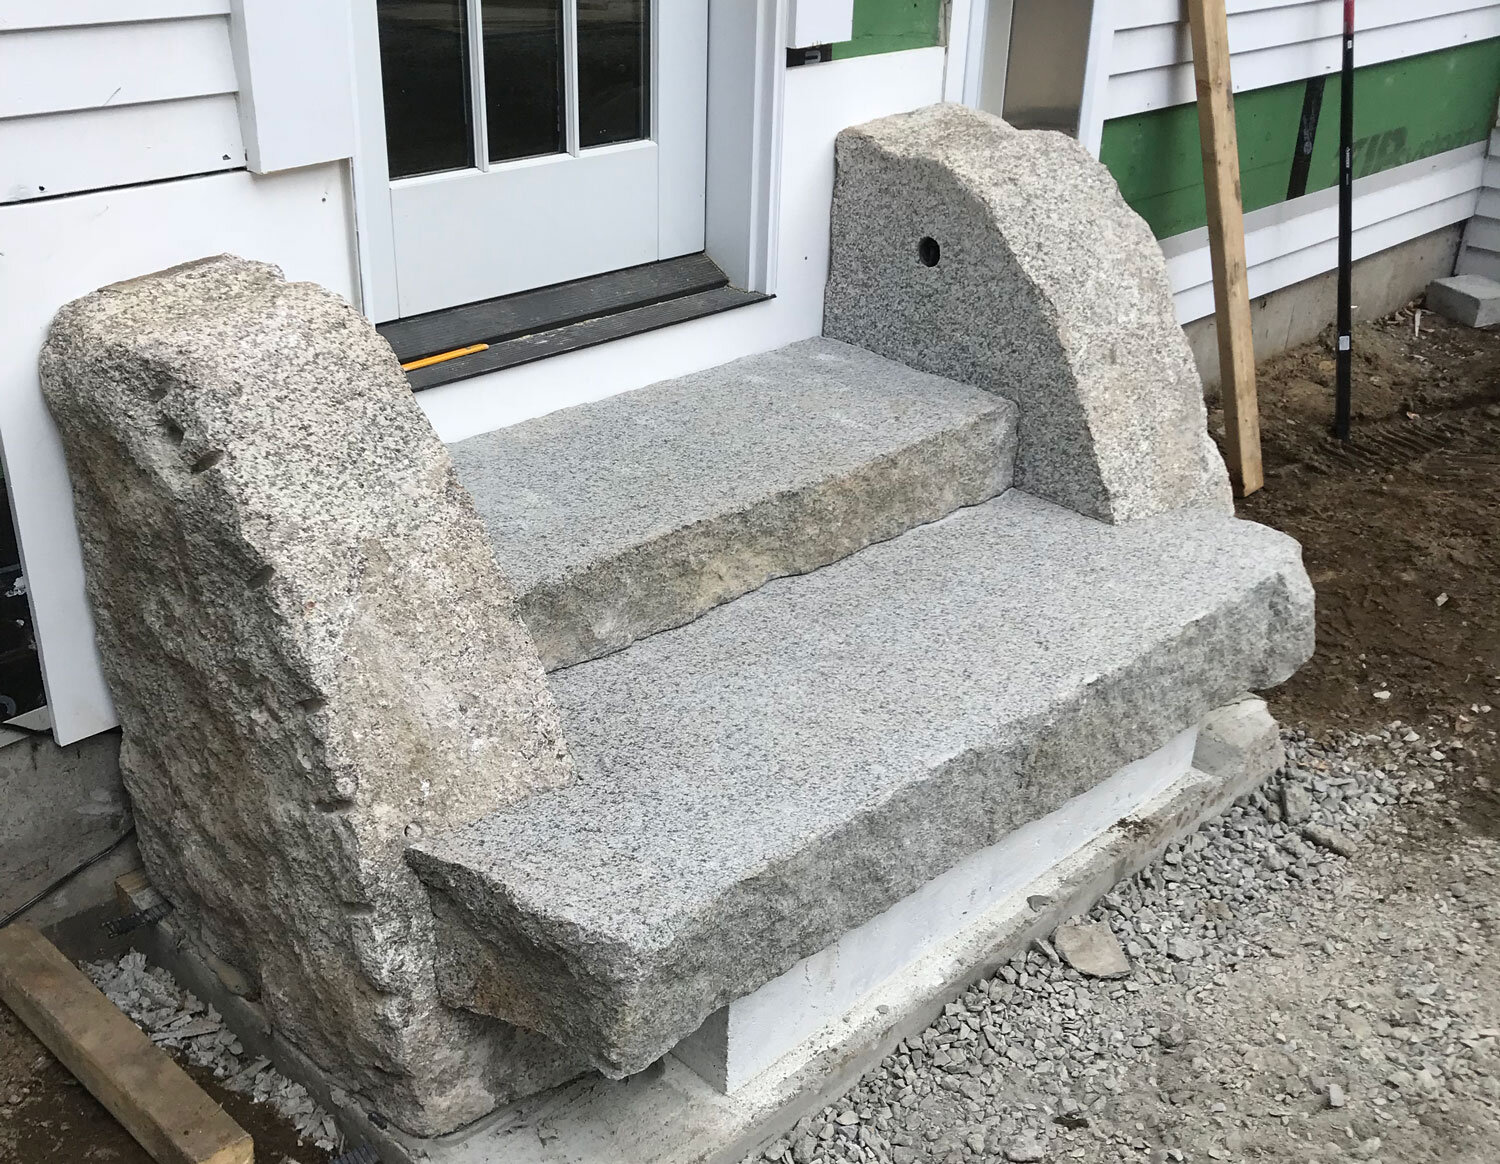
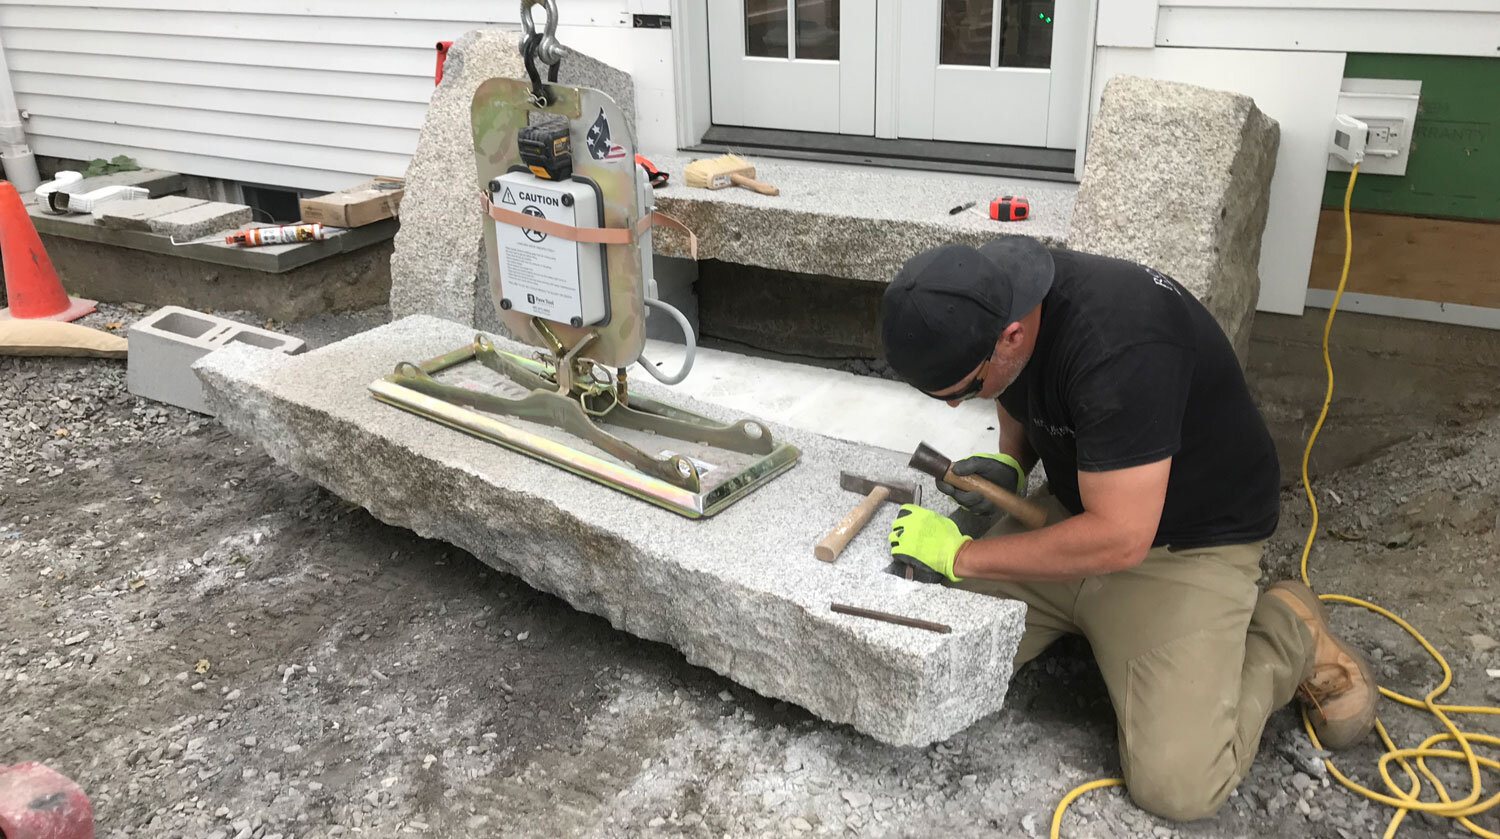
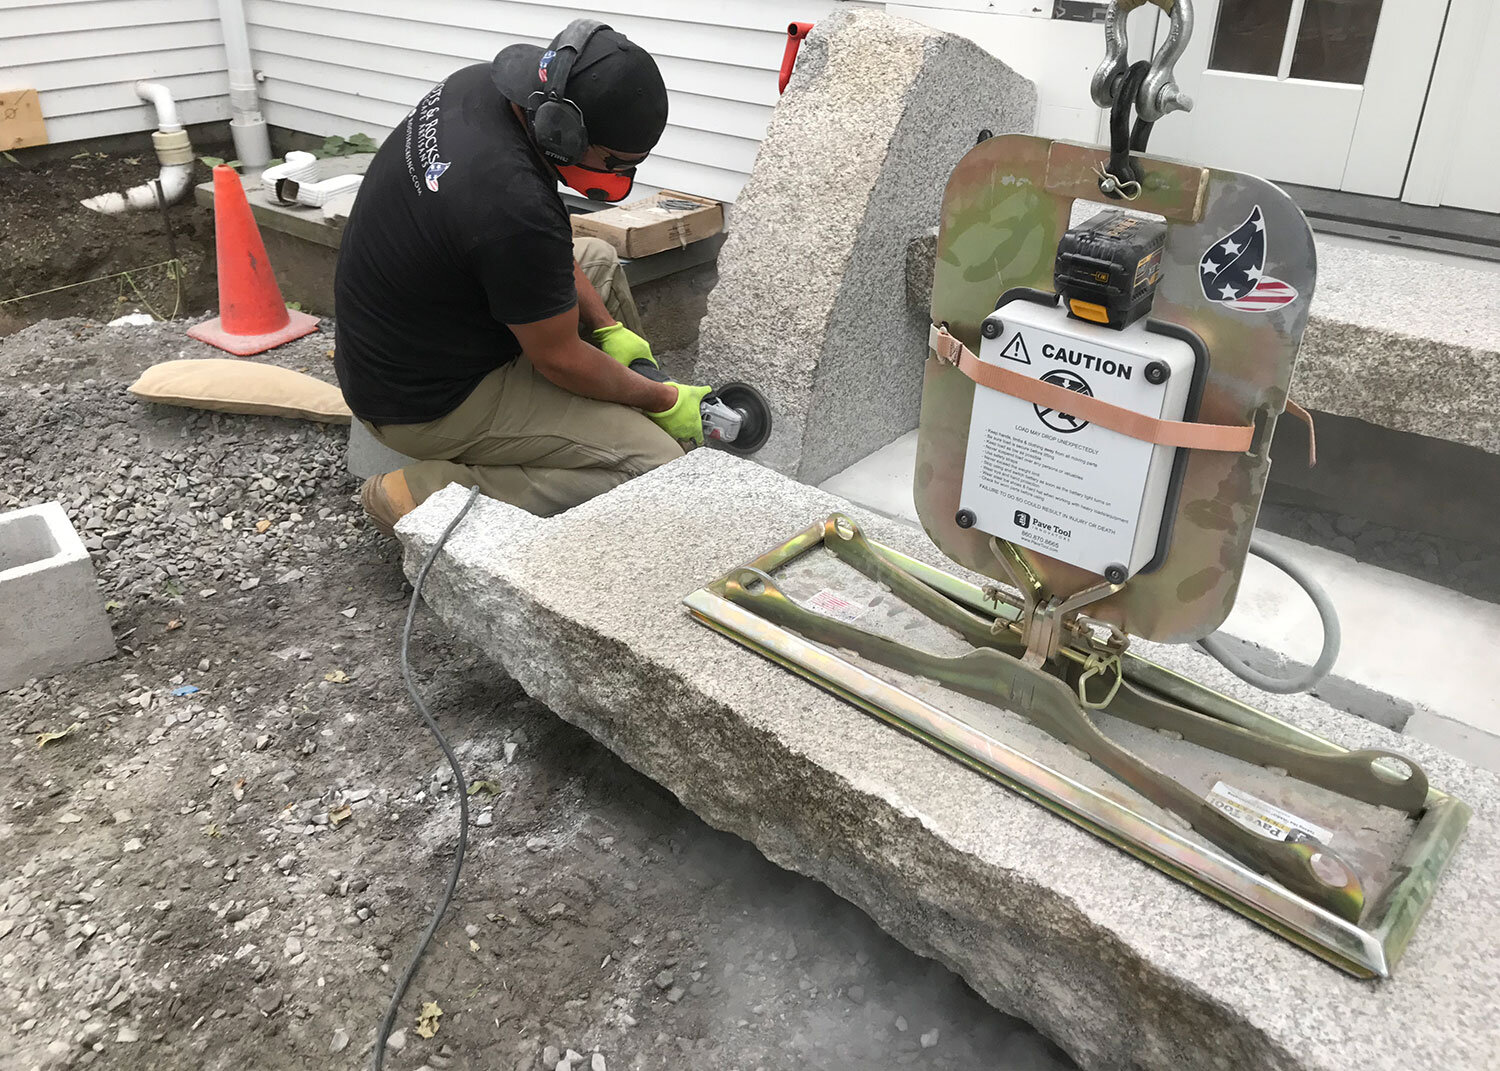
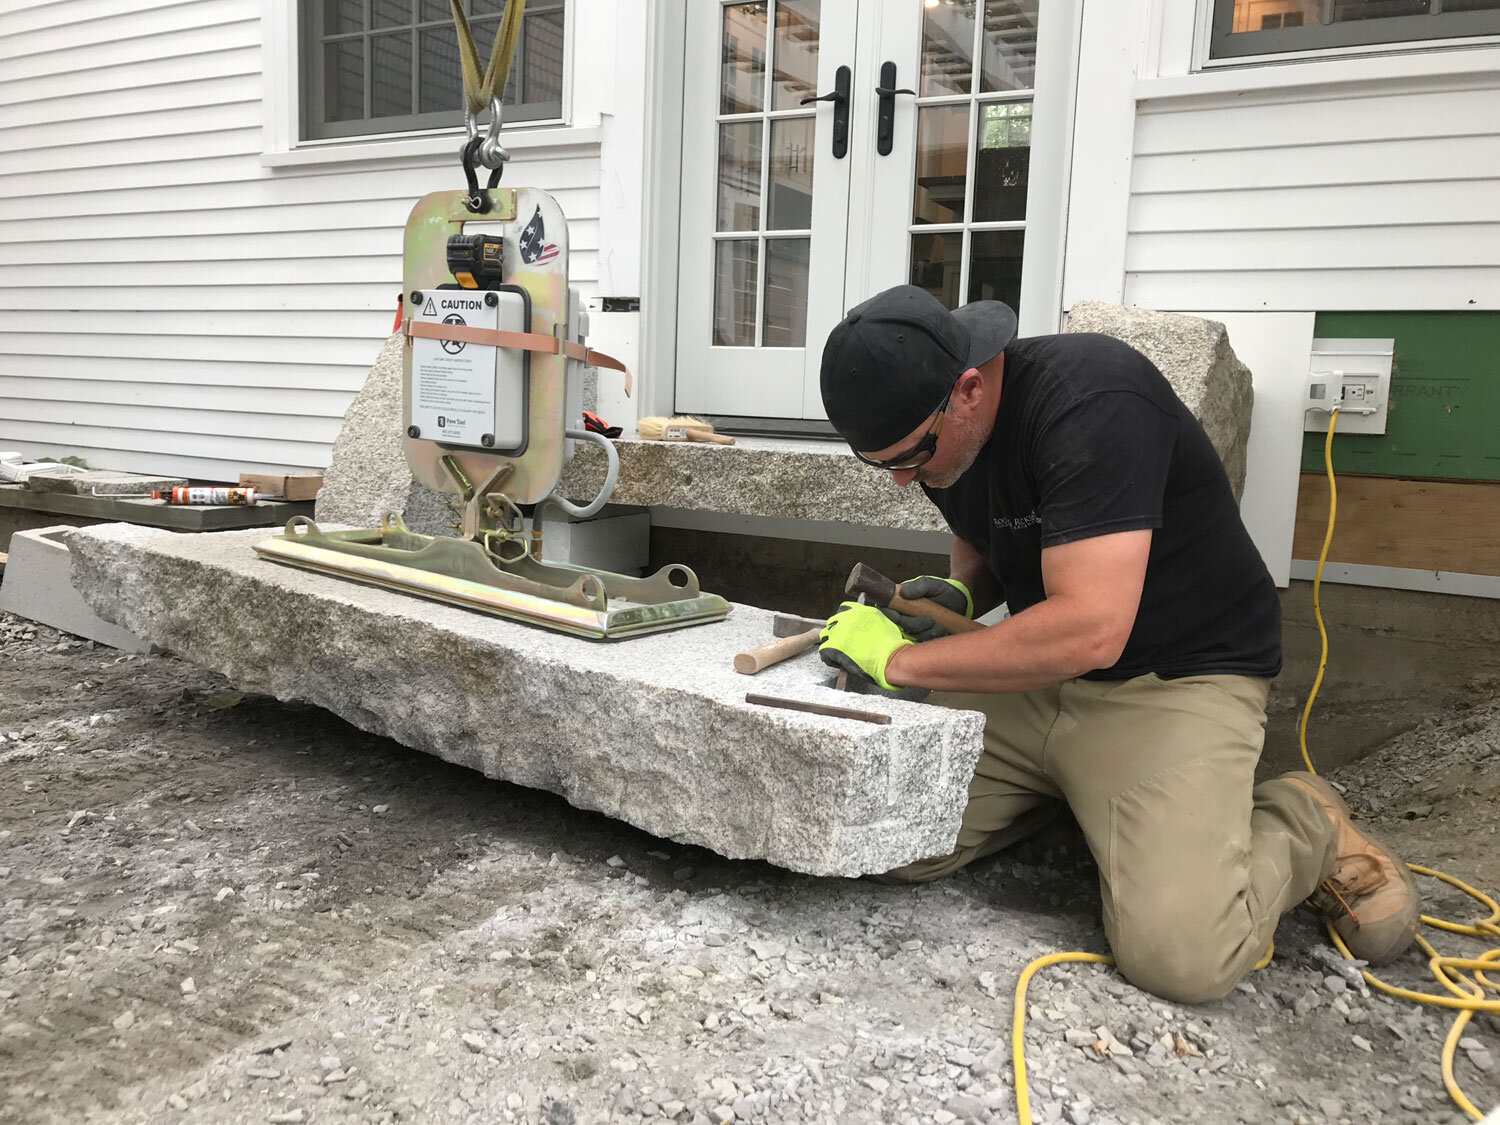
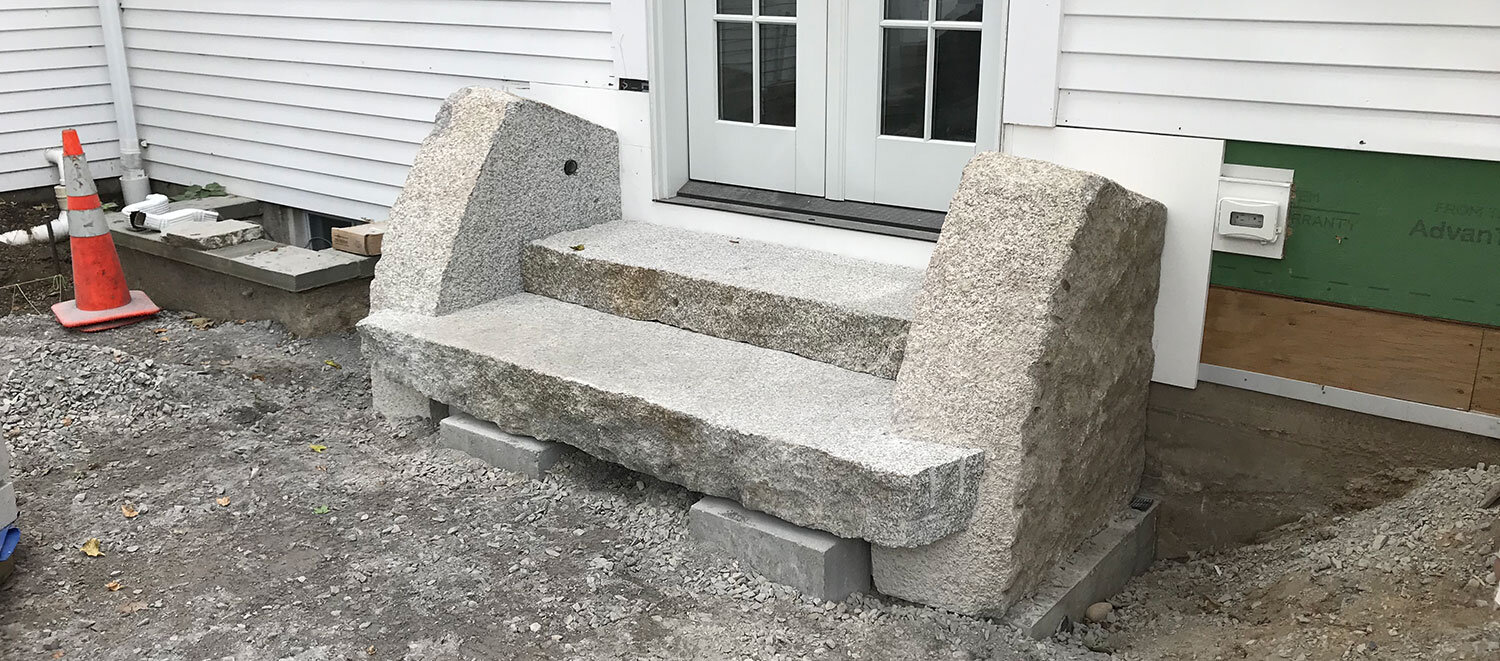
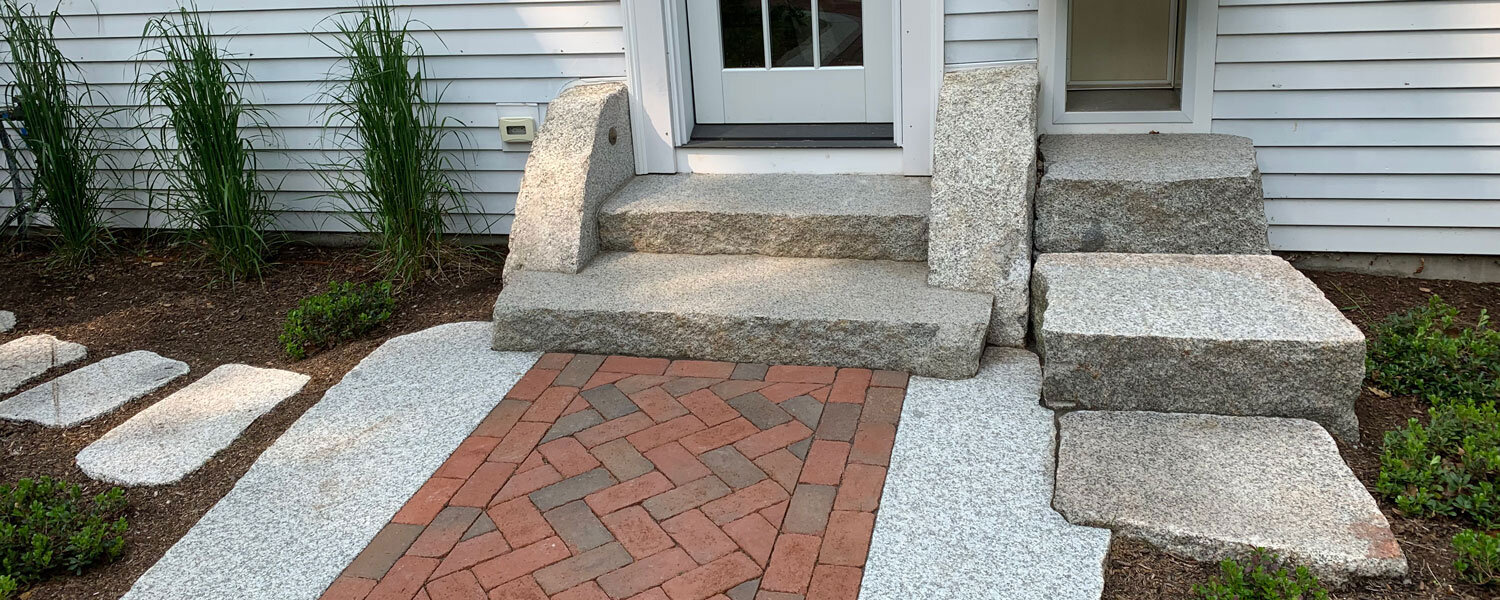
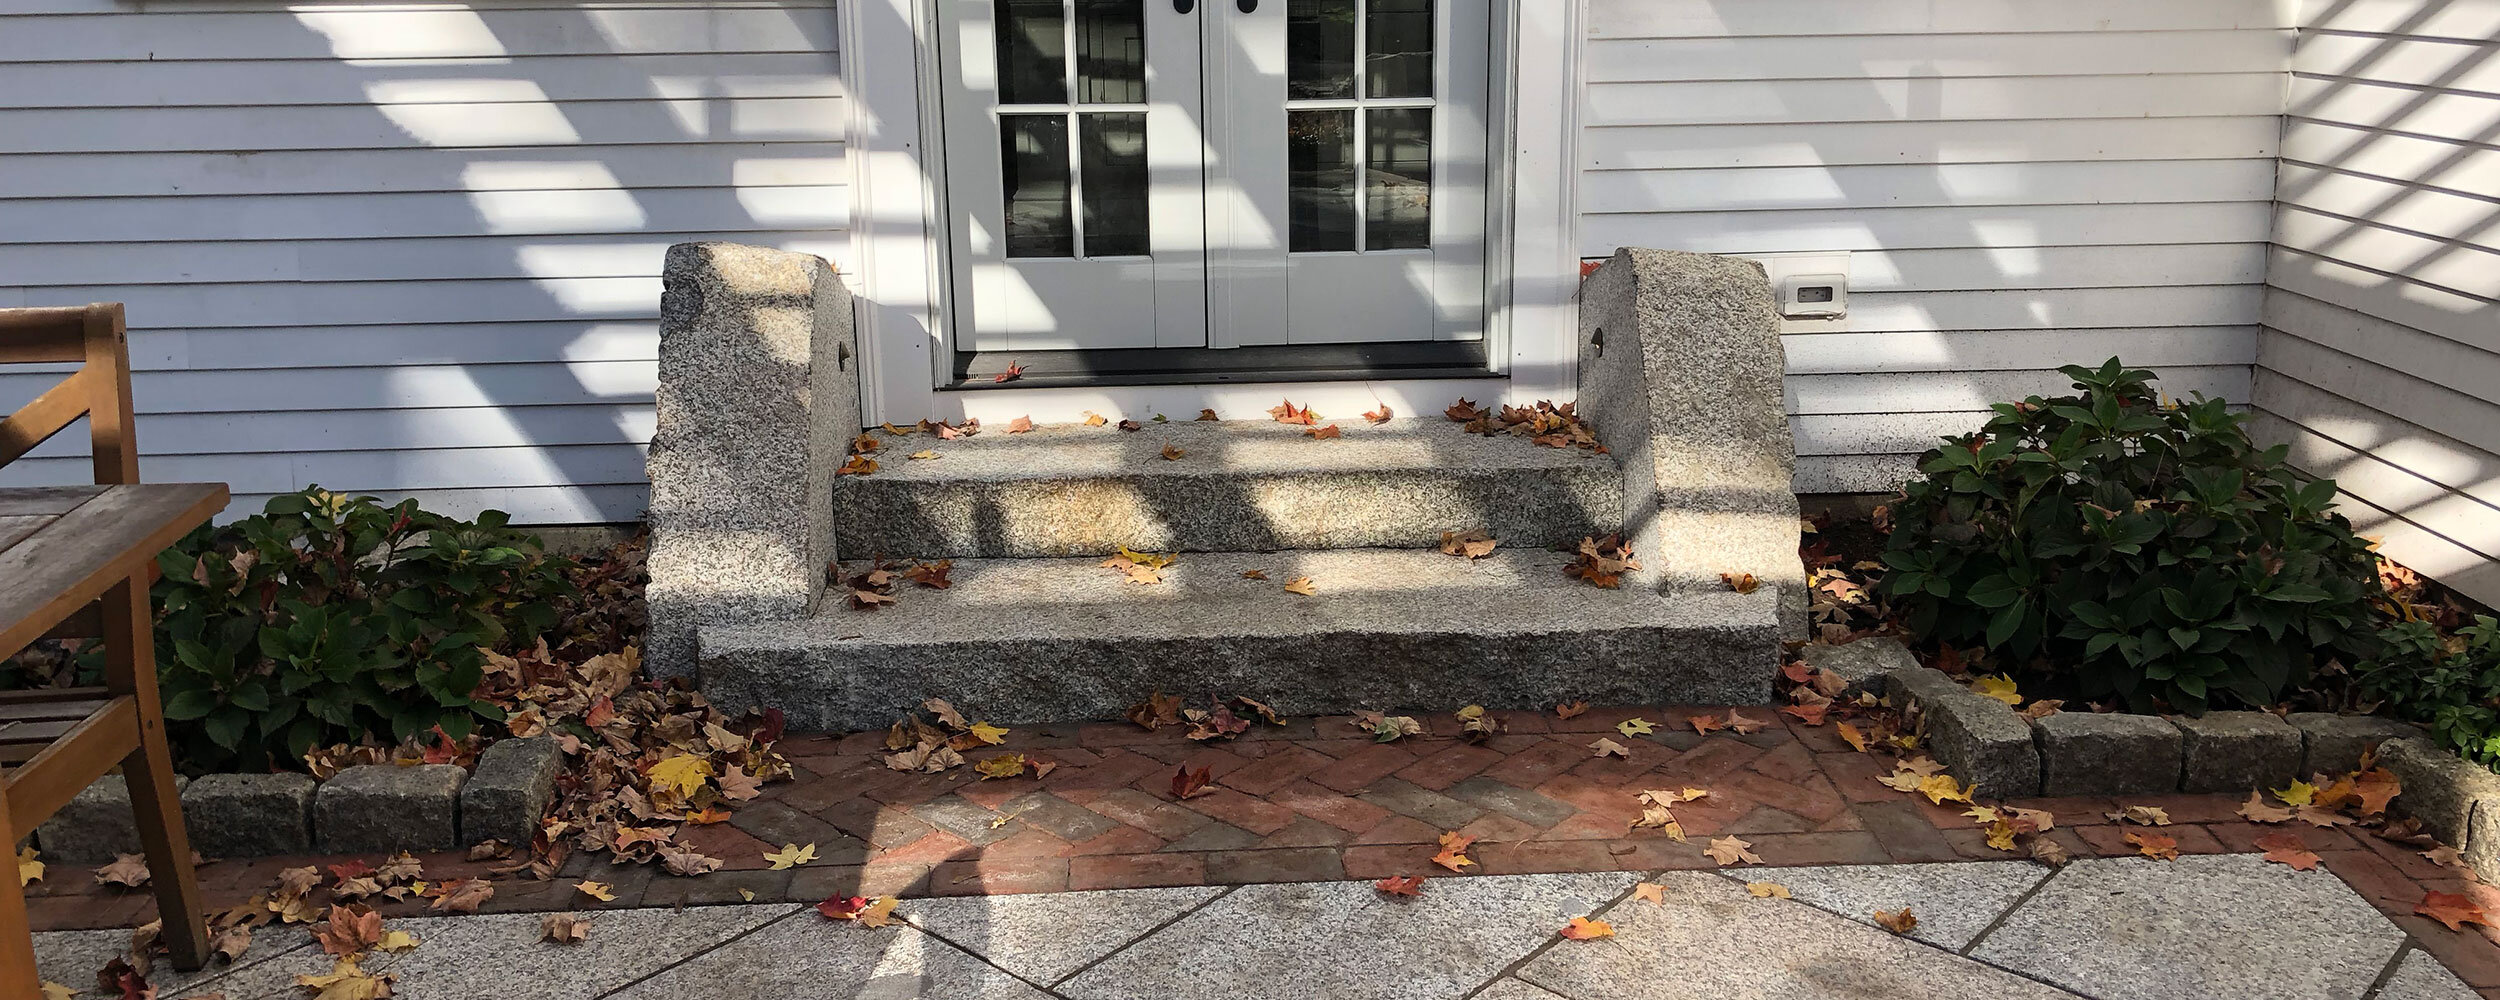
This is one of our favorite elements on this project. On our hunt for reclaimed granite, we came across two radial cheek stones. We did not originally purchase these for this project but we knew we had to have them, as they were quite unique. After many hours discussing ideas for the patio steps and how to incorporate the curved stones, we decided to create matching “sister” stair sets. We cut each stone in half, vertically, and thermal finished the inside cut to match the stair treads. We then core drilled holes for custom lighting accents. From there, we took our live edge steps and finish-chiseled them to fit the dual radii of the cheek stones perfectly, leaving no visible seams. As an added element, we created an auxiliary granite stair set to the doggy door just for our new buddy ‘Jack’- the dog.
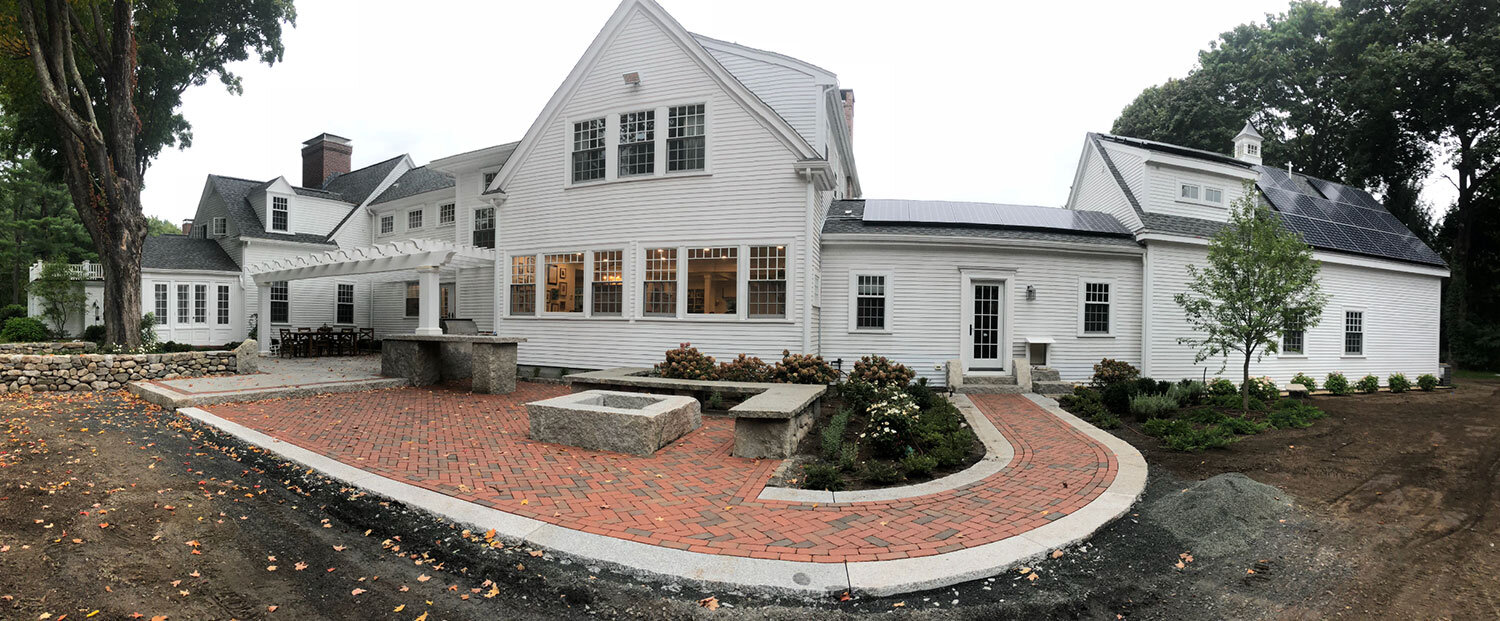
OUTDOOR KITCHEN WITH LONGFELLOW BRIDGE COUNTERTOPS

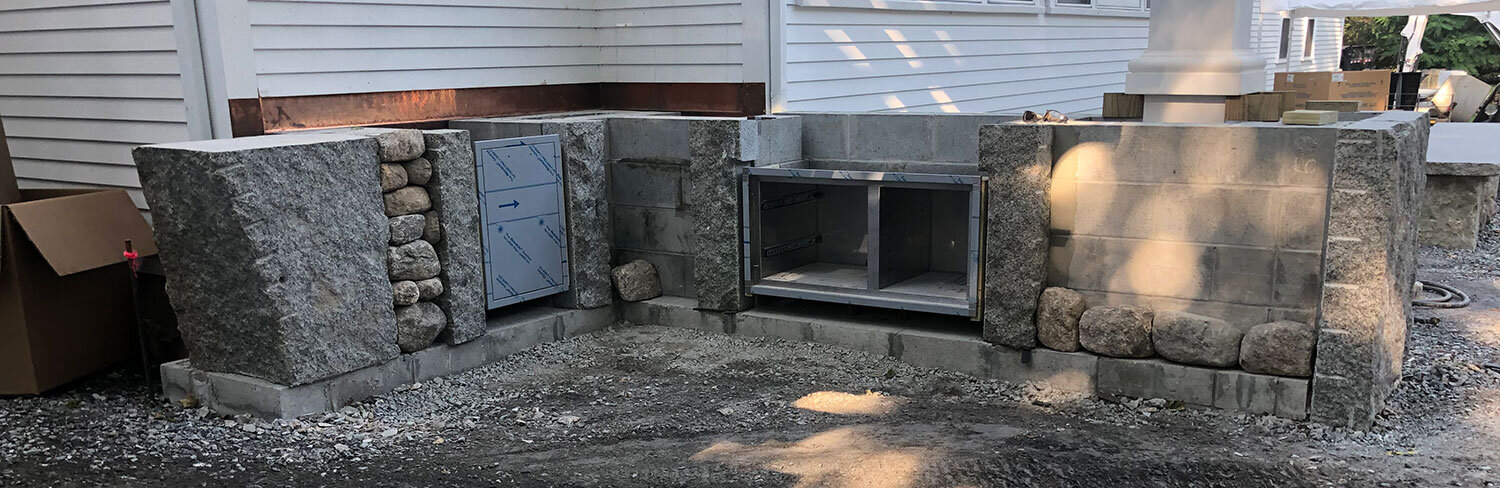
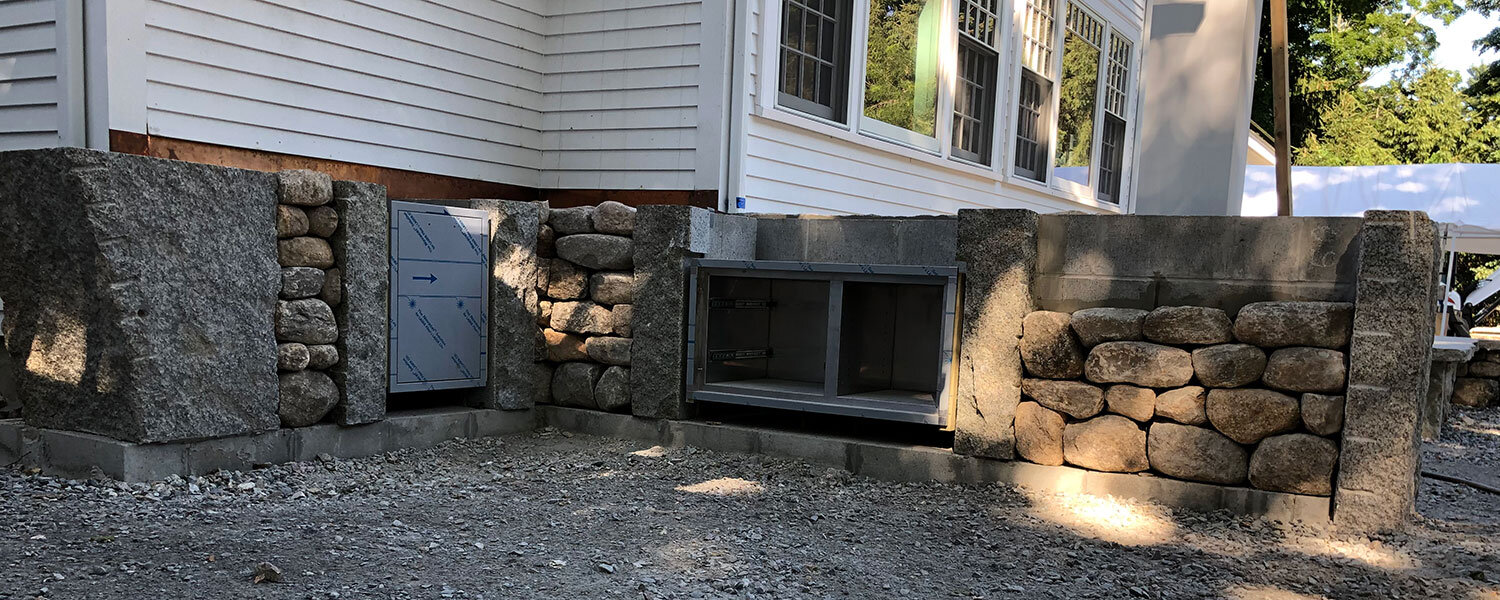

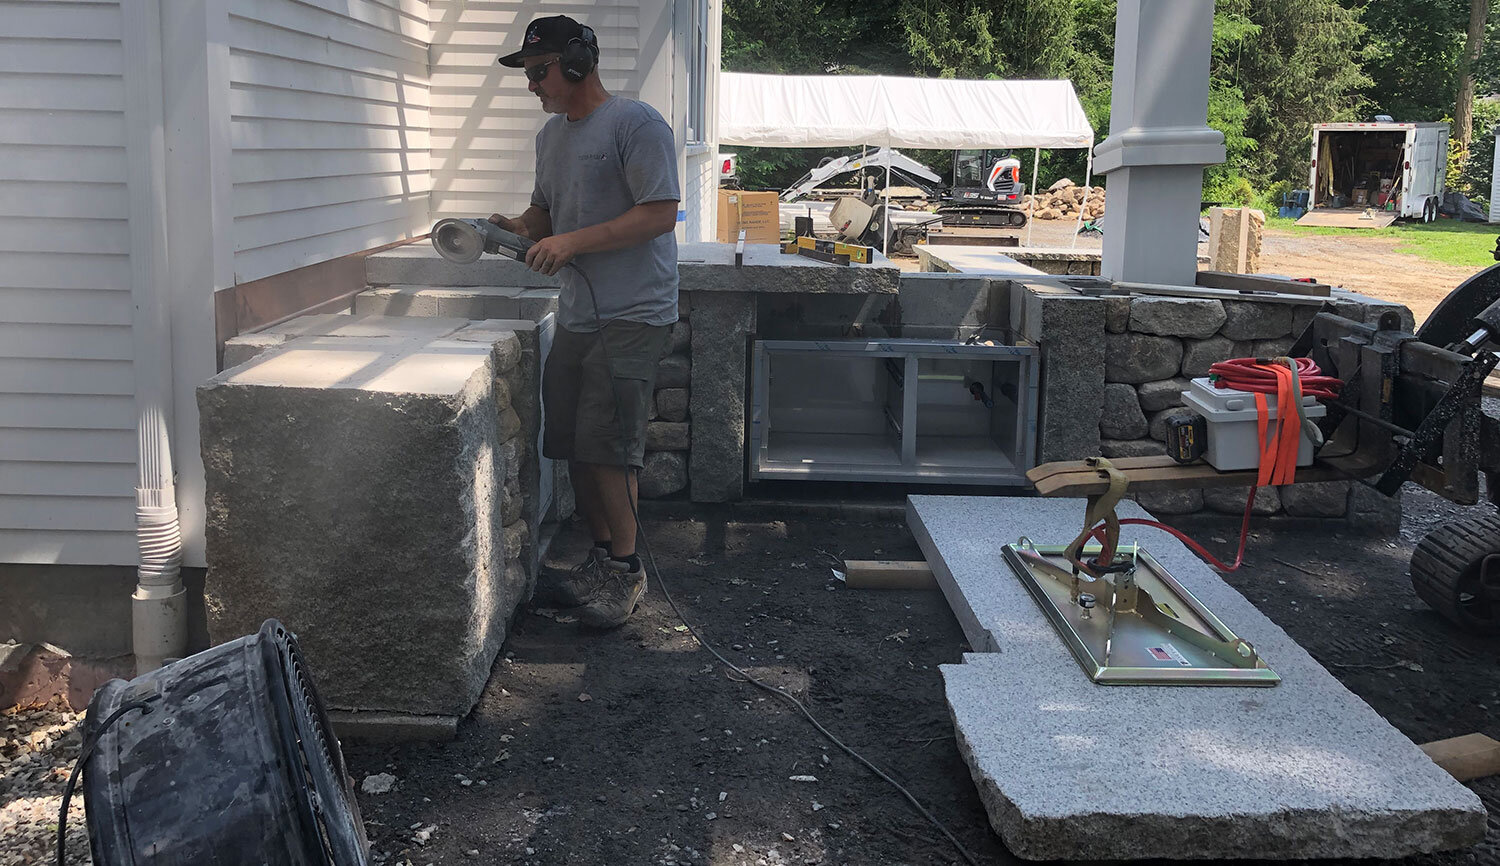
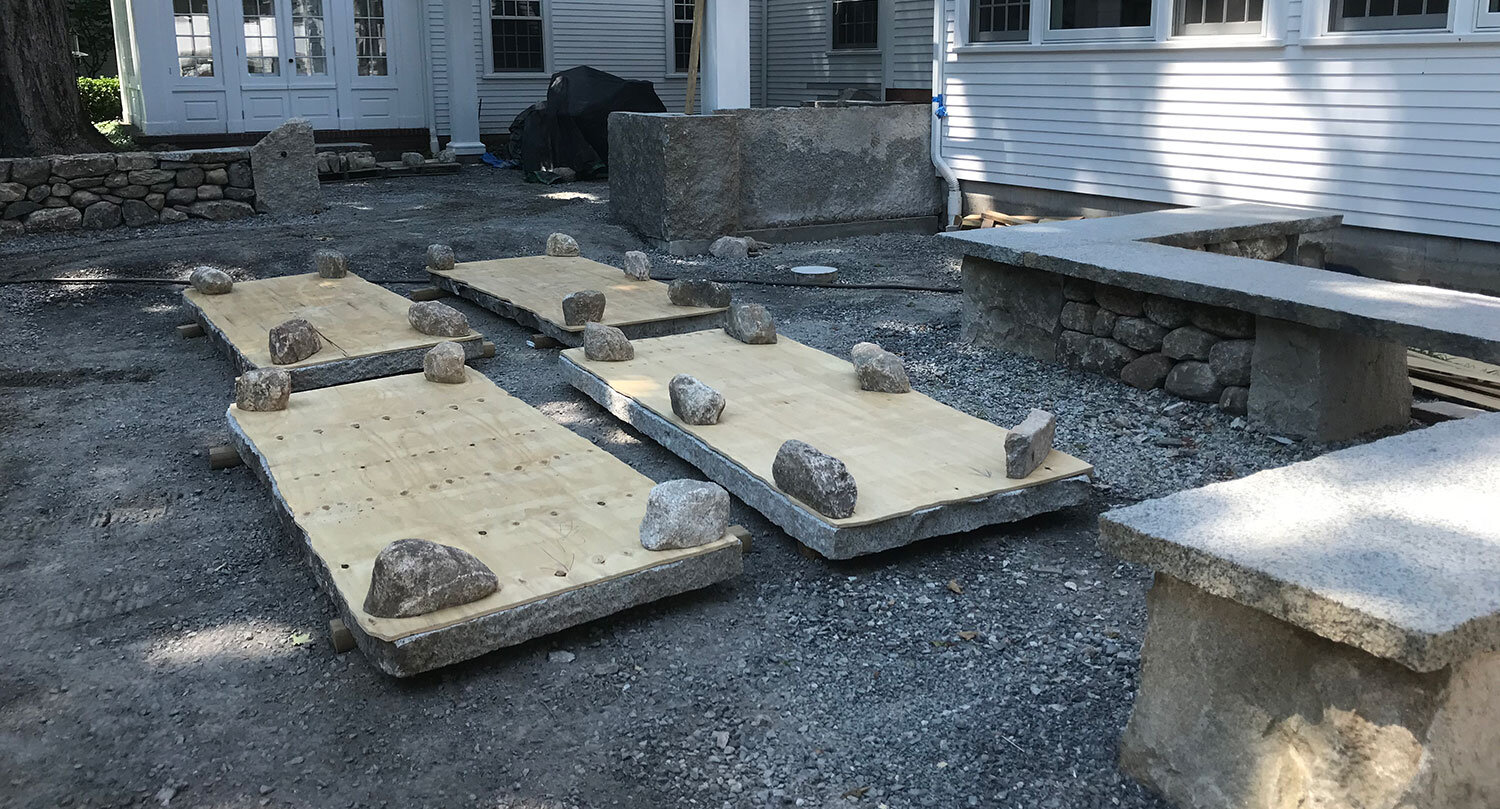
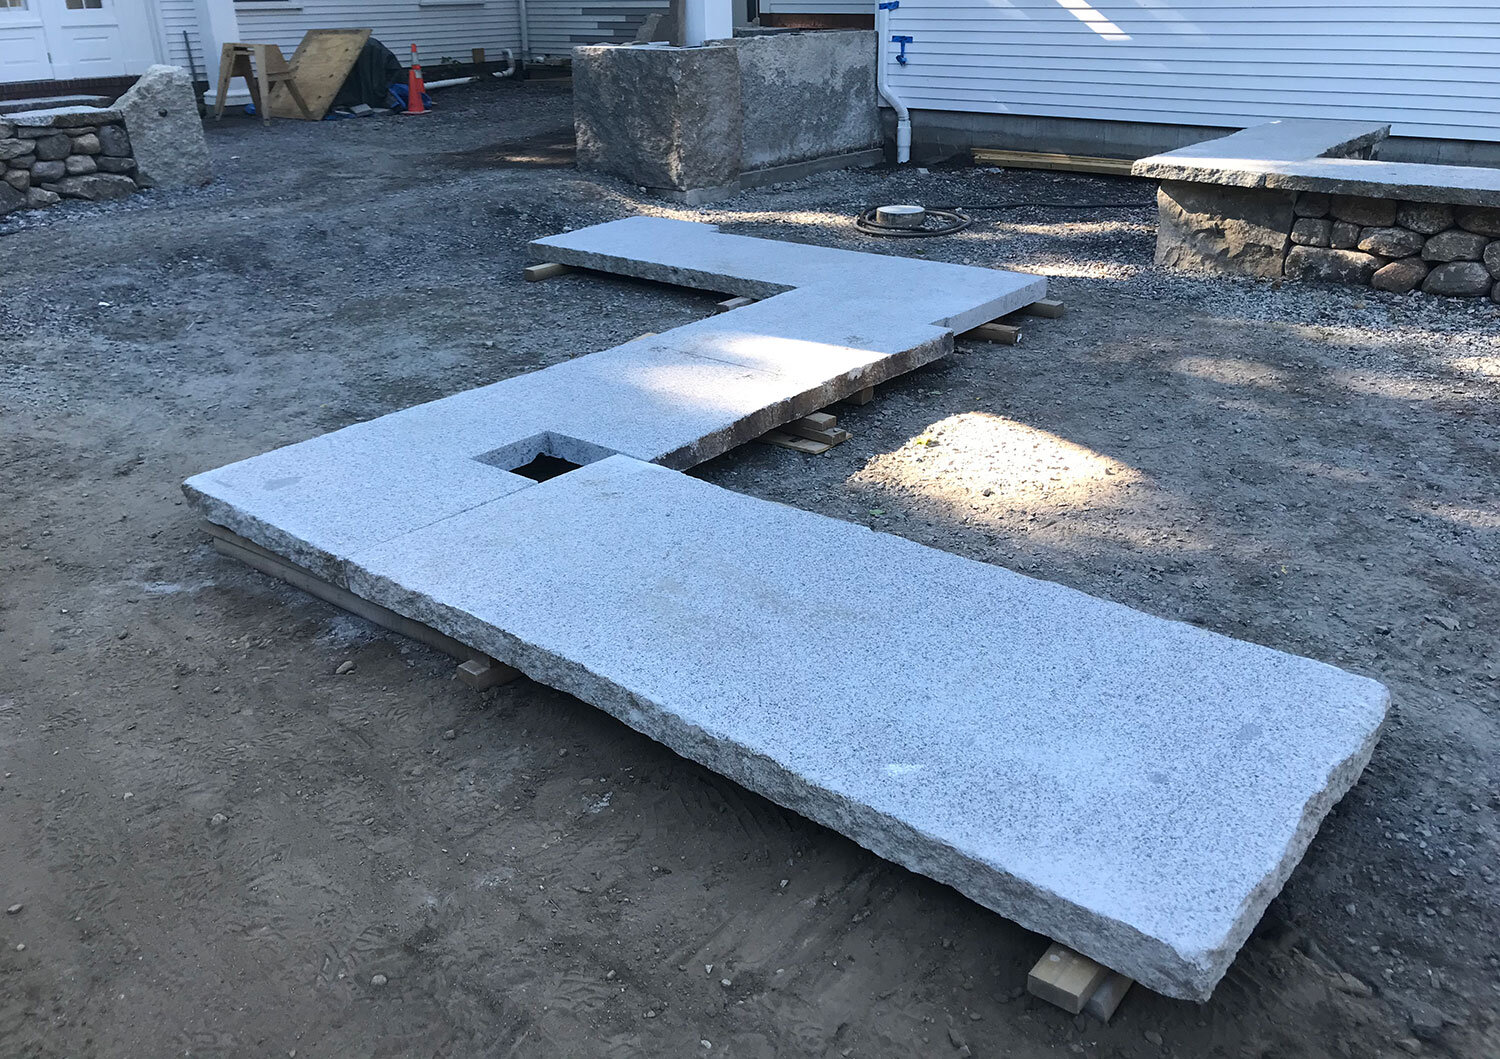
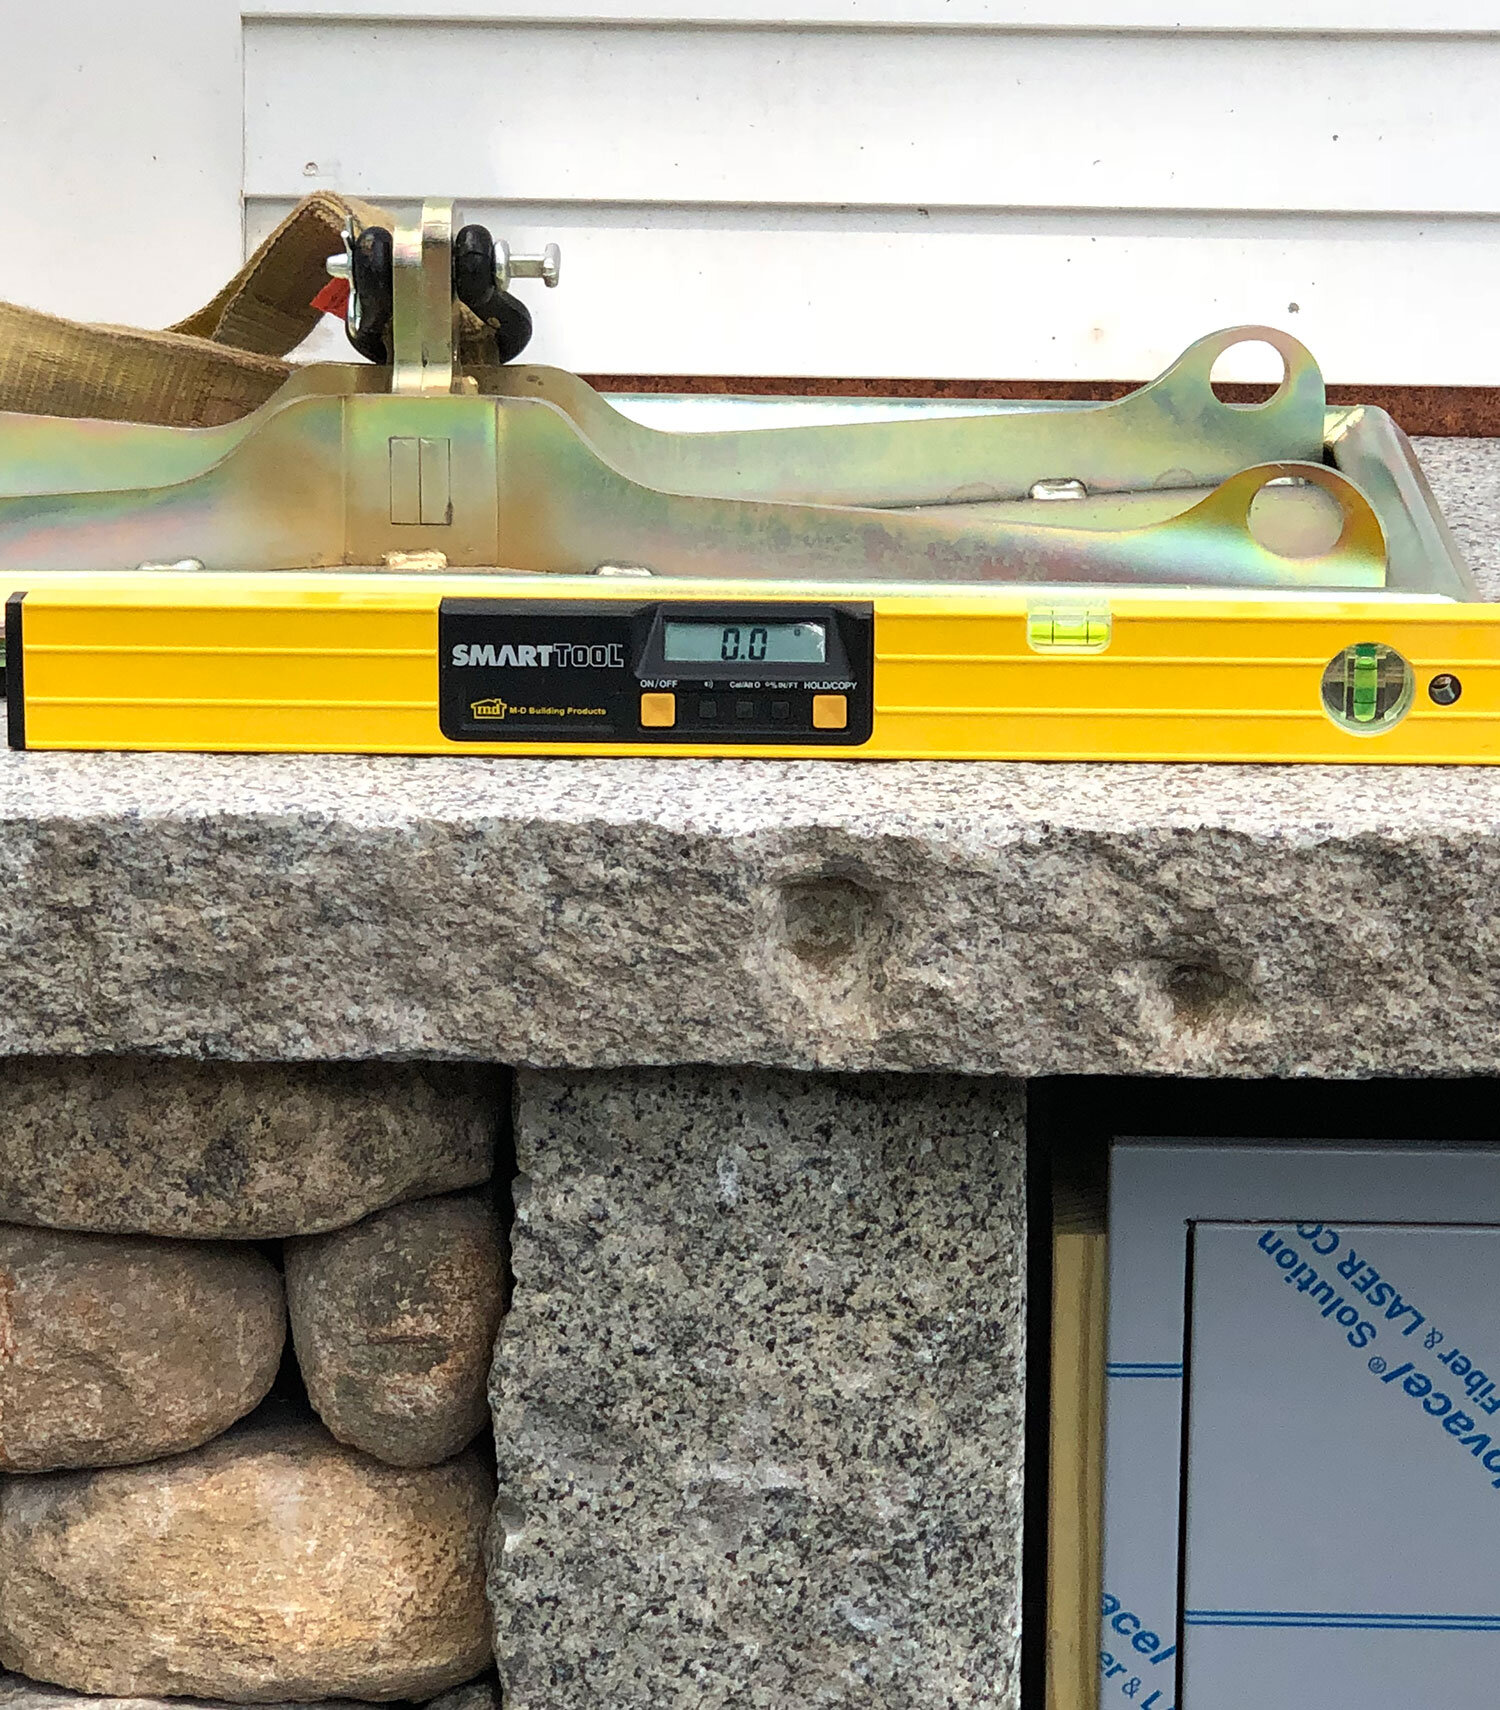
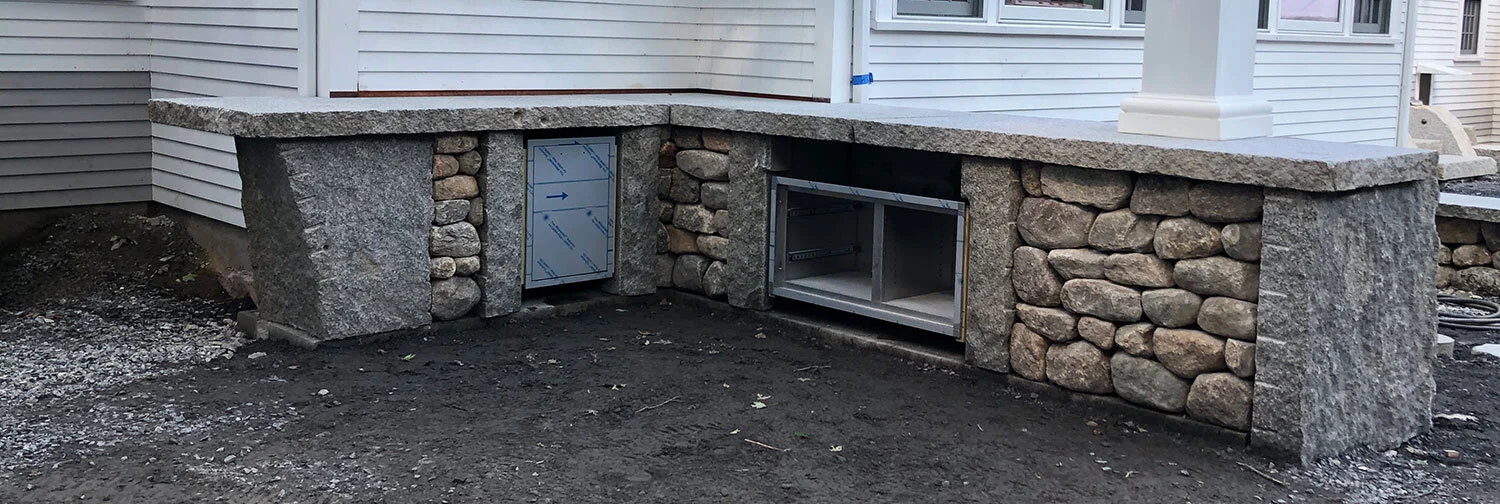
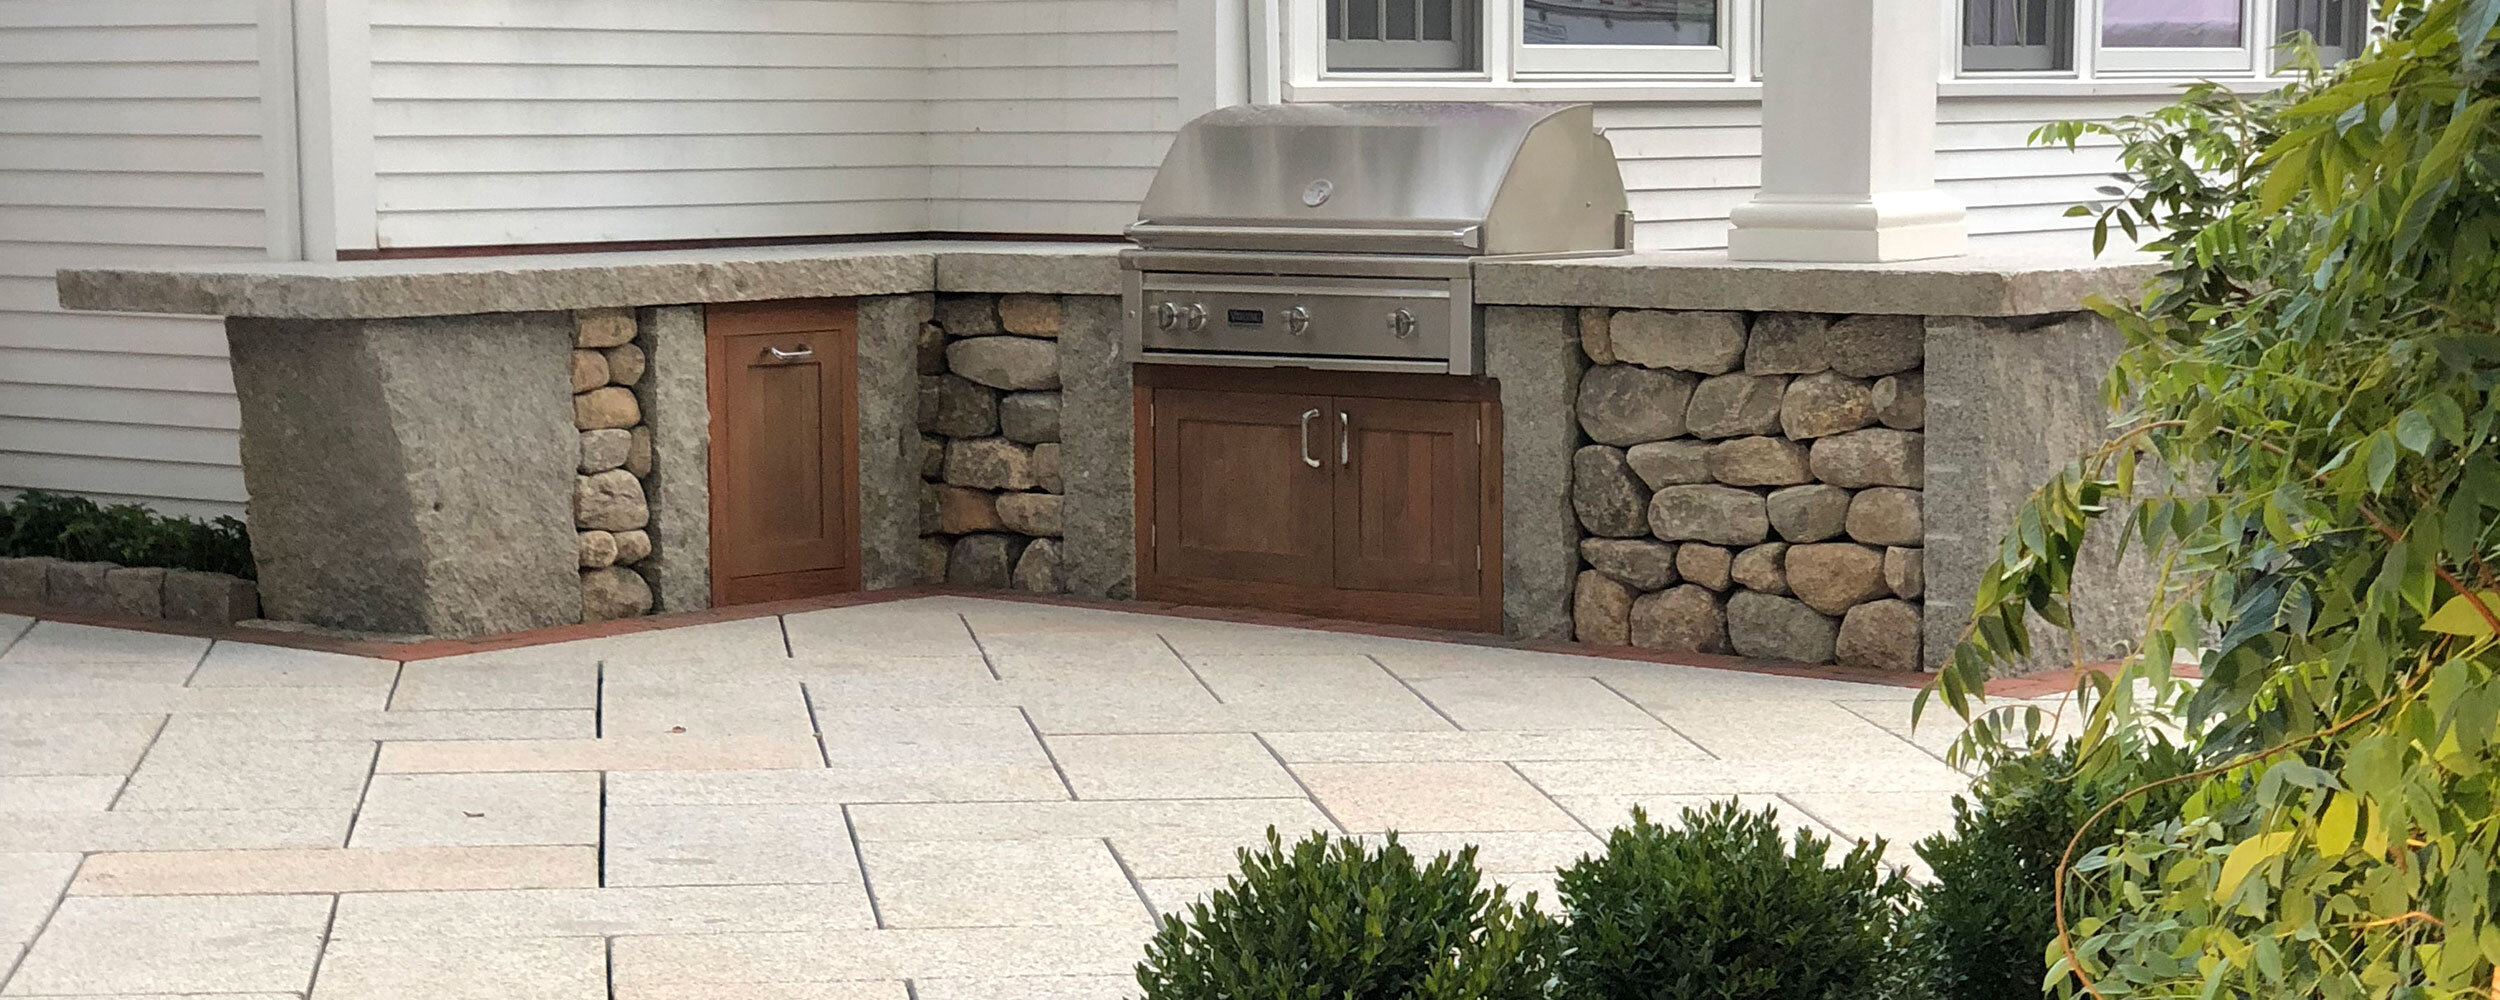
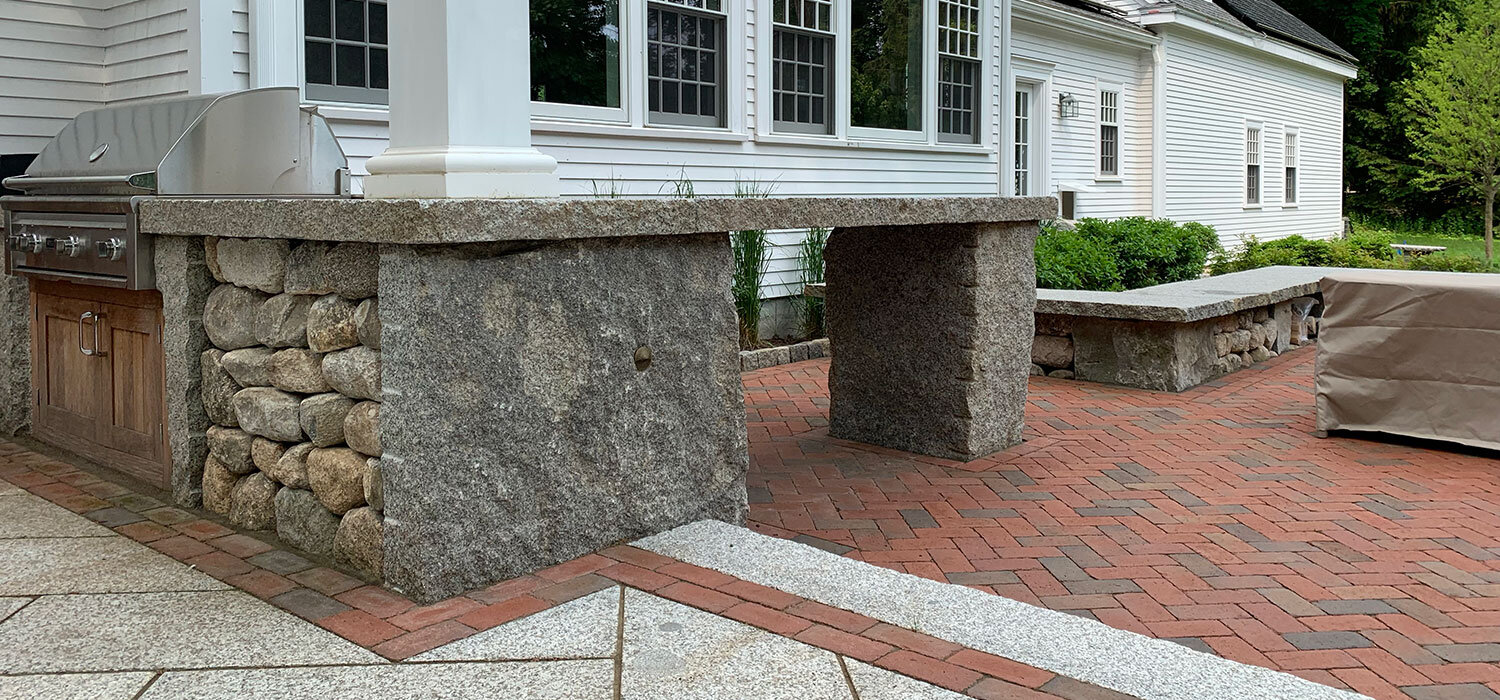
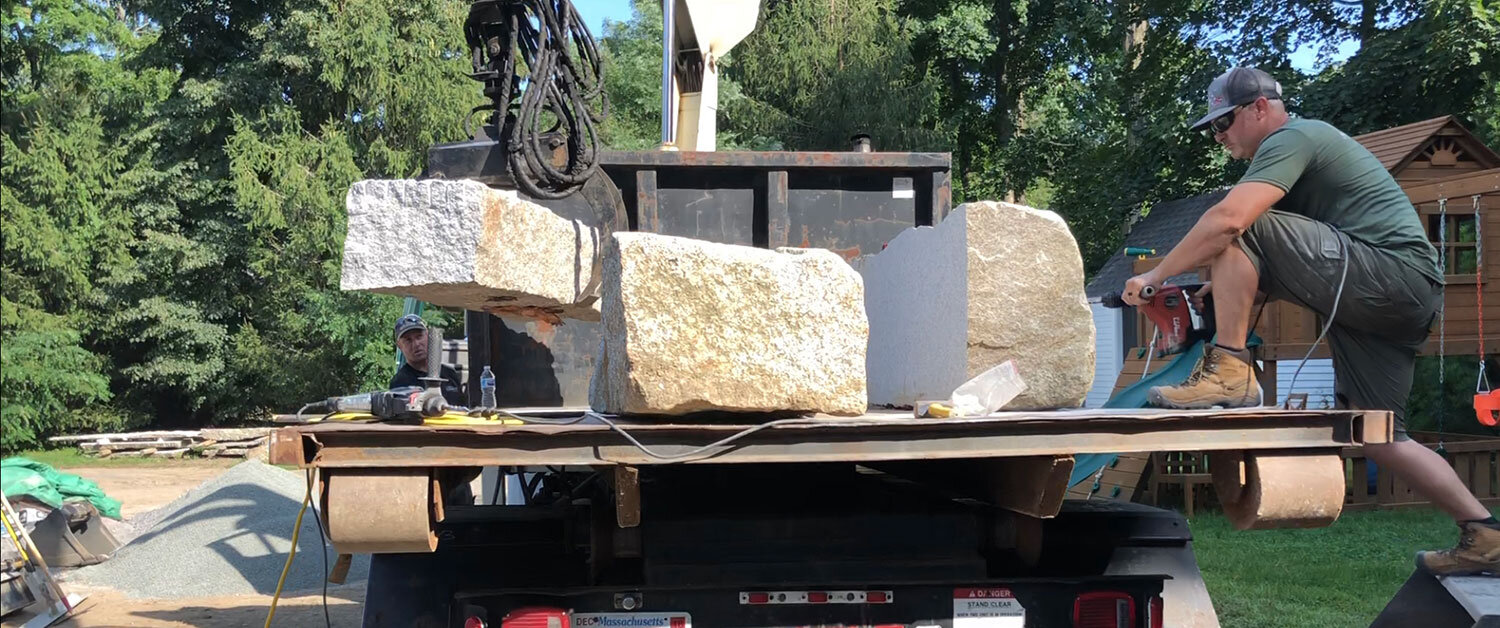
This is where our live edge idea started for the project. We found a beautiful block from the Longfellow Bridge restoration project in Boston. We planned to use this block to fabricate the countertops for our outdoor kitchen and bar. This was truly a “one chance” fitment on these countertops as we could not replicate this historic and patinated block. We created templates with a matching ‘live edge’ to mock our countertop layout. The hardest part of live edge stones is that there is no constant or square edge to work from. Add in the fact that the siding on the house was not quite perfectly square, meant we really had to put some time into our templates. We used the countertop skin (top patina layer of the massive 8’x4’x3’ block) as one giant veneer stone for the back of our kitchen. The massive 900lb kitchen corner veneer was used to set our grade transition from the upper cooking area to the lower bar area. Our design intention was to have the stonework on the kitchen appear to be dry-stacked. To achieve this look, we cut our own full bed veneers to a depth of 7” from the farm stones we gathered for the other dry stonework. This allowed us to build structurally with mortar while maintaining a deep reveal on our stones to keep the look consistent with the curved wall. Another challenge along the way came from our cabinets. We wanted to use Ipe wood for our doors versus the typical stainless steel build commonly used to create a “softer” feel in the space. To do so, we needed to recess our custom-built cabinets to accommodate clearances for the wood panels and hand chisel the stone surrounds to match the wooden seams perfectly. We have been told by many peers that this is one of the most intricate custom outdoor kitchen builds they have ever seen.
CUSTOM CUT 17”X34” ROCKPORT GRANITE PAVERS
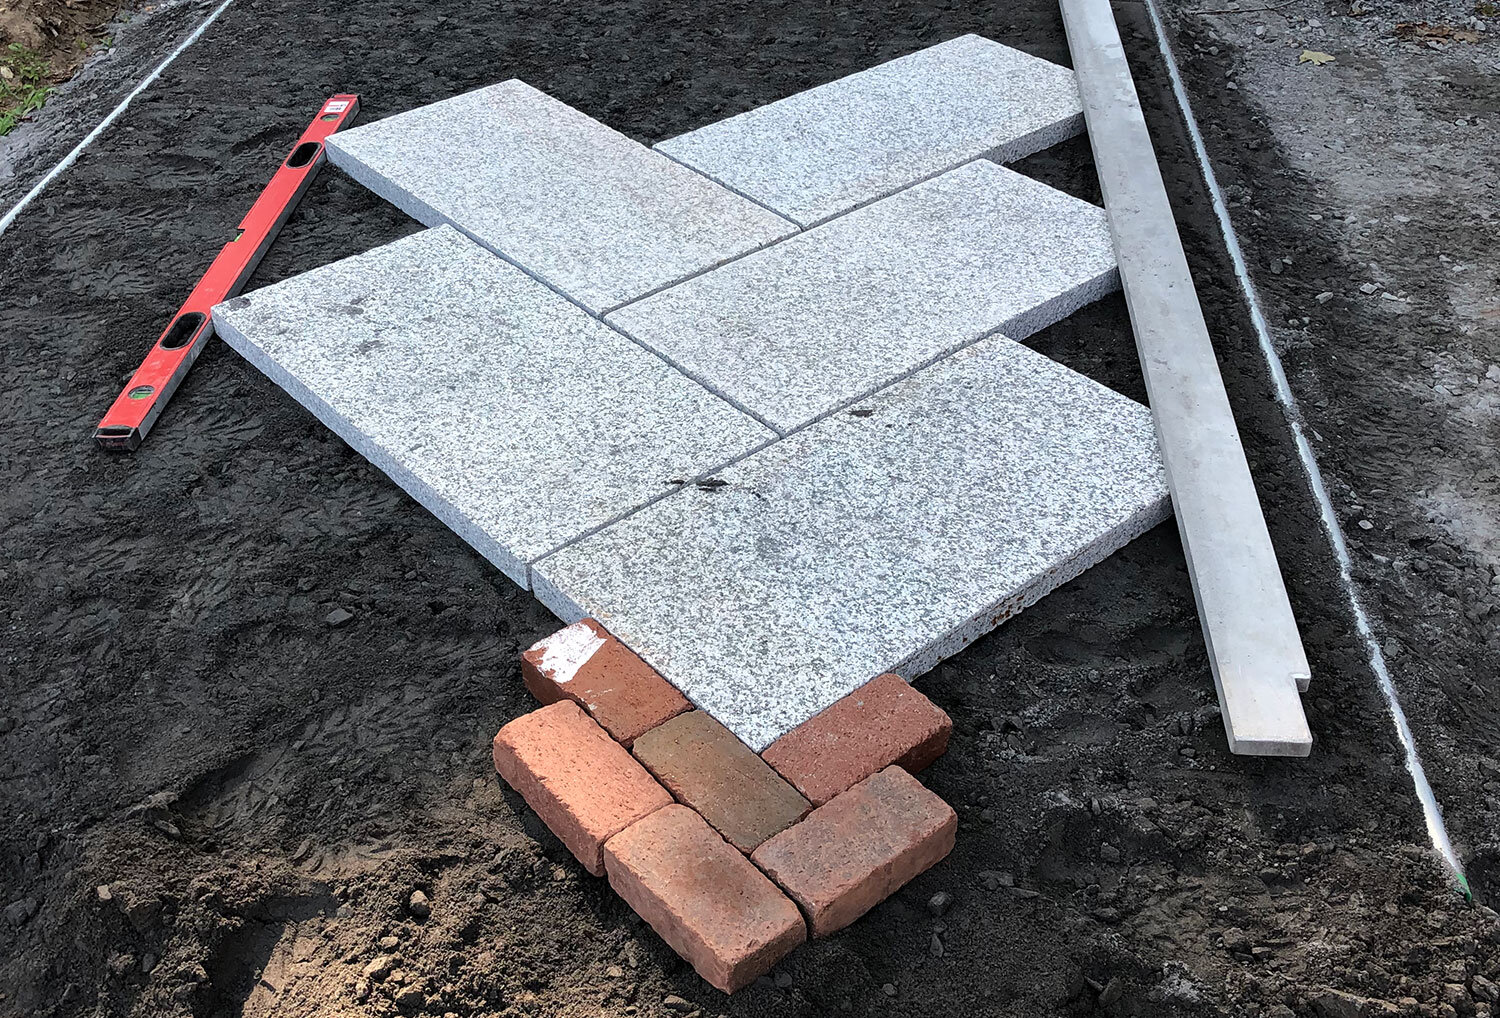
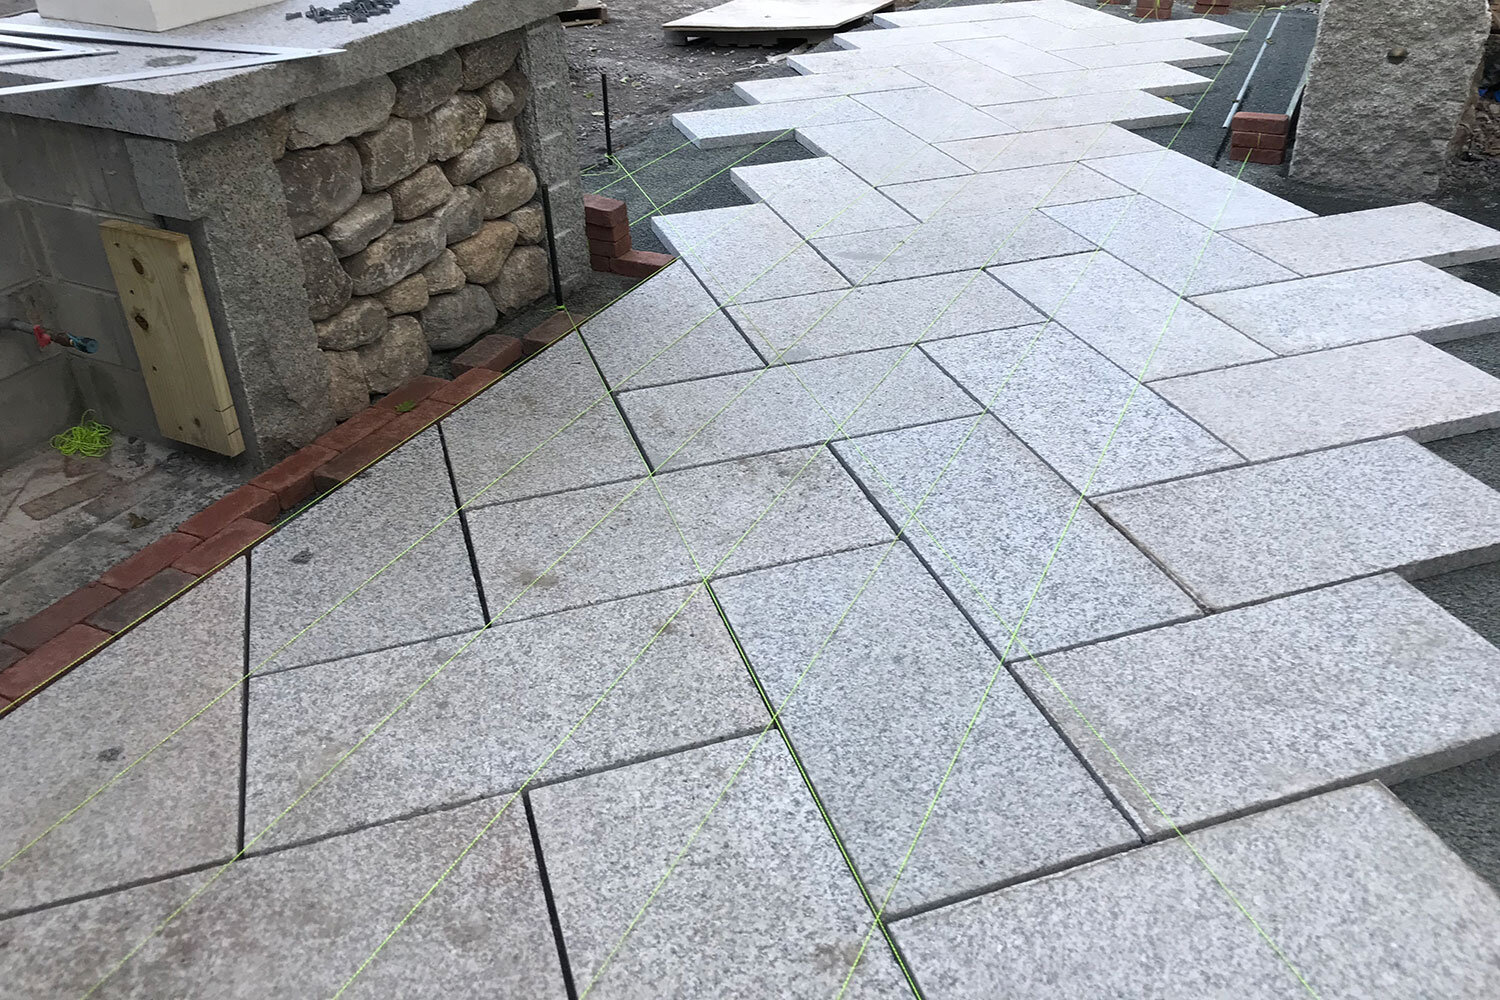
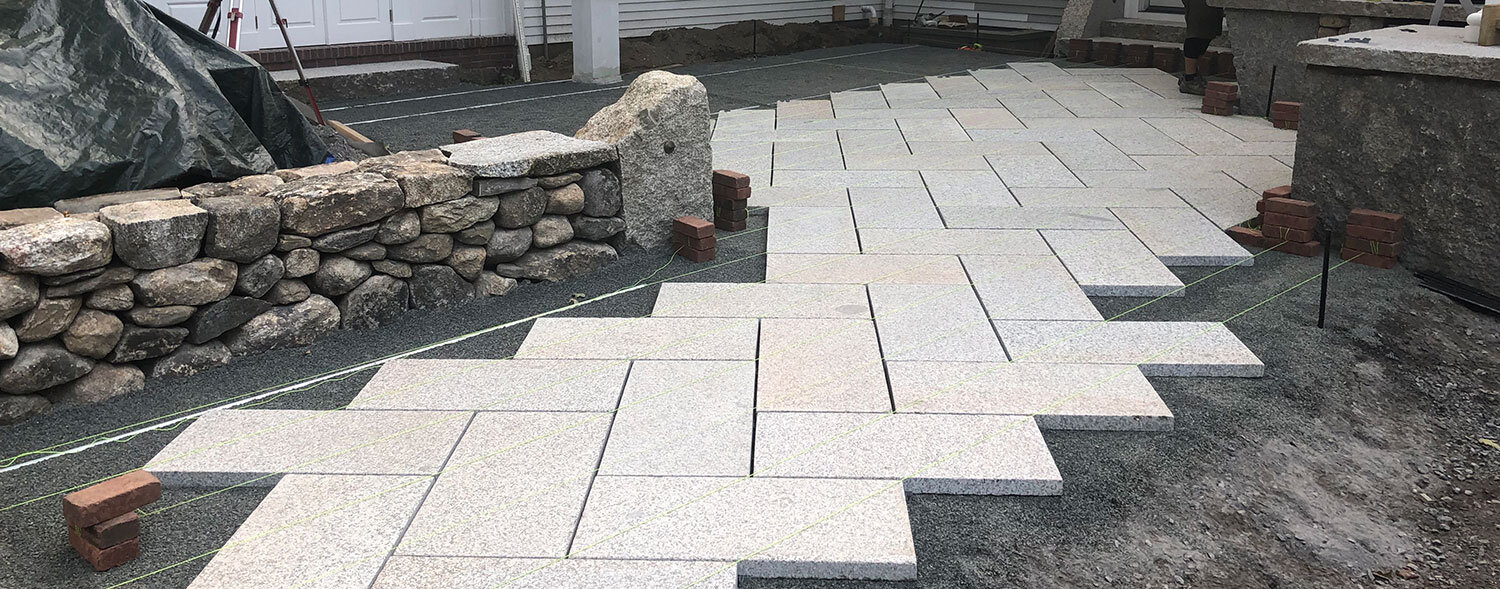

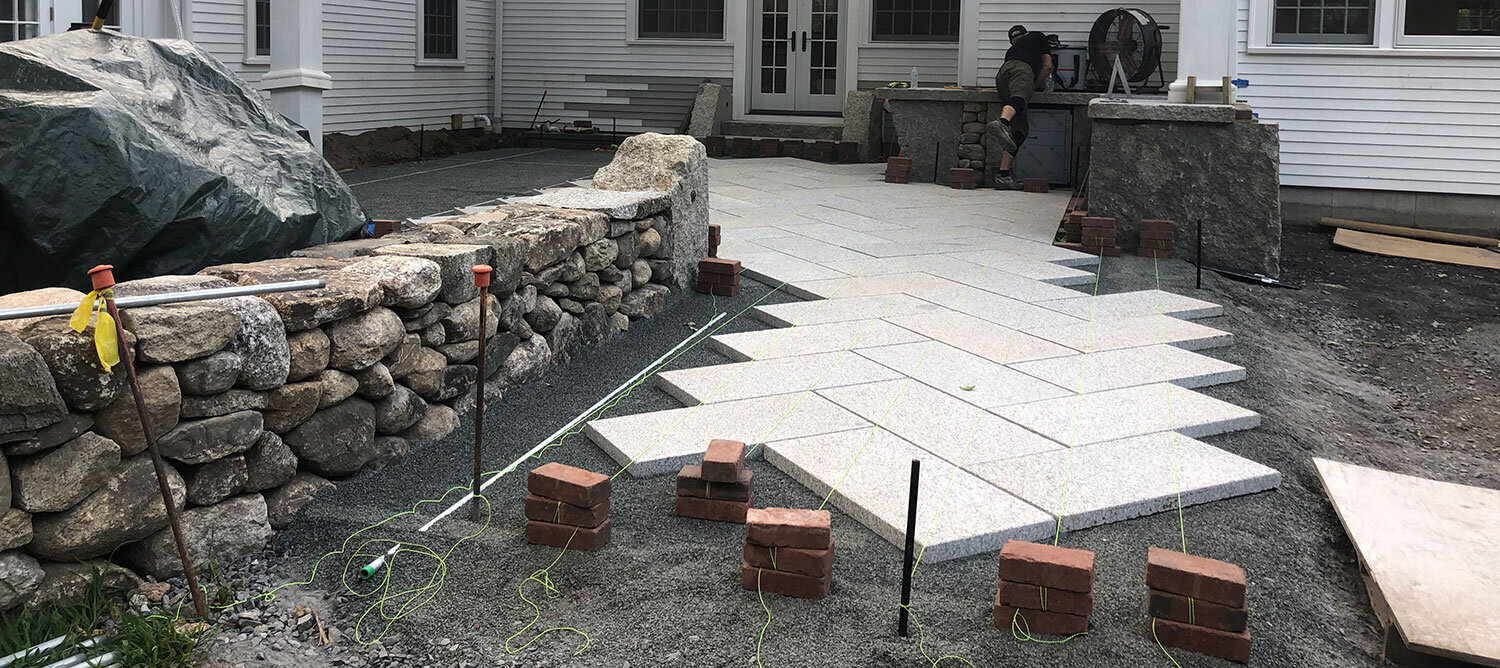
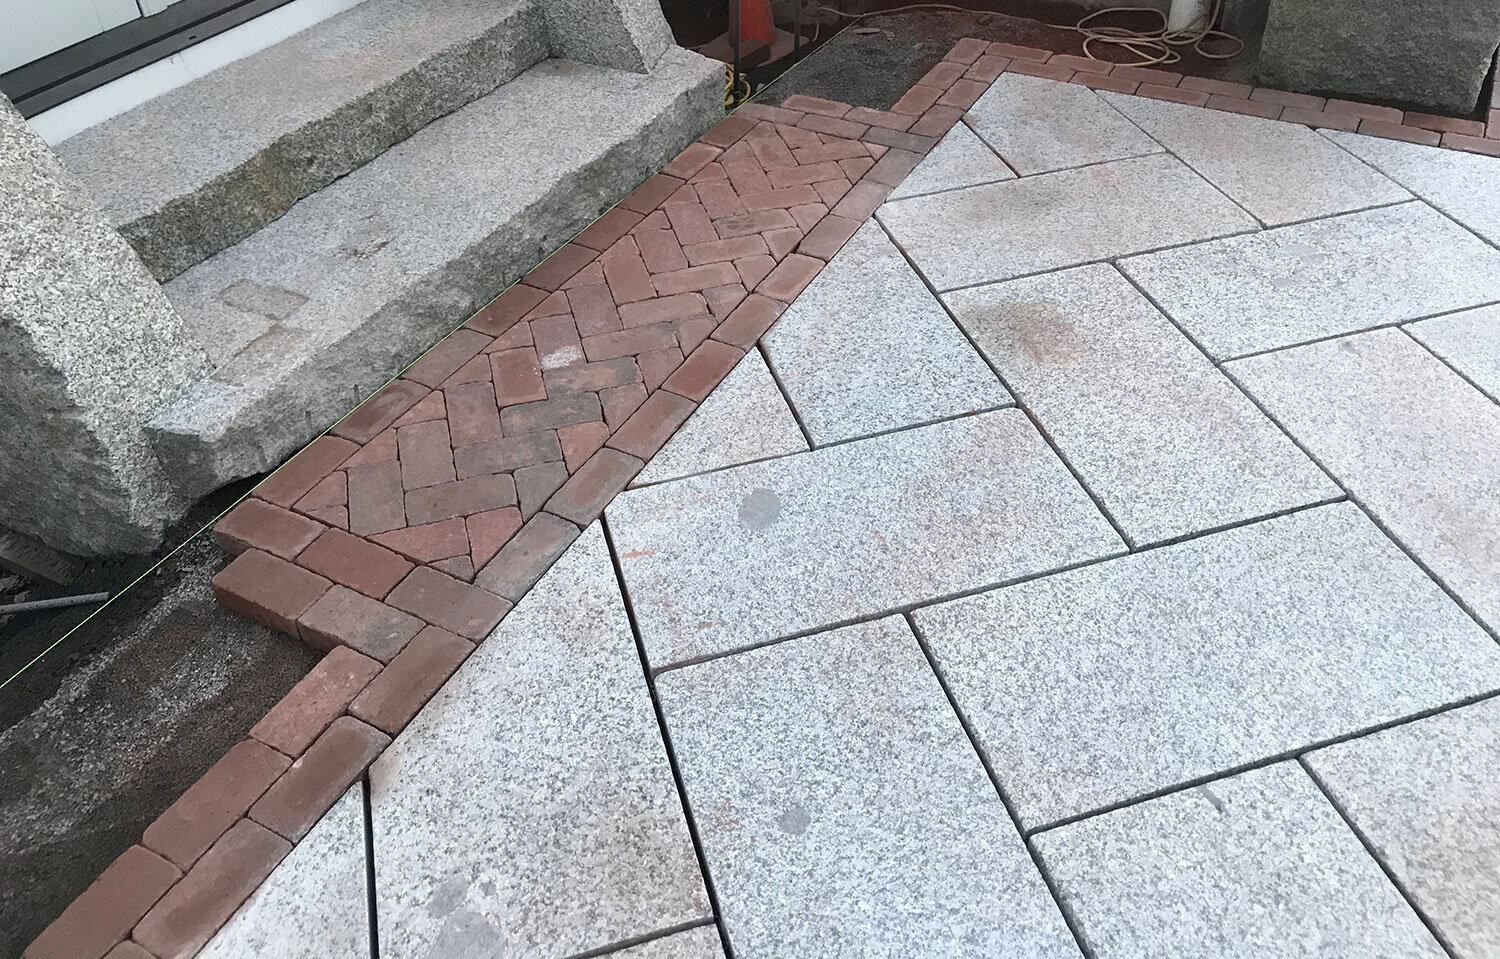
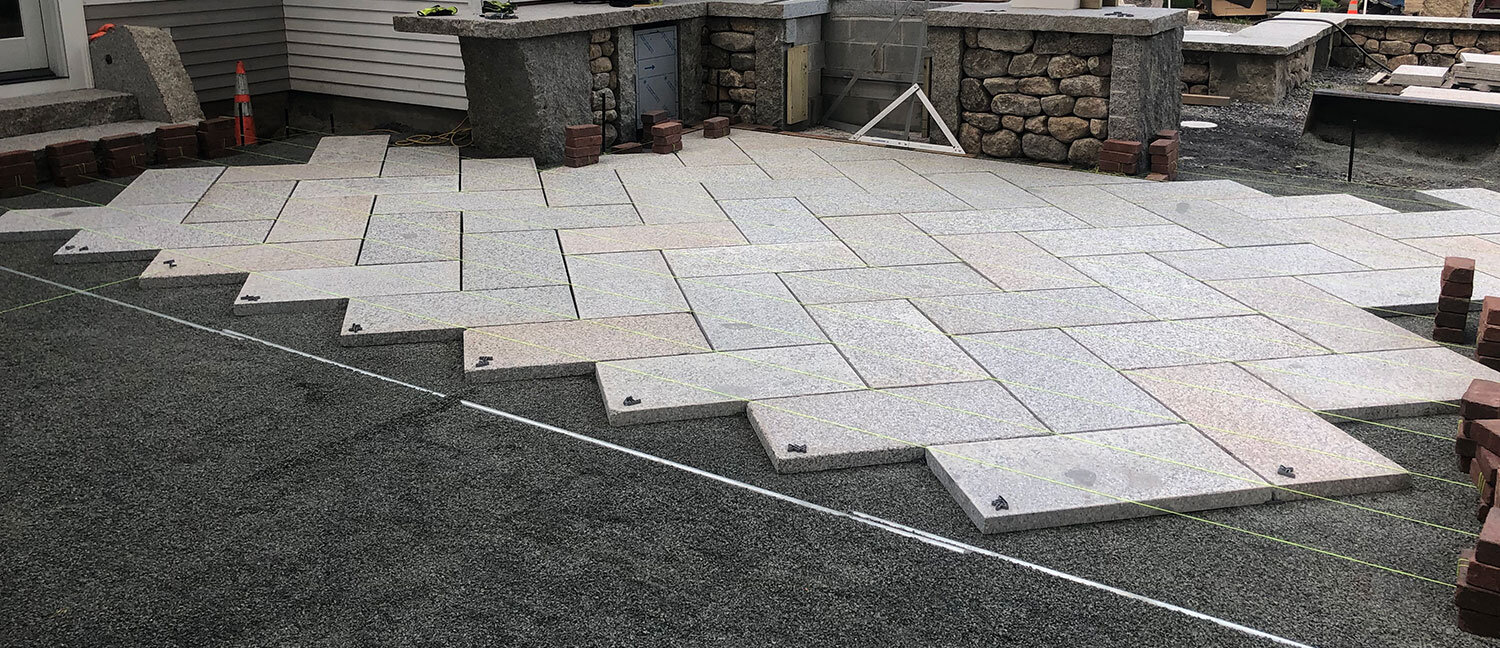

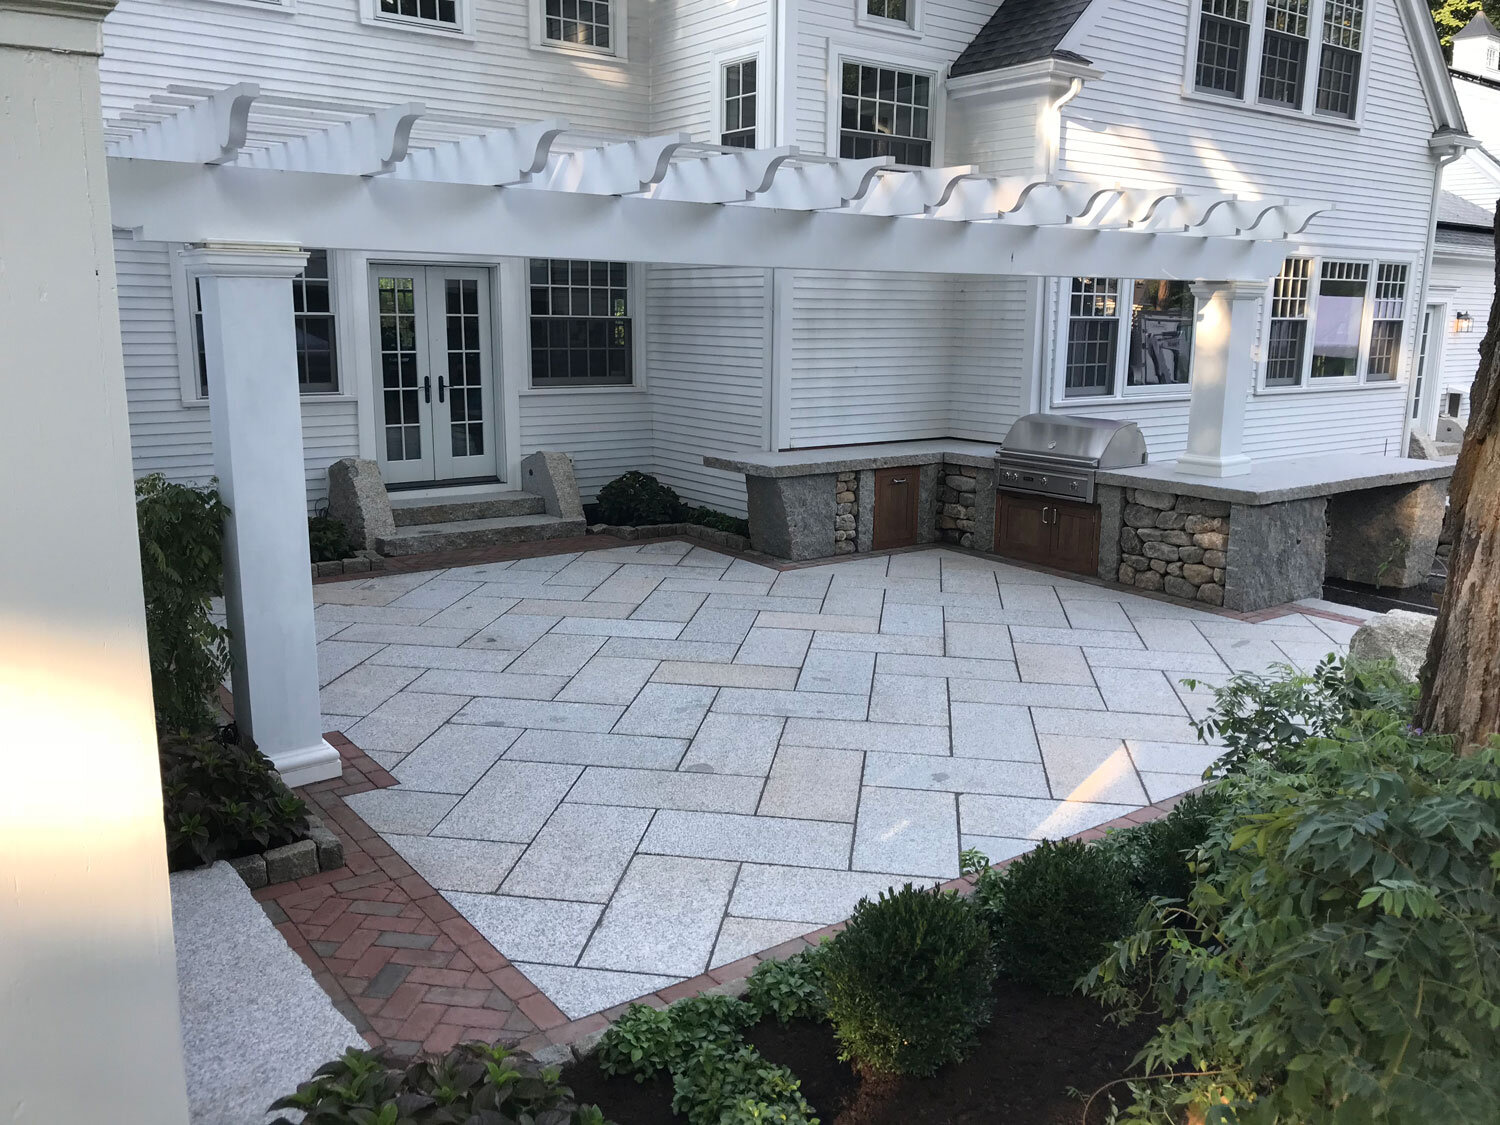
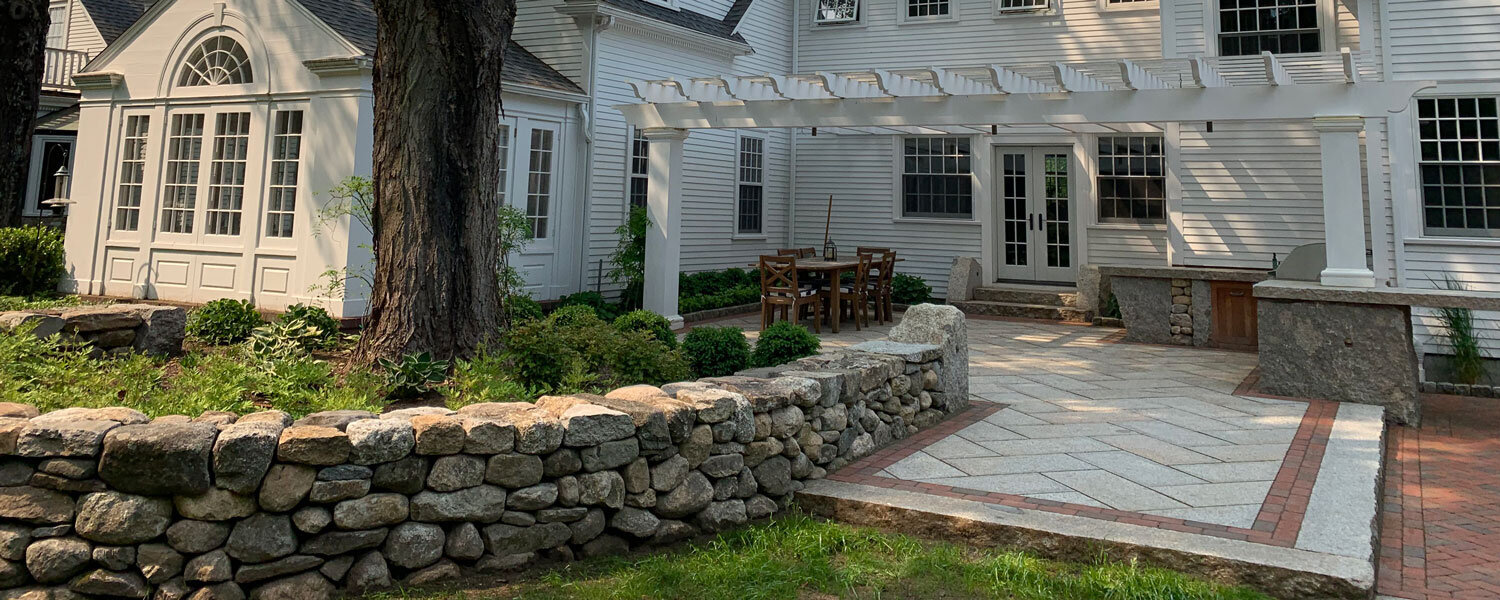
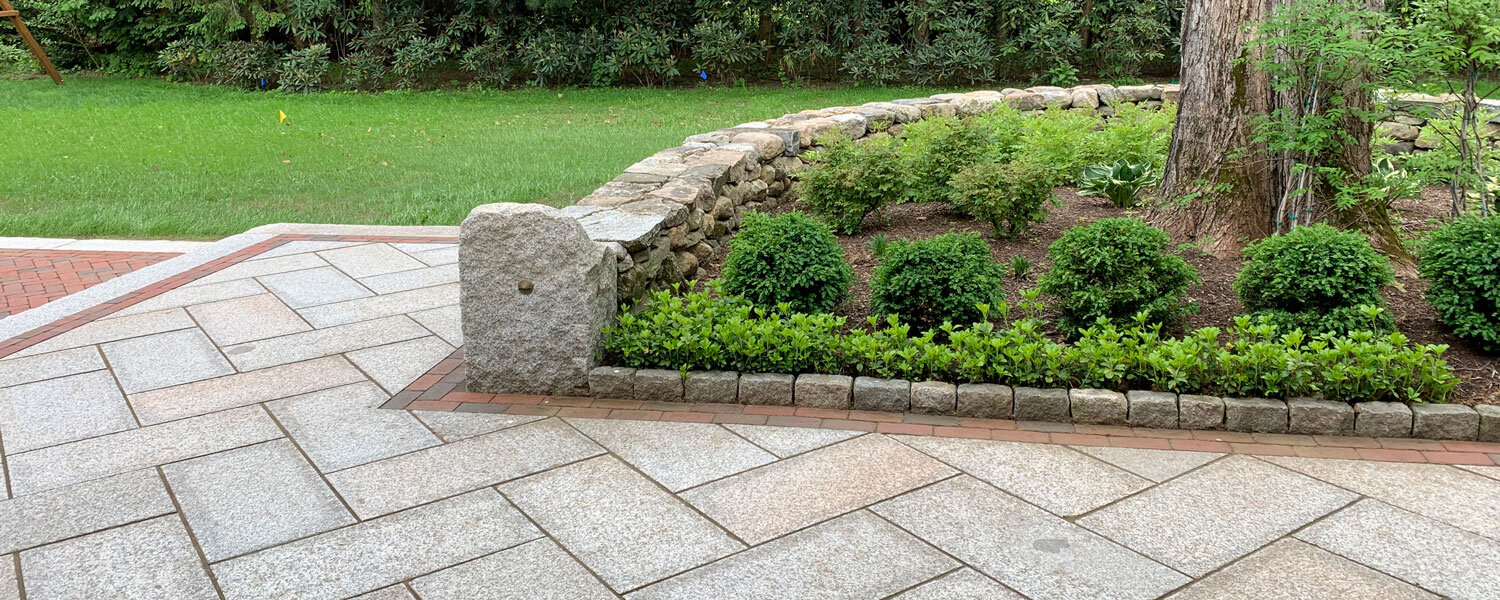
Our patio consists of custom cut 17”x34'‘x2” Rockport granite pavers. We cut our own pavers from chunks of Rockport granite we sourced from all over New England to match the unique grain of the Longfellow Bridge stone. No easy feat, considering the last known quarry of this grain type had closed up shop nearly a full century ago! We left no waste on this project, even fabricating 12 pavers from the inside of our corner veneer used on the outdoor kitchen. Our customer loved the look of herringbone. To challenge our skill set, we decided to do a 45º herringbone pattern keeping consistent 3/8” jointing. We spent many hours on layout so that we would end up with the same size triangle pavers in each of the corners, one of the small details that makes a big impact when standing in the space!
LOWER PATIO: CLAY BRICK & ROCKPORT BANDING
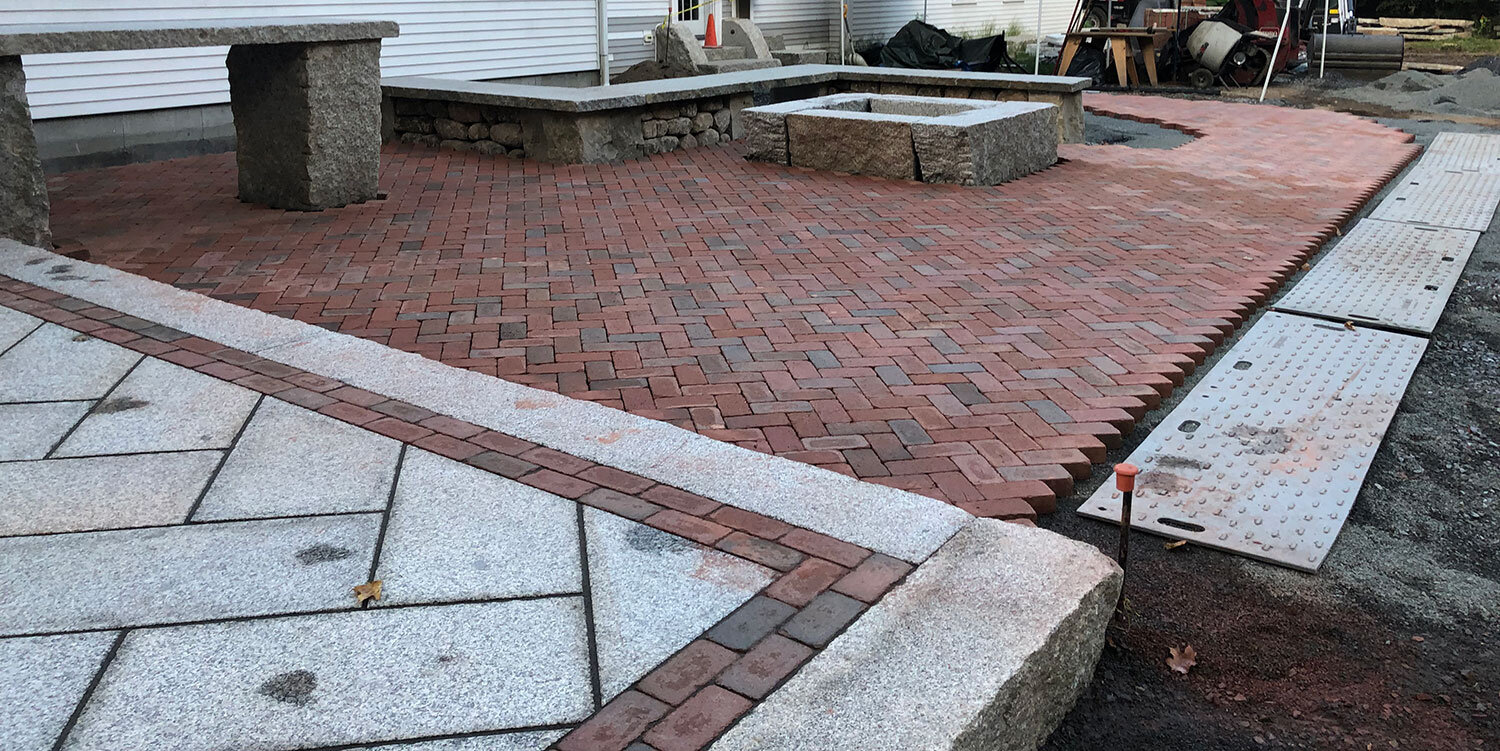
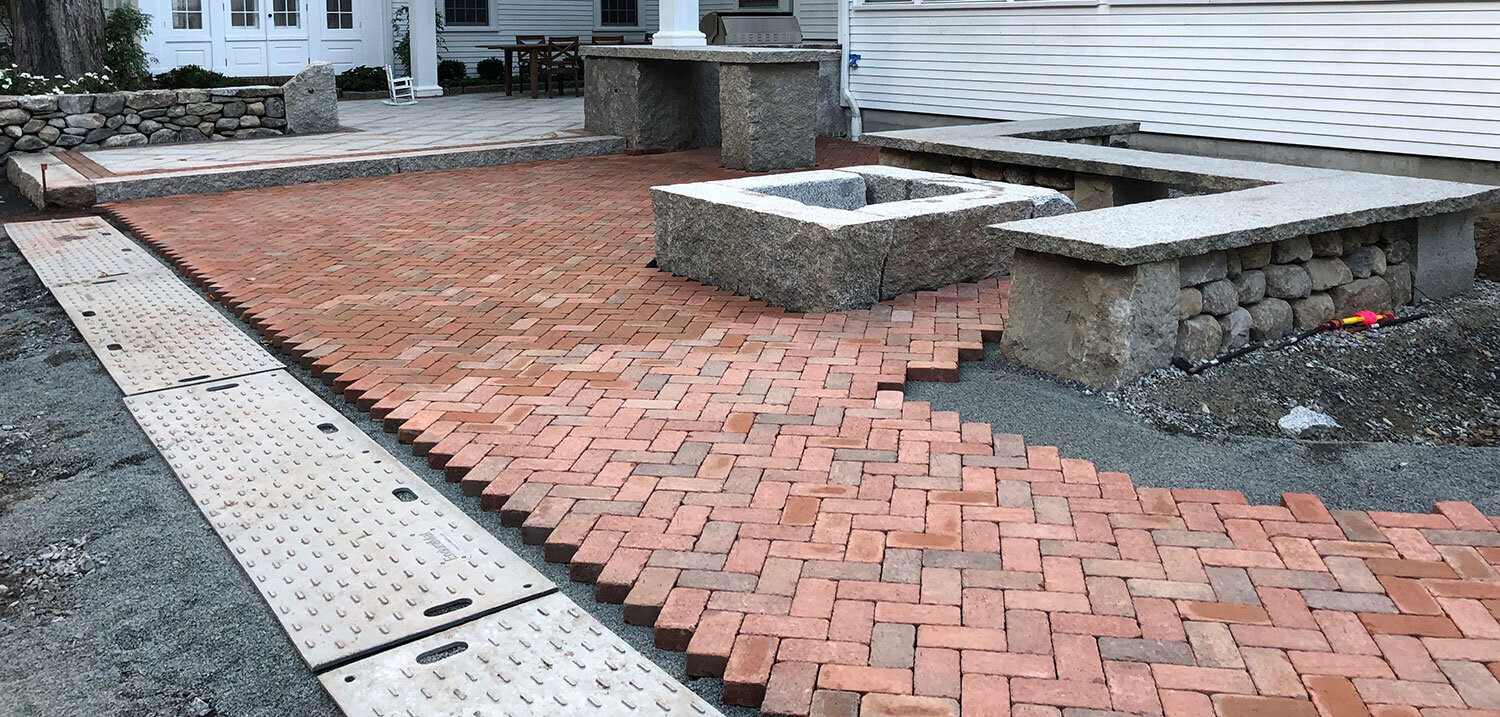

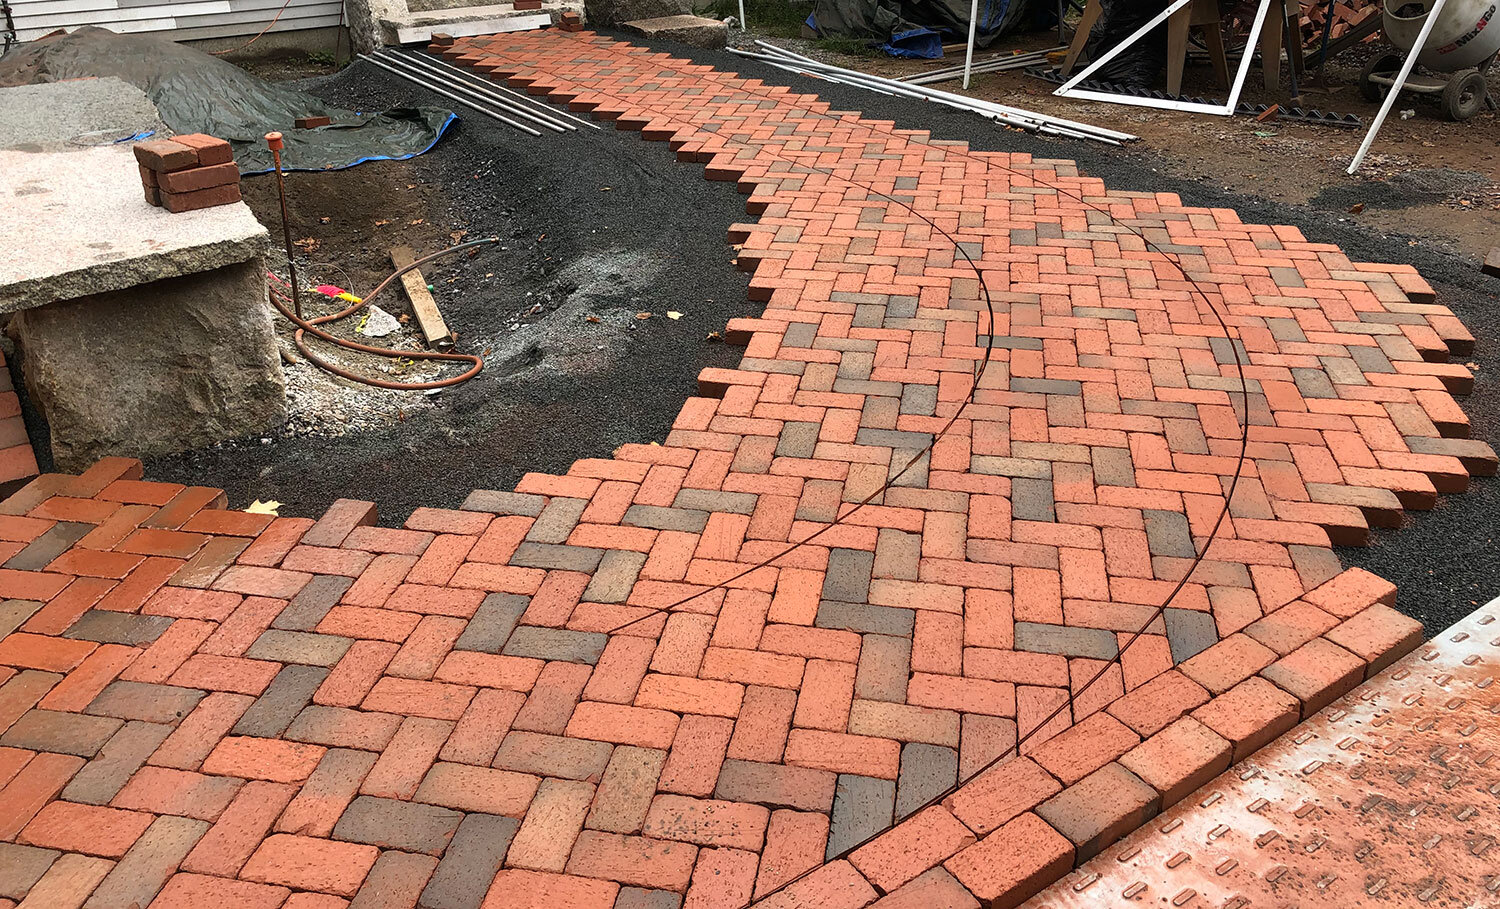
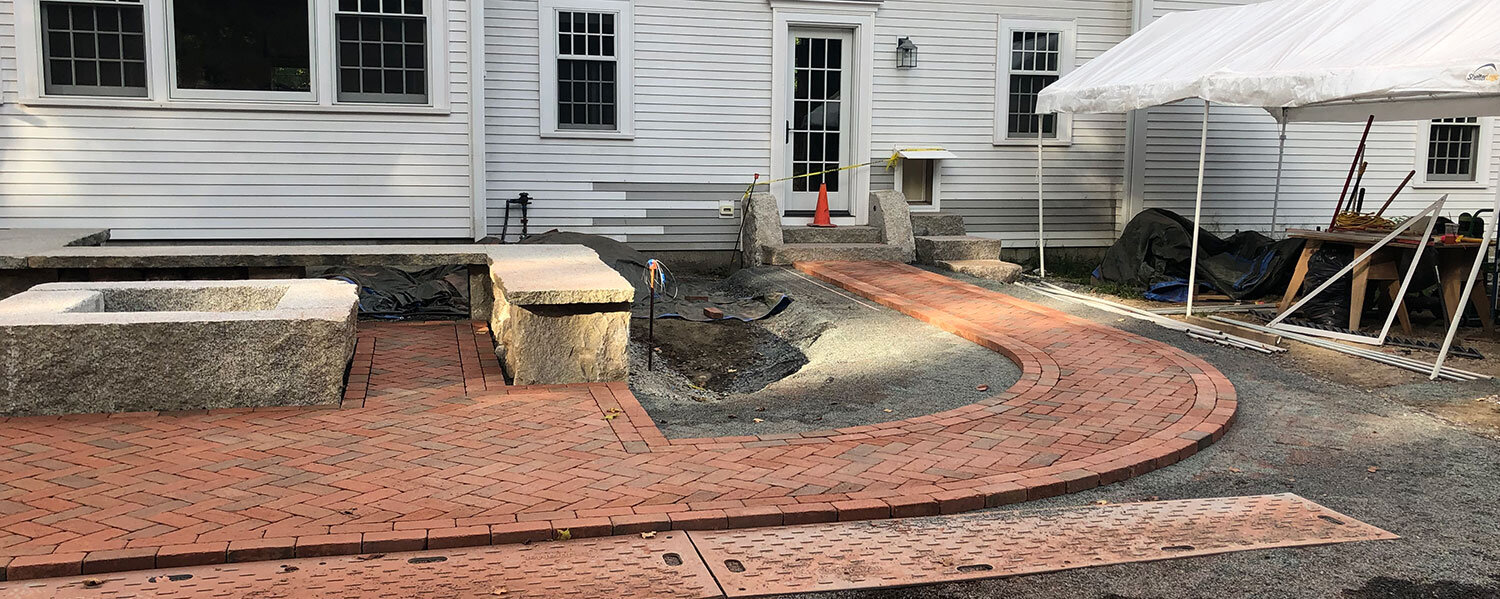
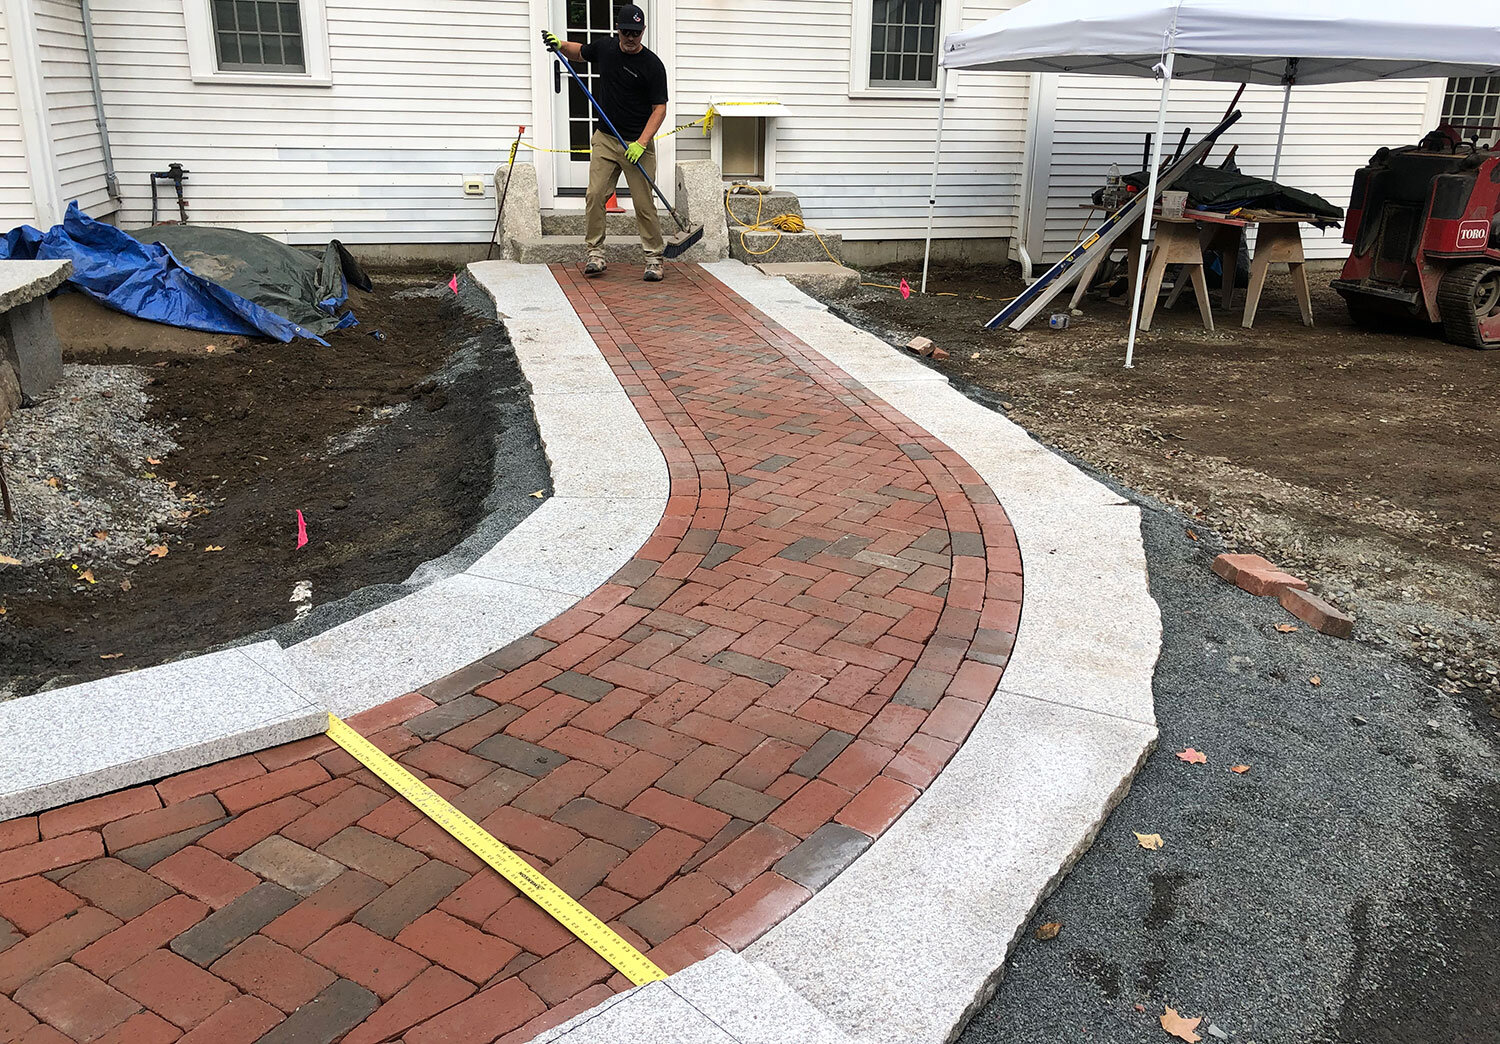
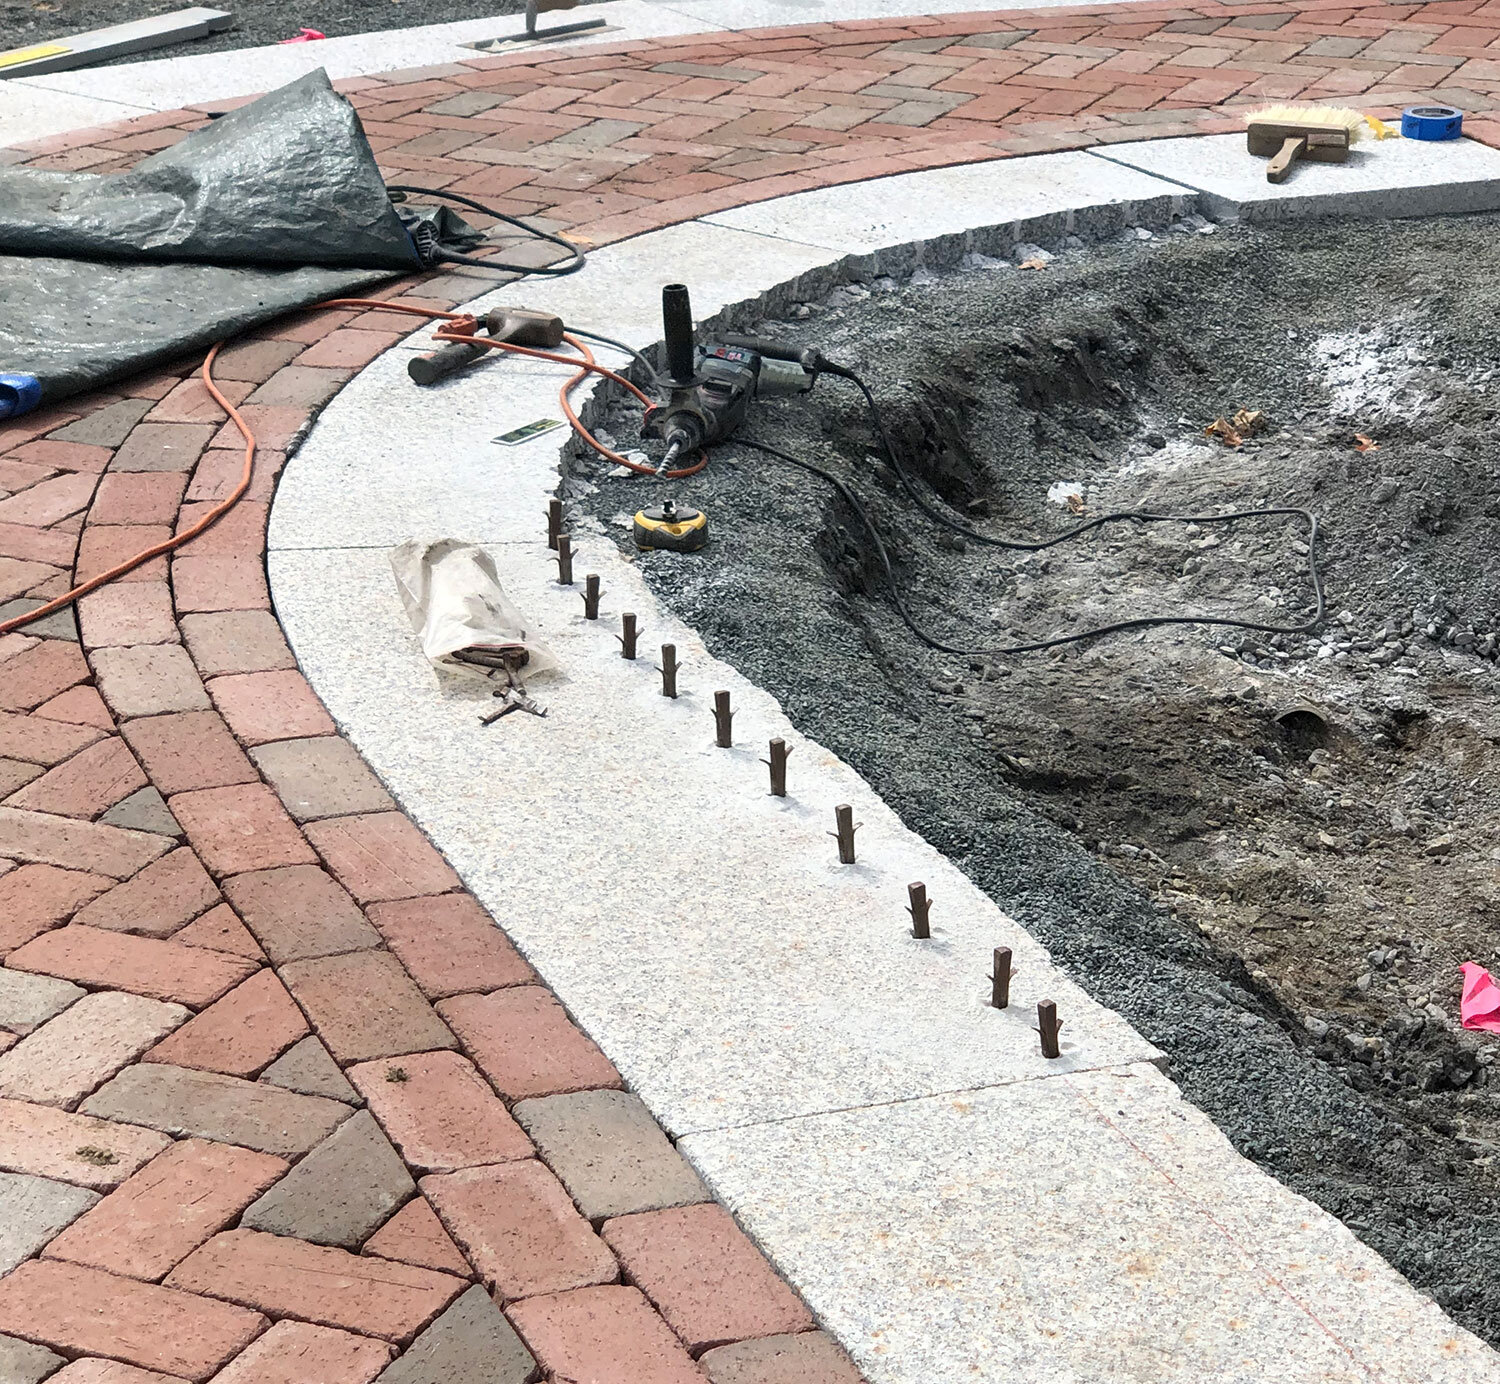
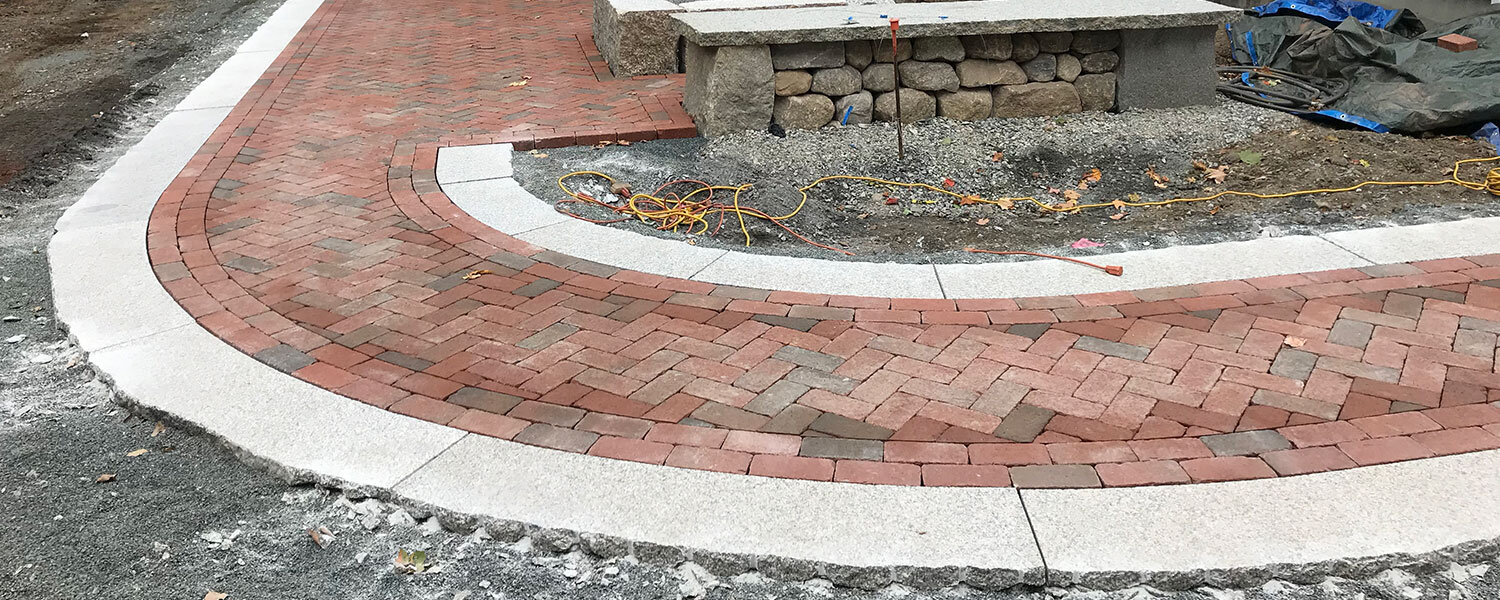
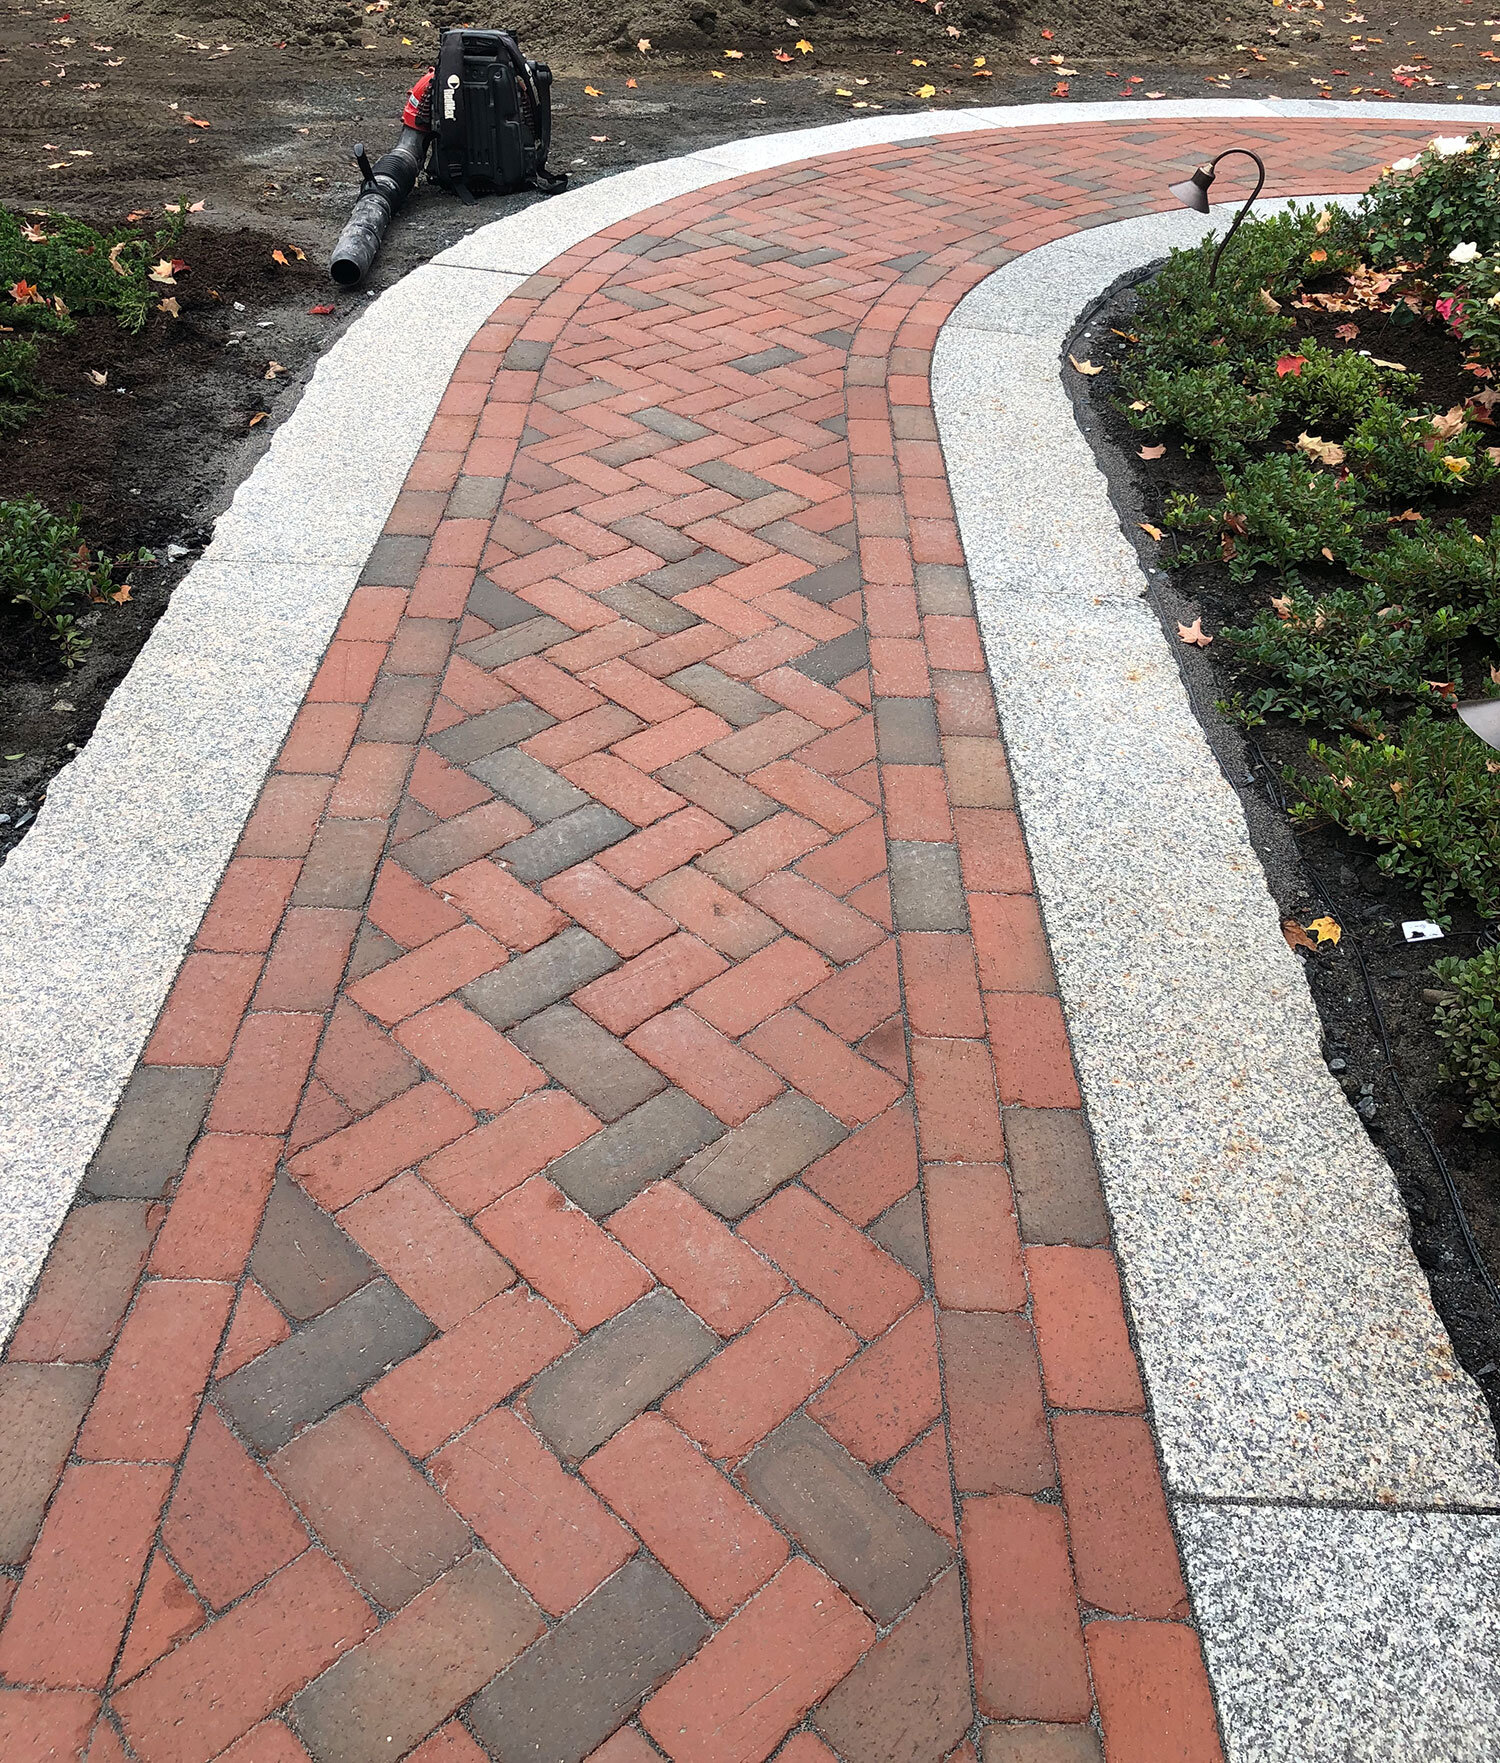
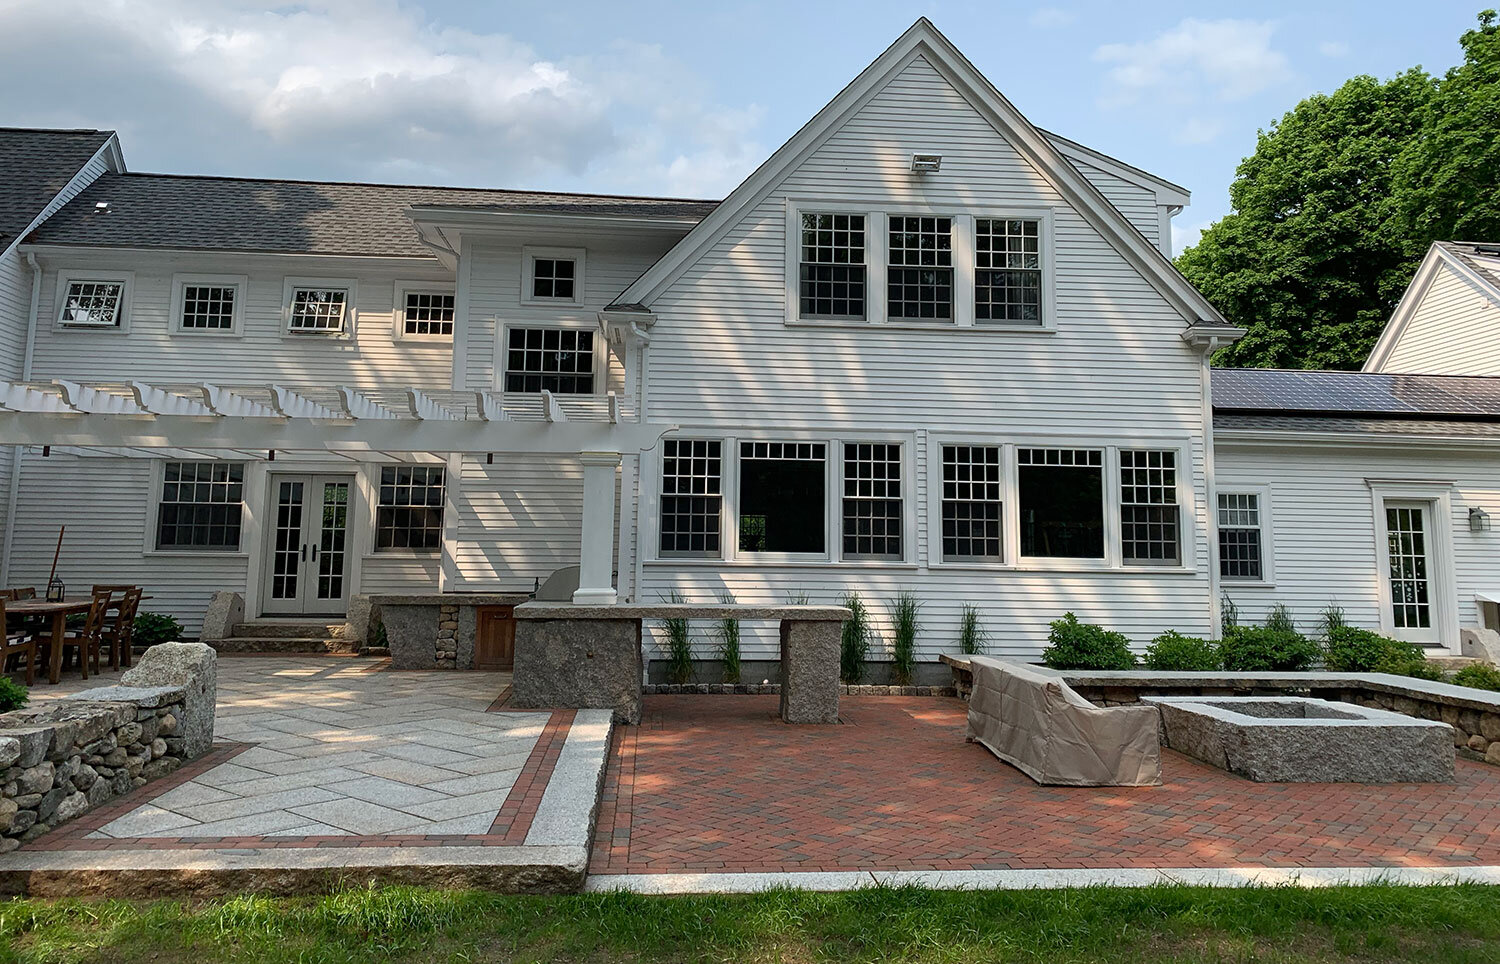
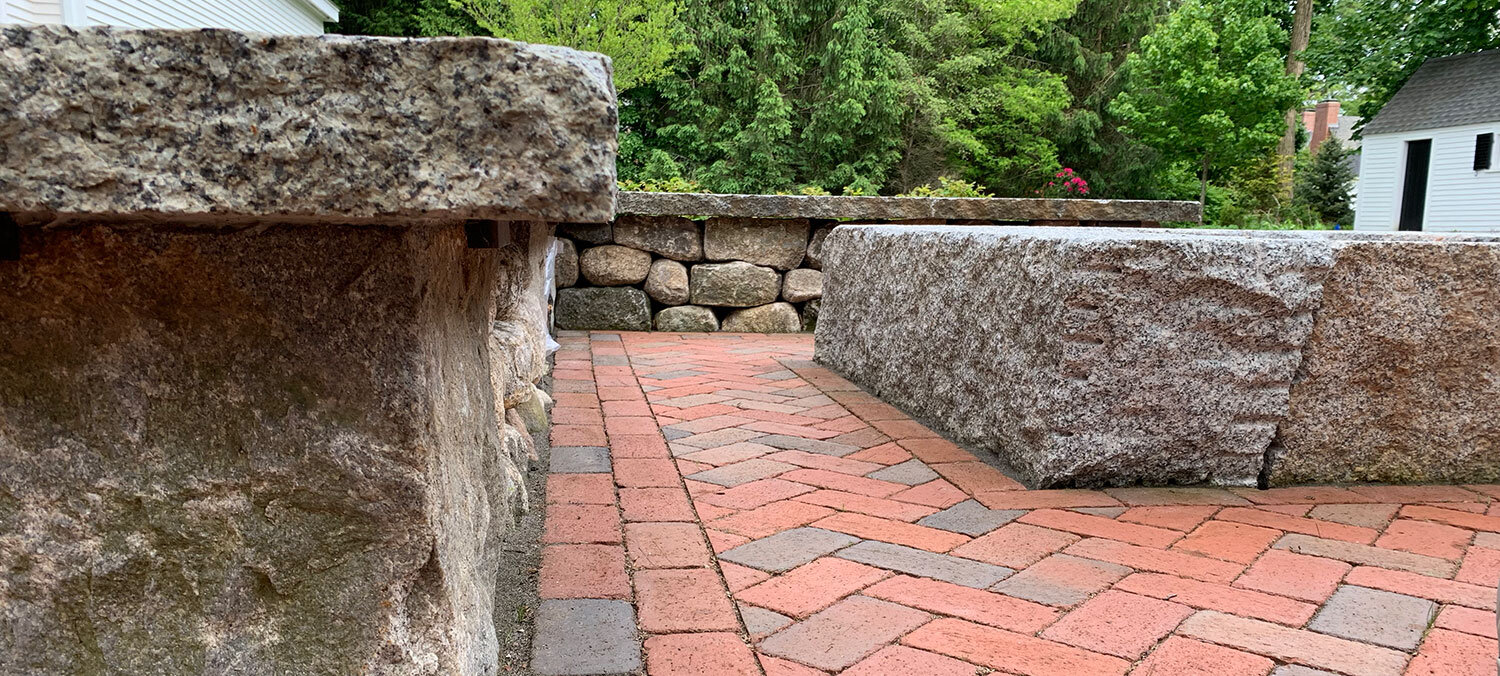
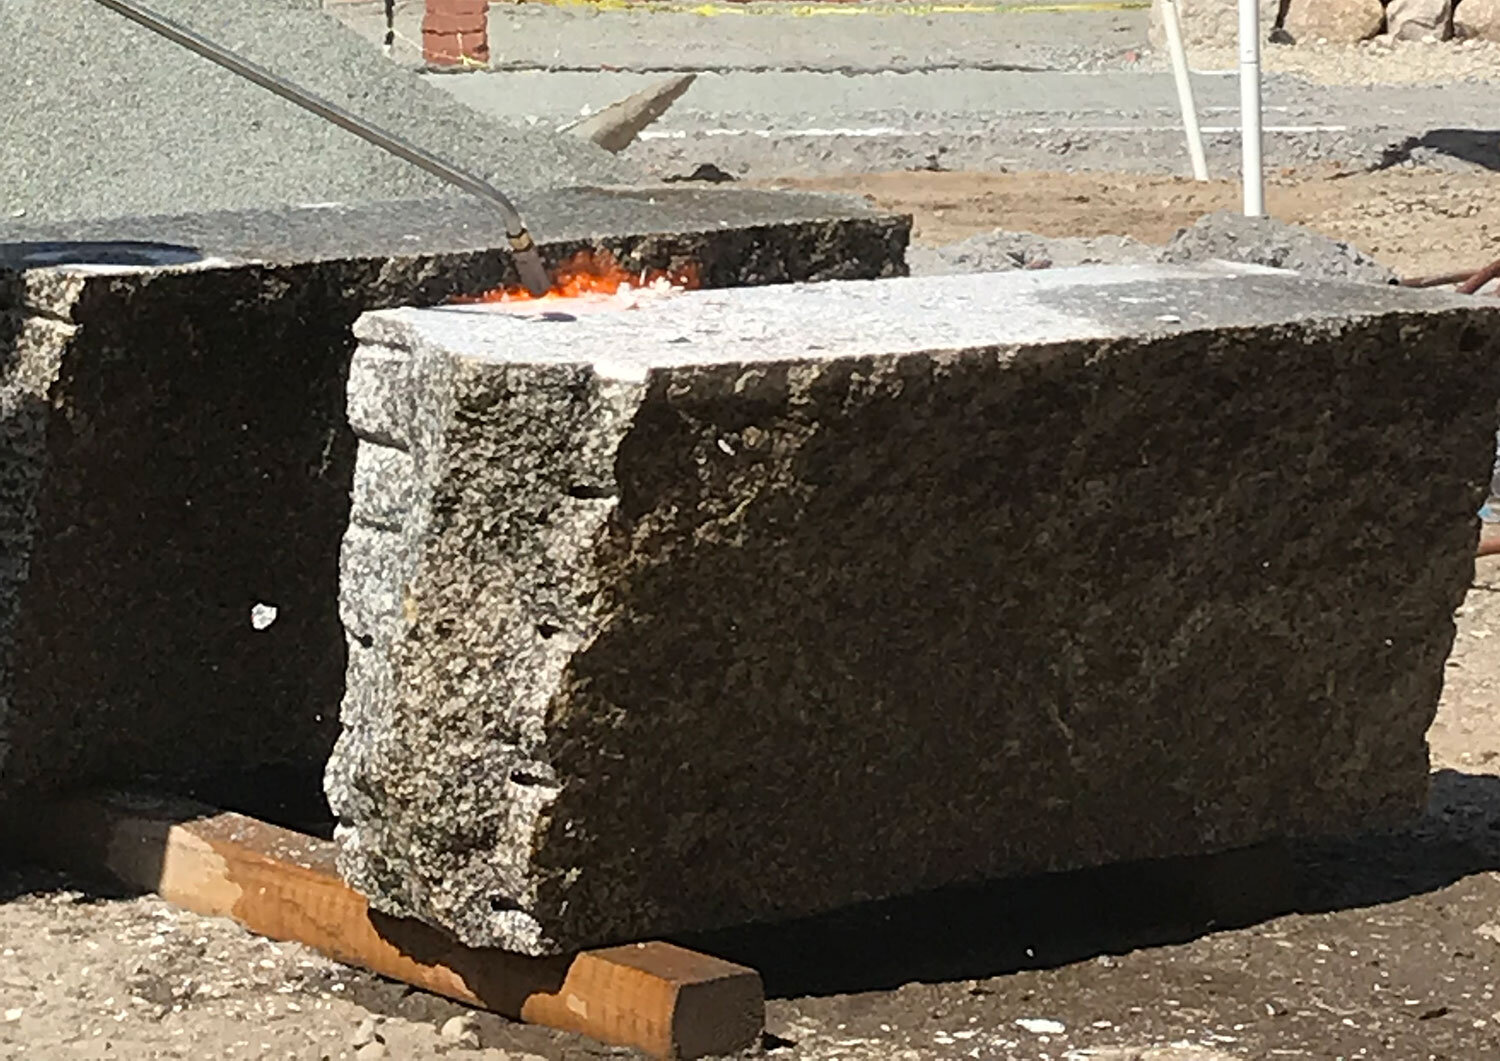
To say this portion of the job was difficult would be an understatement. While our clay pavers were classified as 4”x8” they did not quite measure up to spec. We were dealing with 4” in one direction and 7.75” in the other. This made keeping our herringbone pattern square and not curving, near impossible. With close attention to detail, and many string lines we were able to keep things straight. We bordered the patio, bar support, firepit, and sitting walls with a double sailor course. Outside of the brick border, we created a live edge Rockport granite banding. We kept our stone seams consistent along the radius of the curved walkway. To create the live edge banding, we utilized the traditional method of splitting the stone with feathers and wedges and then rolled the outer edge with finish chisels to keep the grass transition barefoot friendly.
DIMENSIONAL FIRE PIT
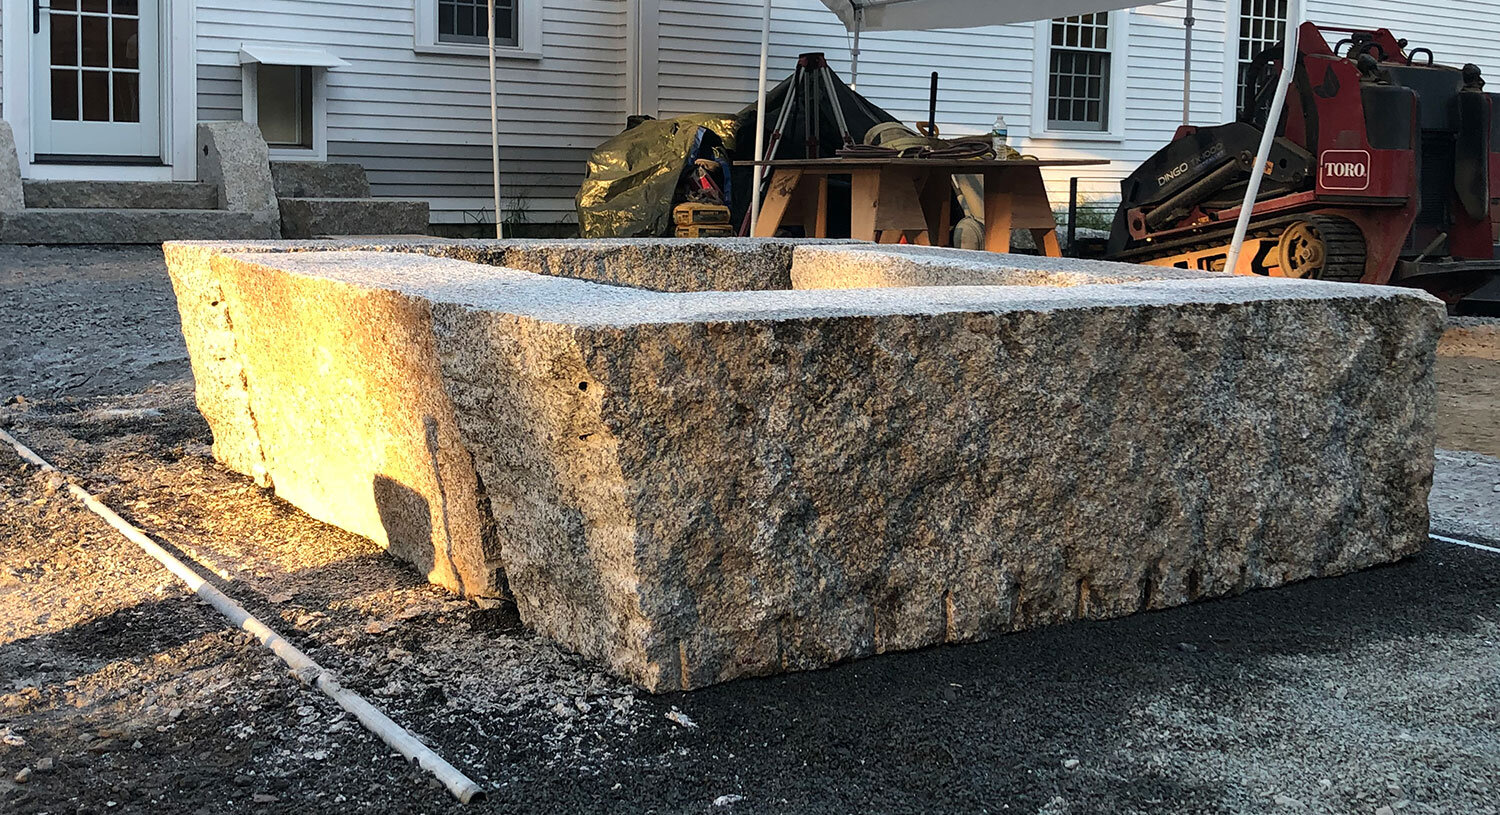
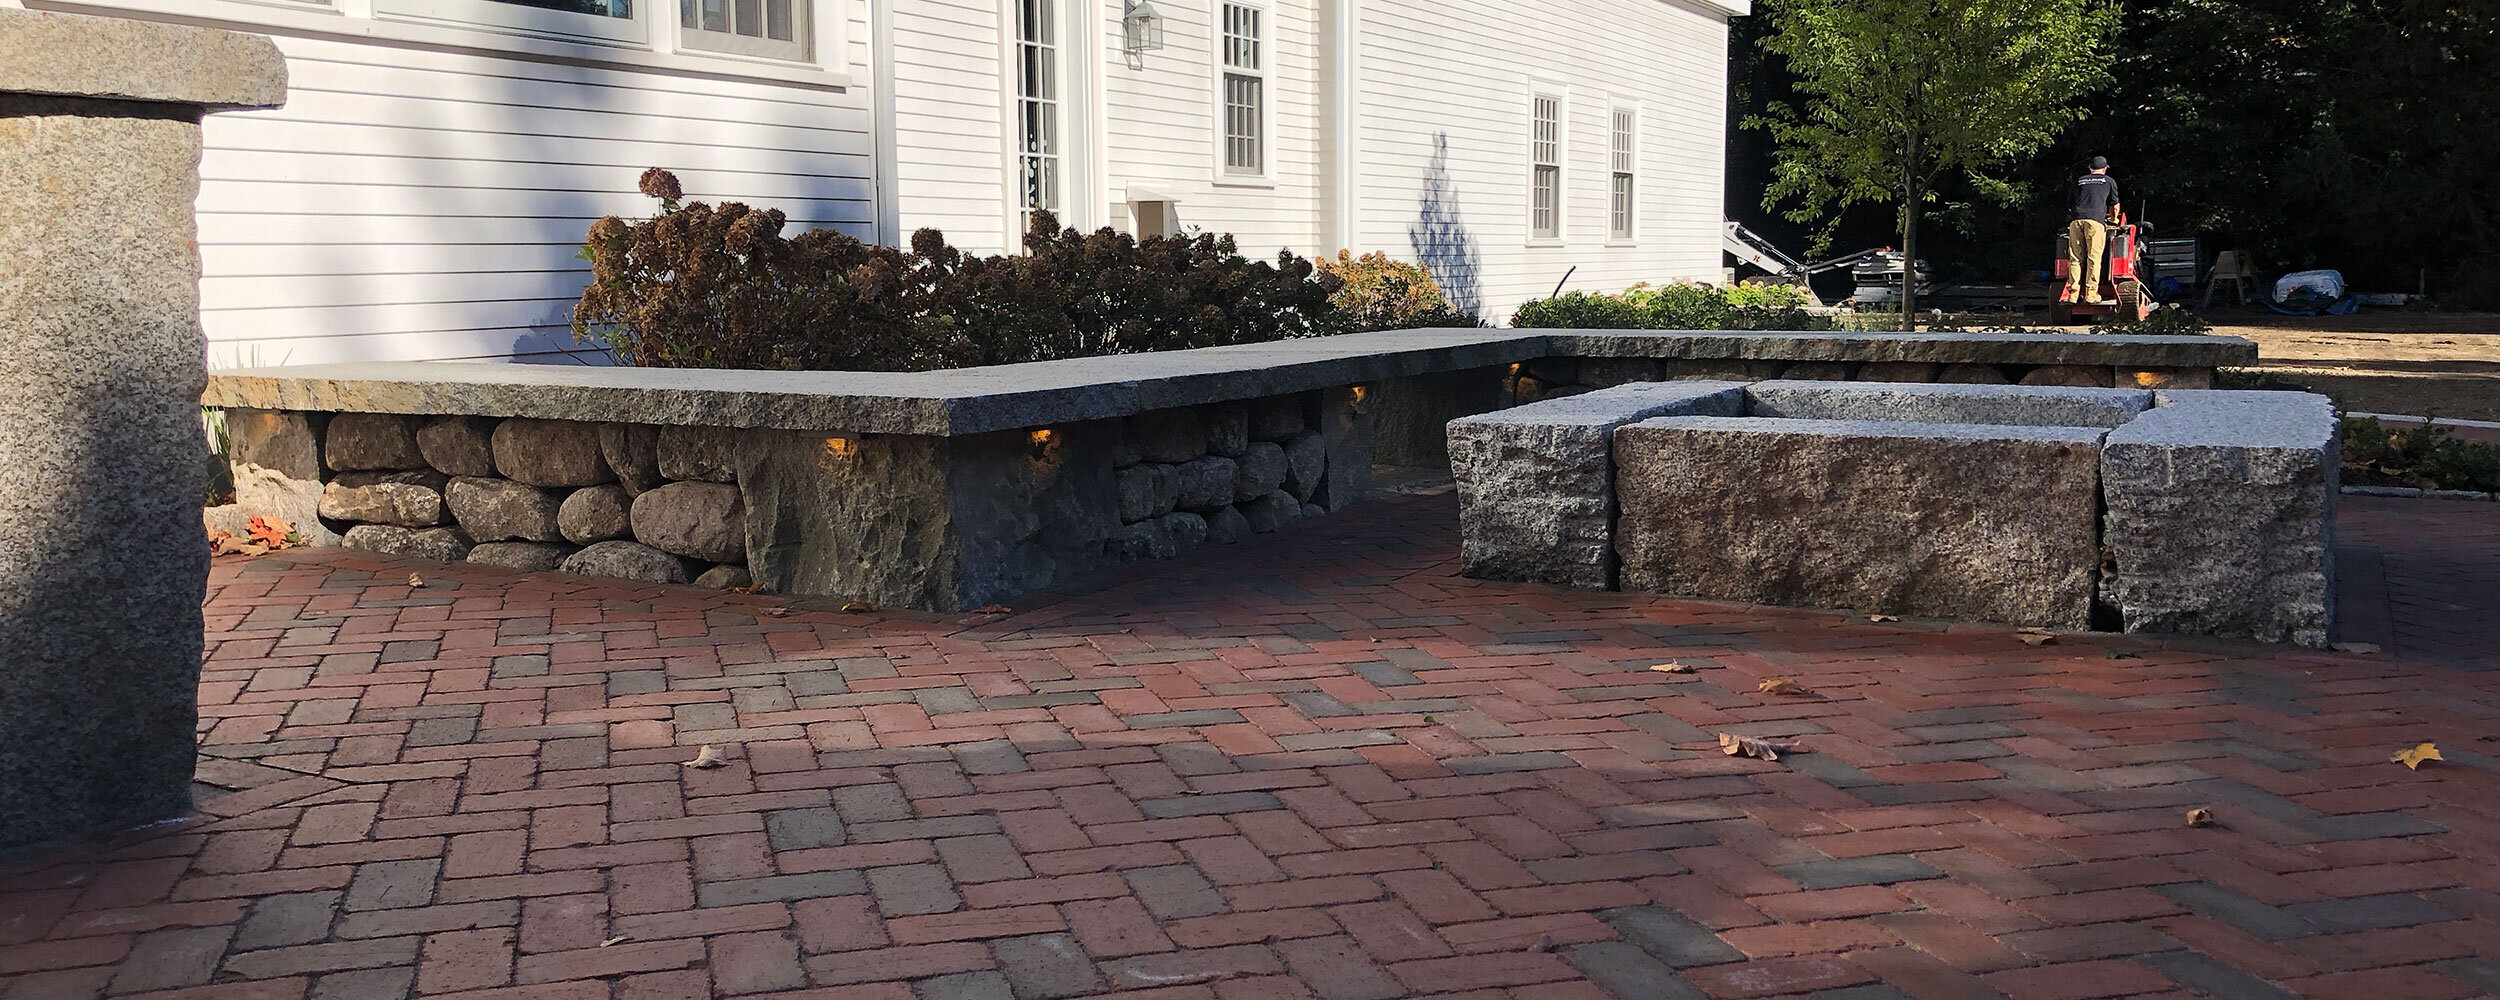
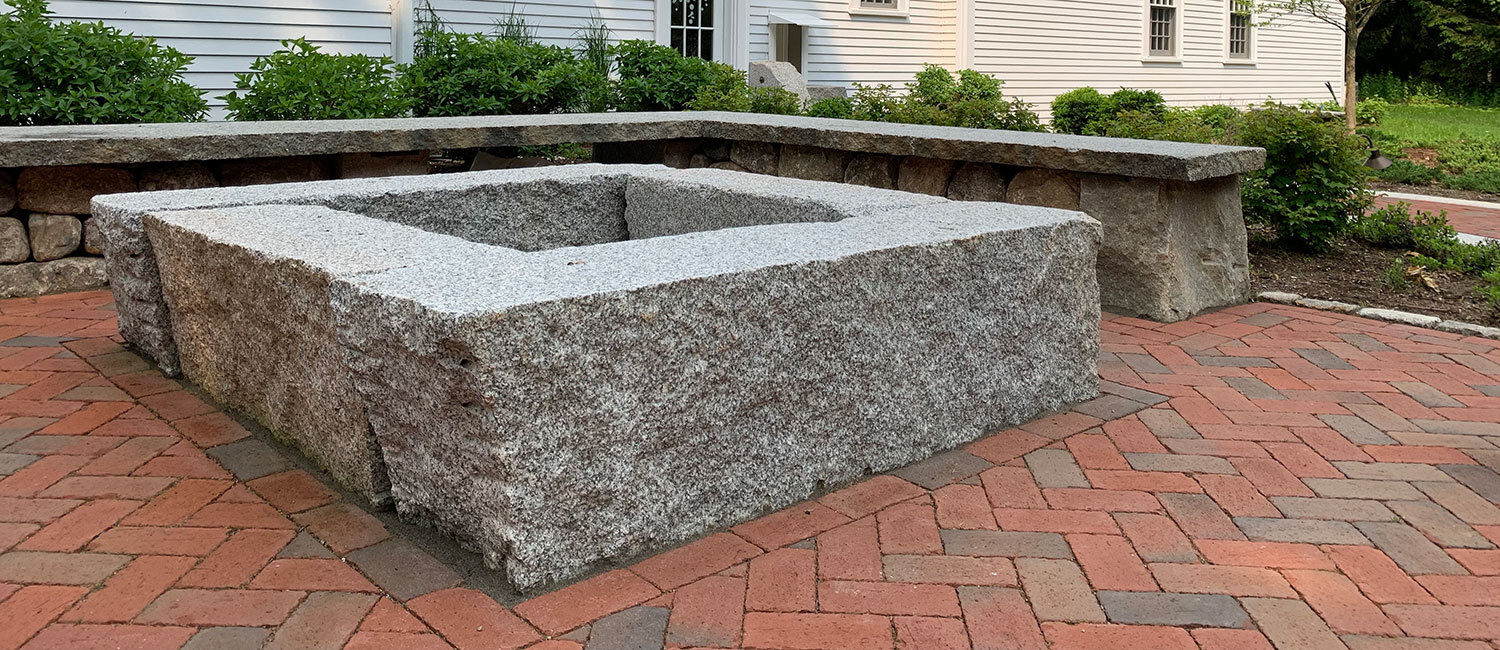
When we first built our firepit, we chose to use some rough dimensional blocks. After doing a quick mock up, we felt the need to revisit the drawing board. Our revised idea was to cut these blocks top and bottom and thermal finish them to give a nice even surface. With these blocks being fairly large and deep, this sawn surface would become a great area to place a drink or all of the ingredients for s’mores. There are a few subtle details to this firepit. We carved the ends of these stones to match the angle of our large granite block supporting the outdoor kitchen to create common elements throughout the entirety of the space.
PLANTING DESIGN
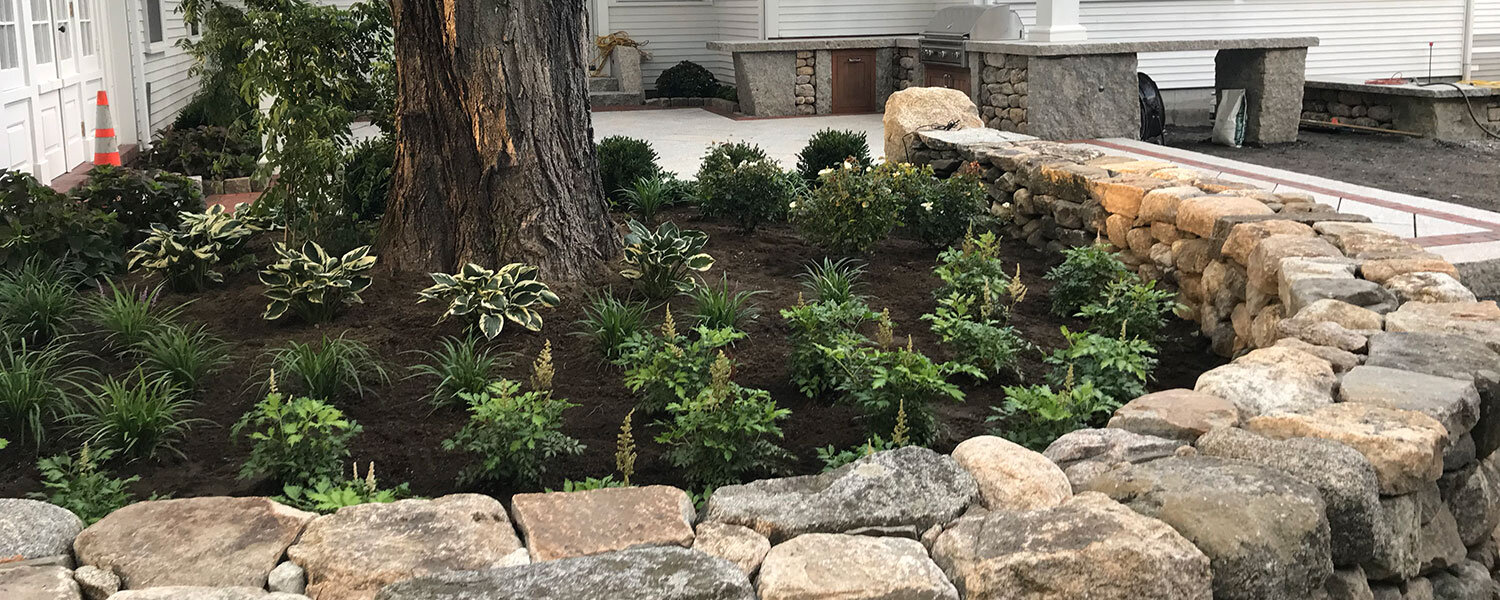
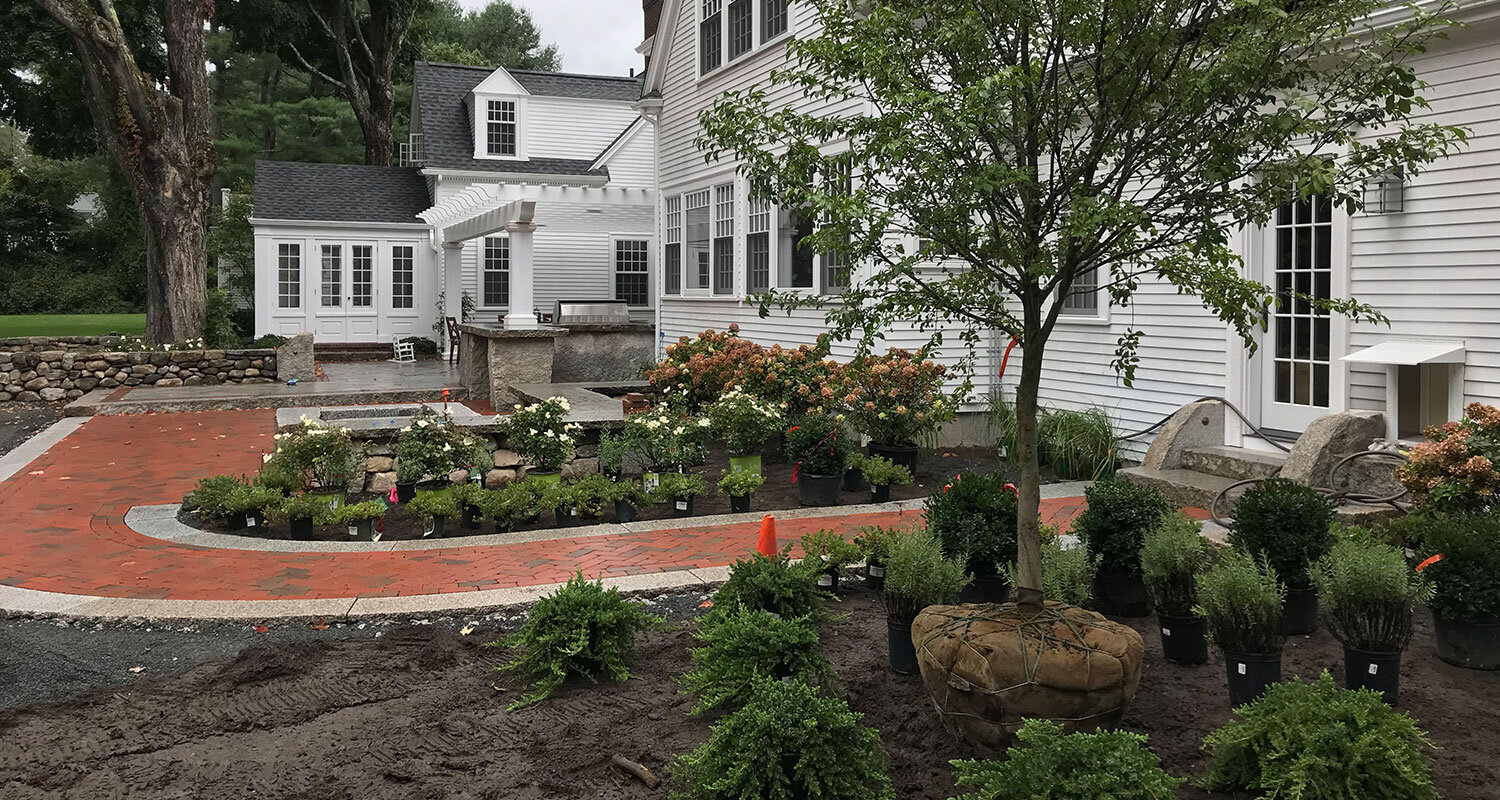
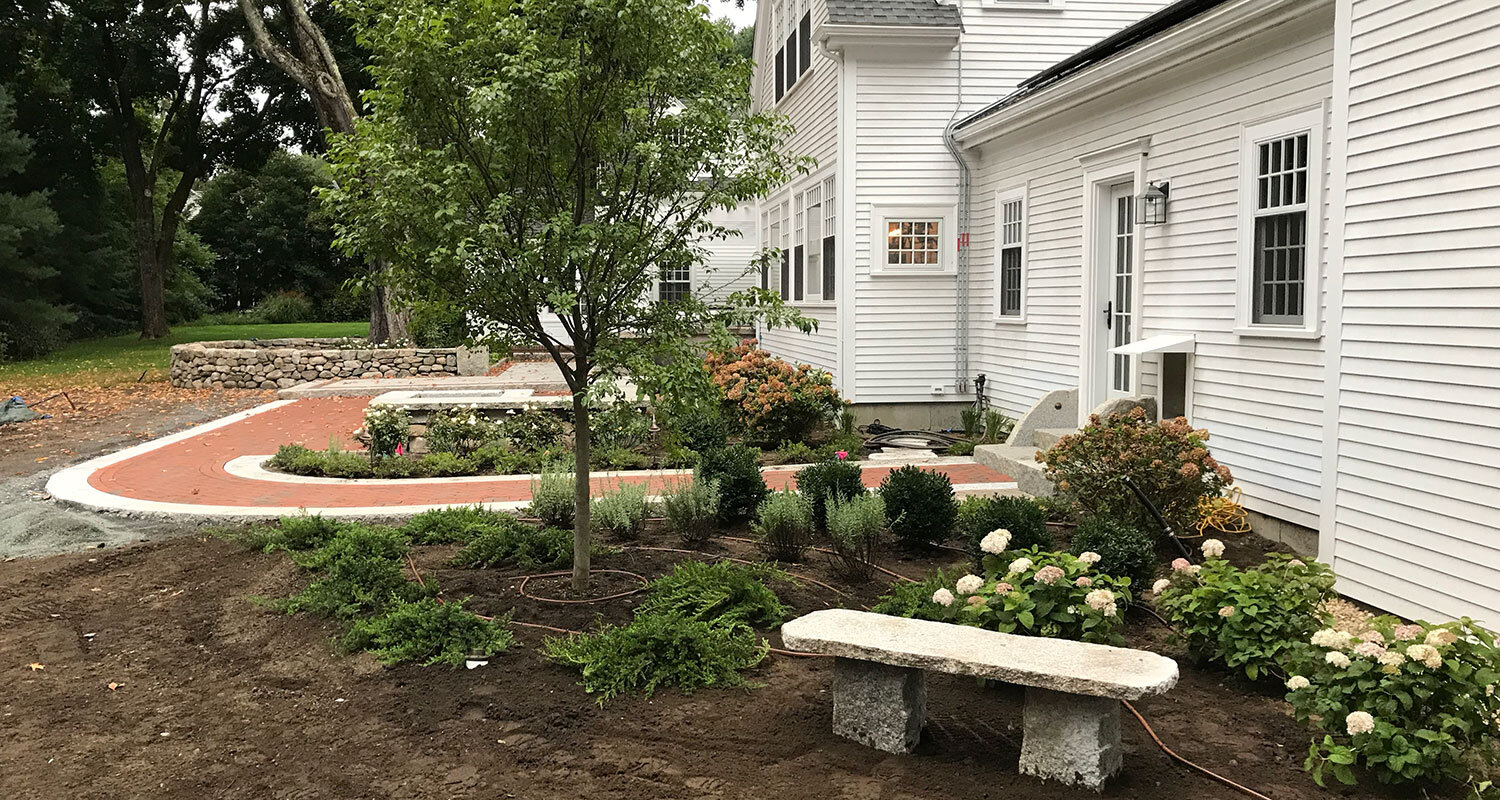
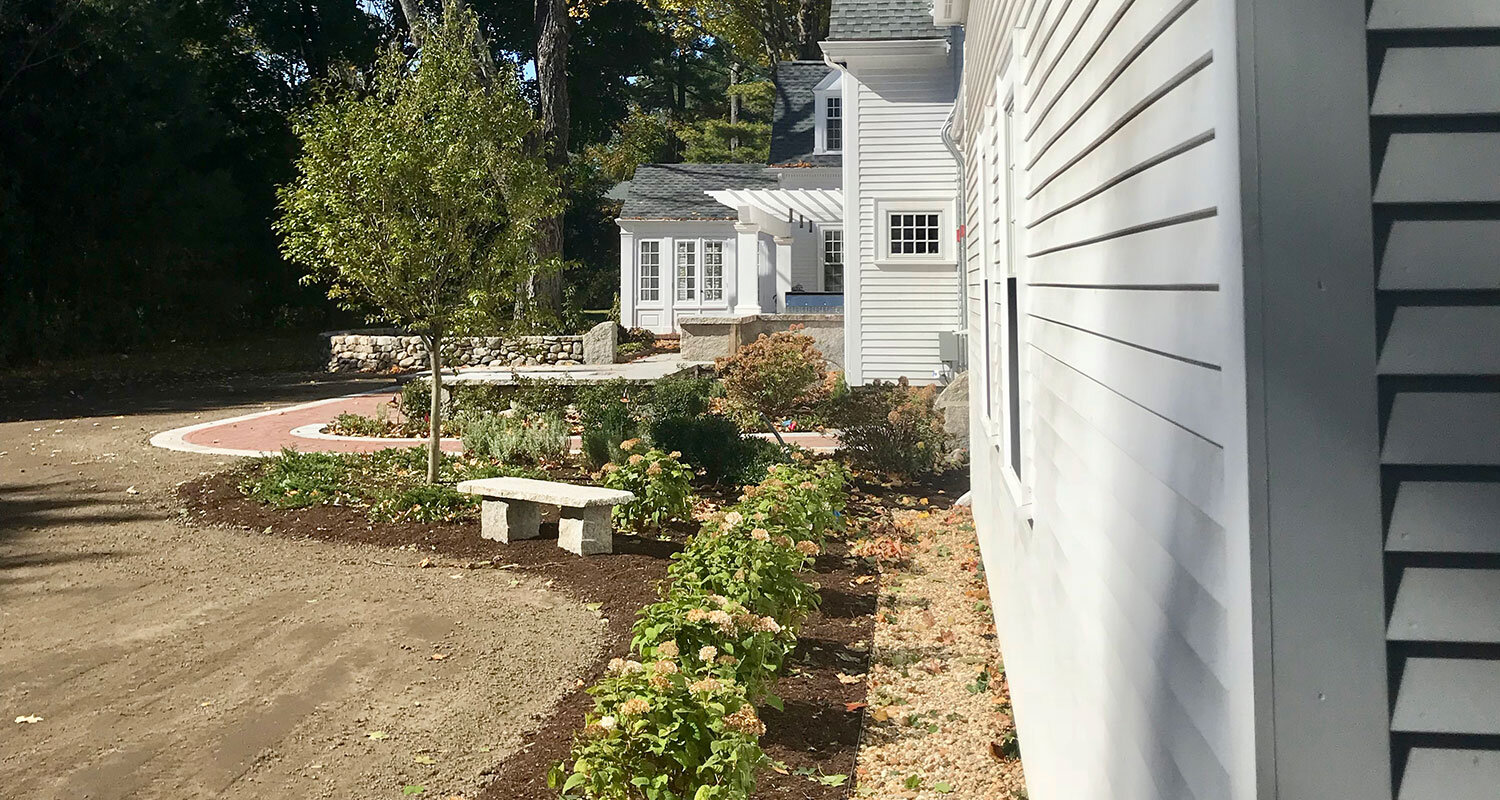


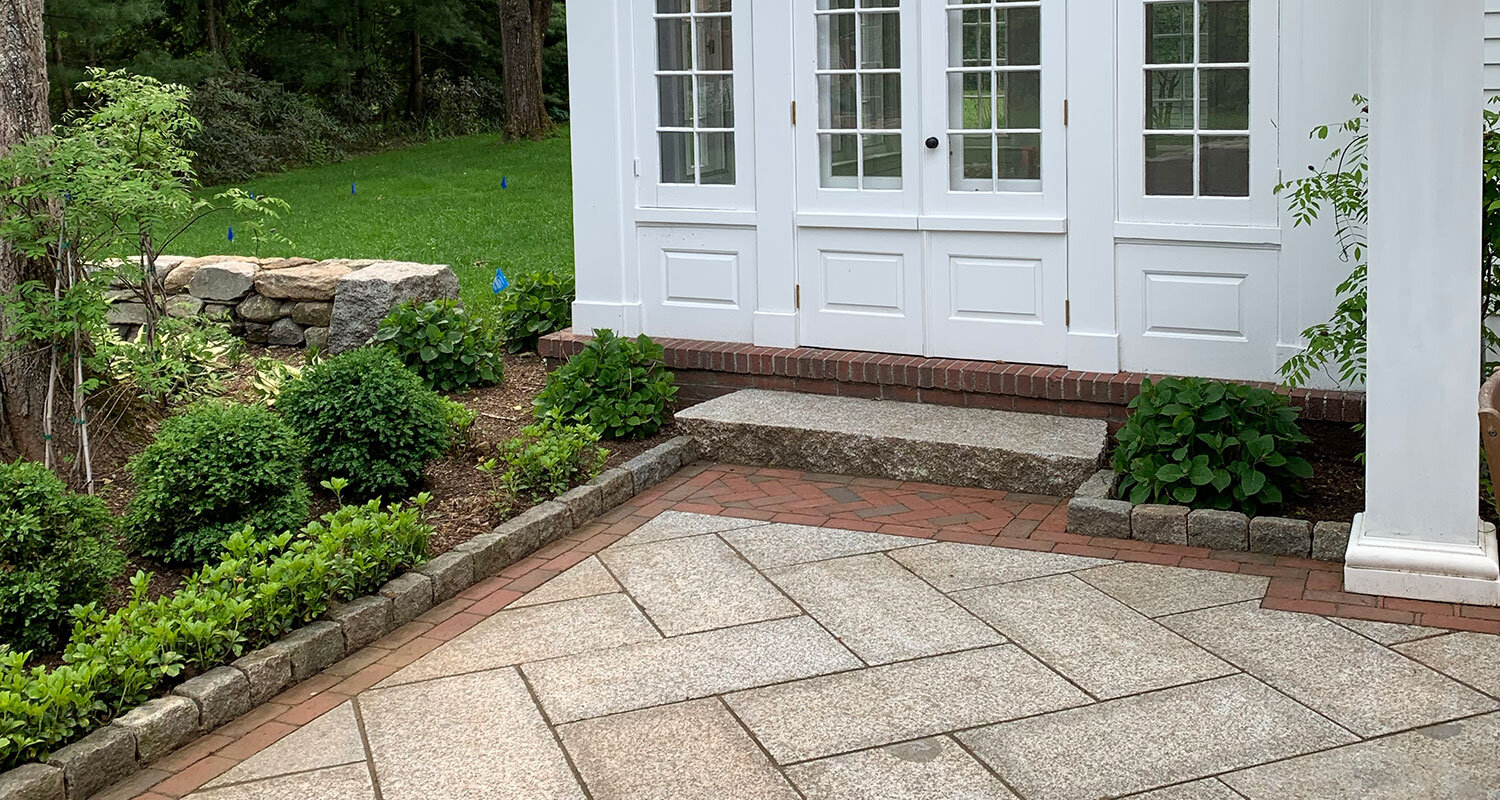
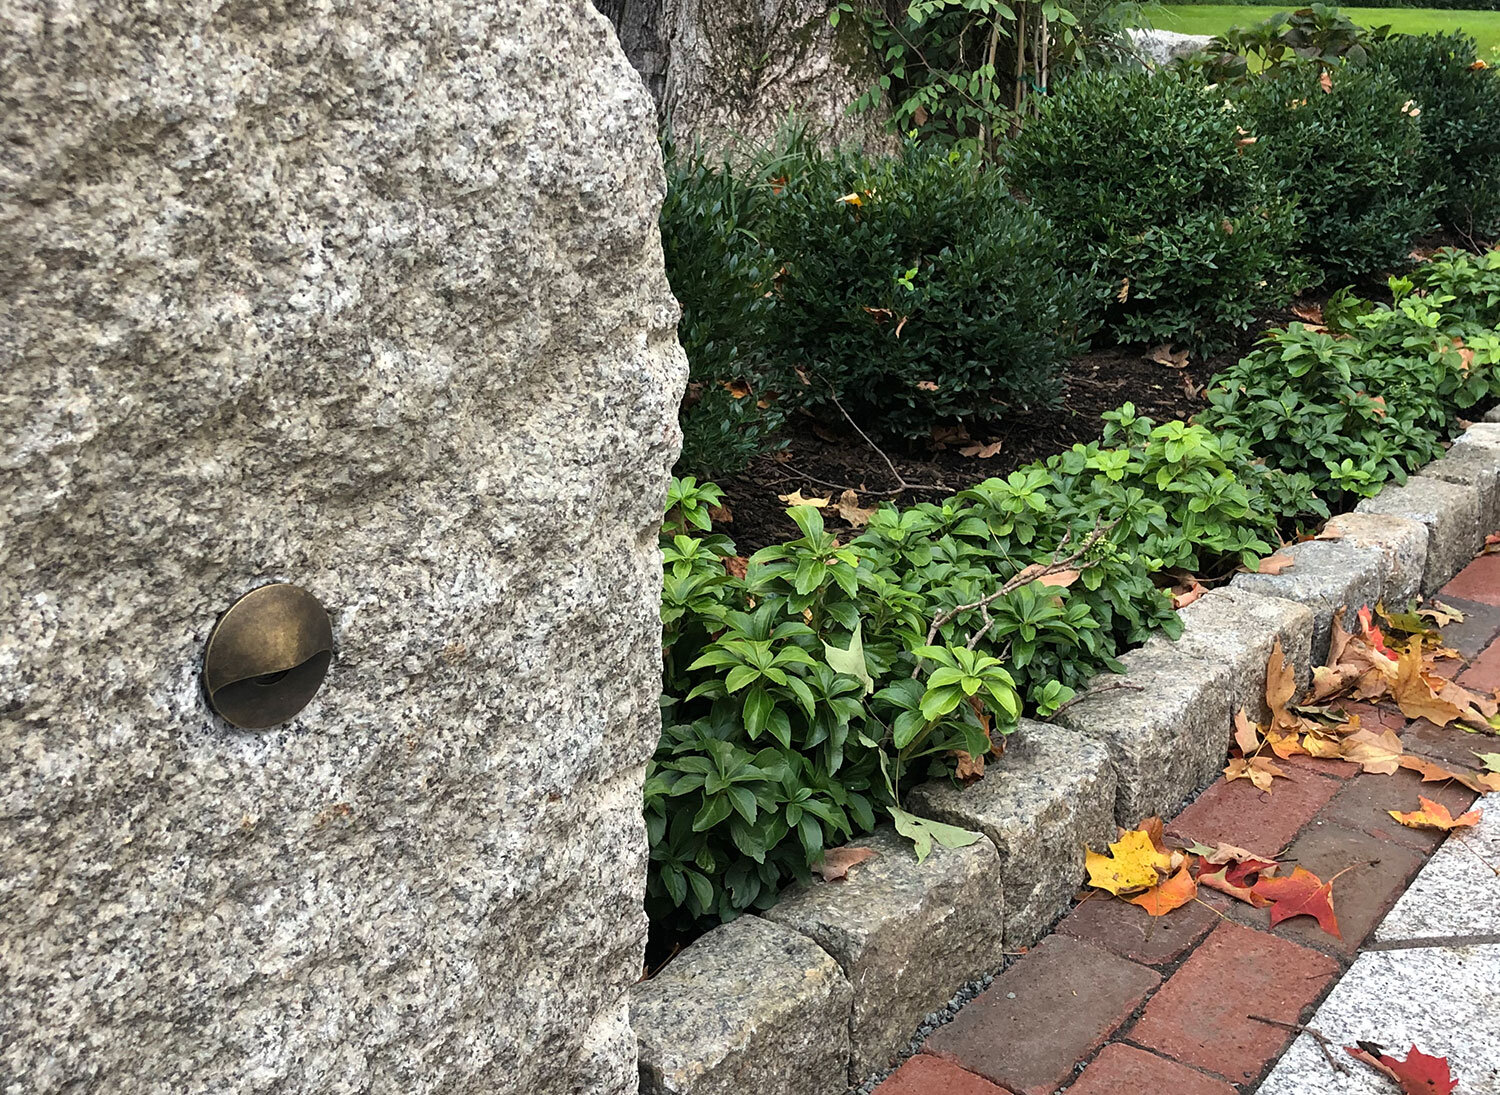
One of the advantages of being the designers and builders of our projects is that we consider the planting layouts in the hardscape design phase. We wanted to create a timeless look utilizing boxwood hedging and different hydrangeas in combination with perennials that would preform well in the space. We used American wisteria that will eventually climb up the sides of the pergola to add an extra architectural element as an a living “arbor” over the French doors. As always, we only incorporated plant material that will be allowed to grow to its full size and fit beautifully in the space without the need for aggressive pruning tactics to contain them. We feel the natural form of each plant should always be allowed to shine, making the proper sizing choices based on mature size of the material, to ensure proper spacing for future growth. We can’t wait to watch things grow in over the next few seasons!
We hope you enjoyed an inside look into how we created this award-winner! Please feel free to leave any comments or questions, and please give us a like or a follow on Facebook and/or Instagram as we are just two guys that love creating beautiful spaces and any traffic helps.